
Black Velvet Cake offers a decadent dessert experience, boasting a deep, dark color and intensely rich chocolate flavor. This recipe guides you through creating a moist crumb and fluffy texture, perfect for any special occasion. Prepare to impress your guests with this irresistible treat, complete with baking tips for success.
Key Takeaways
- Gather and prepare ingredients meticulously for optimal baking results.
- Achieve a perfect batter consistency by carefully combining dry and wet elements.
- Utilize hot water as a key ingredient for an exceptionally moist and fluffy cake.
- Ensure proper baking and cooling techniques for an ideal cake texture and structure.
- Enhance your cake with delightful frosting suggestions and effective storage methods.
- Understand the nutritional profile and receive creative serving ideas for your cake.
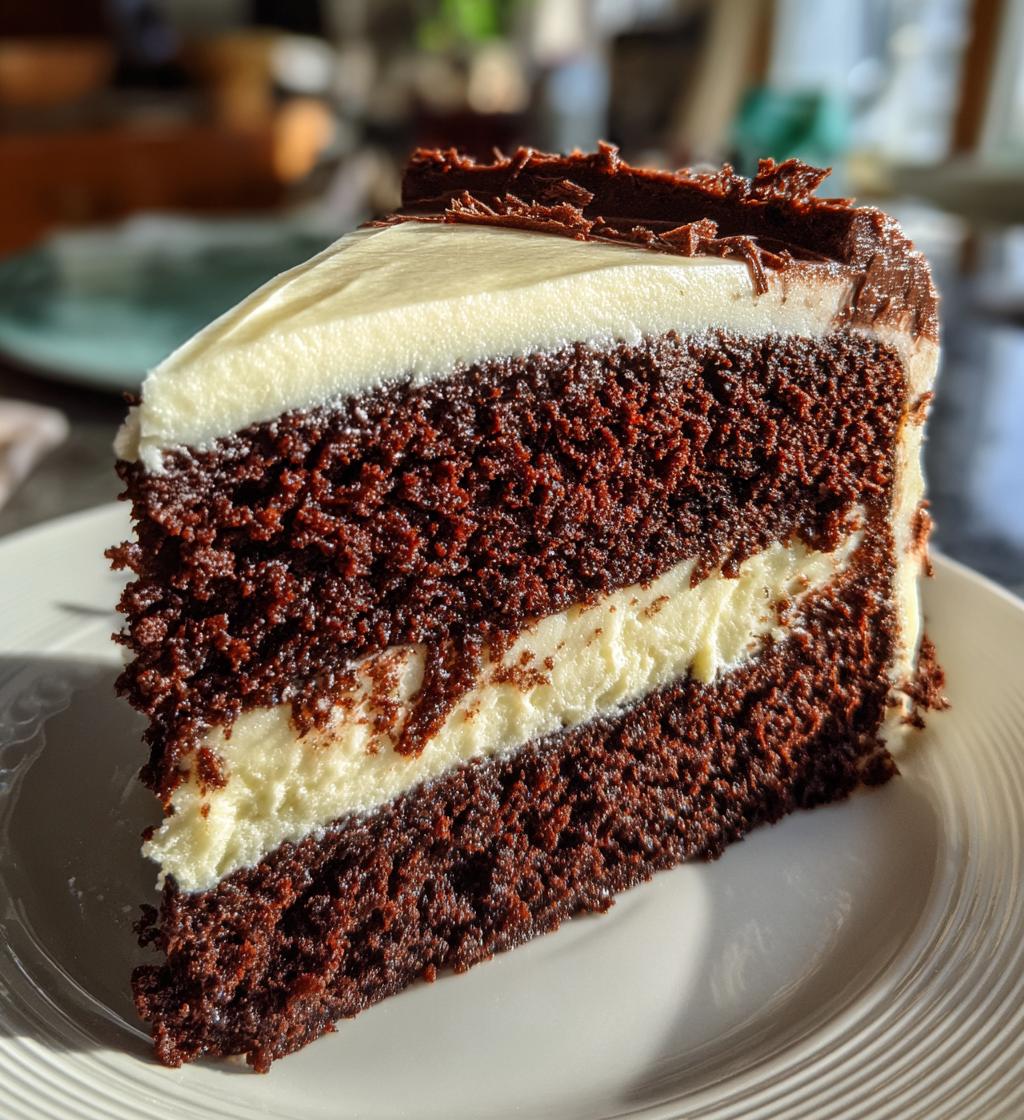
This cake looks truly impressive. Its deep color is always captivating. The rich chocolate flavor delights senses. Enjoy baking this wonderful dessert. It’s perfect for any festive gathering.
Black Velvet Cake: Prep Starts
Gather All Ingredients
Before beginning your journey to a perfectly baked Black Velvet Cake, the first and most crucial step is to meticulously gather all your ingredients. This practice not only streamlines the baking process but also ensures you have everything on hand, preventing any last-minute rushes or substitutions that could compromise the final result. For a truly rich chocolate flavor and moist crumb, quality ingredients make a significant difference. Ensure your butter, eggs, and buttermilk are at room temperature. This allows them to emulsify better, creating a smoother, more uniform batter. Precise measurements are also paramount; use a kitchen scale for dry ingredients like flour and cocoa powder to achieve accuracy, as even slight discrepancies can affect the cake’s fluffy texture. Having everything measured and ready will set you up for baking success, making the entire process more enjoyable and less stressful.
Preheat Oven, Grease Pans
The importance of proper oven and pan preparation cannot be overstated when aiming for a consistently baked Black Velvet Cake. Begin by preheating your oven to the specified temperature. A properly preheated oven ensures that the cake starts baking immediately at the correct heat, leading to even rising and a beautiful, consistent texture. Opening the oven door to insert your cake can cause a slight temperature drop, but a fully preheated oven recovers quickly. Simultaneously, prepare your cake pans. Grease and flour them thoroughly, or line them with parchment paper, especially on the bottoms. This step is vital to prevent sticking and ensure your delicate cake layers release cleanly once baked. Taking the time for this foundational prep guarantees a smooth transition from oven to cooling rack, preserving the cake’s structural integrity and aesthetic appeal. For another delightful dessert, consider trying a quick Italian cream cake.
Dry Ingredients: Mix Well
Combine Flour, Cocoa, Sugar
Creating the foundation for your deep, dark Black Velvet Cake begins with the careful combination of dry ingredients. Start by sifting together the all-purpose flour, granulated sugar, and unsweetened cocoa powder into a large bowl. Sifting is not just about removing lumps; it also aerates the ingredients, contributing to the cake’s light and fluffy texture. For the distinctive dark hue and intense rich chocolate flavor that defines a Black Velvet Cake, using a high-quality Dutch-processed cocoa powder is highly recommended. Dutch-processed cocoa has been treated to reduce its acidity, resulting in a darker color and a smoother, less bitter chocolate taste, which pairs beautifully with the other ingredients. Ensure these elements are thoroughly whisked together so that they are evenly distributed, laying the groundwork for a uniform and flavorful batter. This careful initial mixing prevents pockets of unmixed ingredients, ensuring every slice boasts the desired decadent taste and deep dark color.
Add Baking Soda, Salt
Once your primary dry ingredients are combined, it’s time to incorporate the leavening agents and flavor enhancers. Add the baking soda and salt to the flour, cocoa, and sugar mixture. Baking soda is a crucial component in this Black Velvet Cake recipe; when activated by the acidity of buttermilk and the heat of the oven, it produces carbon dioxide bubbles, giving the cake its lift and tender crumb. The salt, while seemingly a minor addition, plays a significant role in balancing the sweetness and intensifying the rich chocolate flavor. It also acts as a subtle counterpoint to the sweetness, ensuring the cake isn’t cloyingly sweet. Whisk these additions thoroughly into the dry mixture, making sure they are dispersed evenly throughout. This step ensures that the leavening action is consistent across the entire batter, leading to an even rise and preventing any dense spots in your finished cake layers. Proper mixing here is key to achieving that signature fluffy texture.
Wet Ingredients: Combine Smooth
Buttermilk, Oil, Eggs, Vanilla
The wet ingredients are where much of the Black Velvet Cake’s signature moist crumb and tender structure originate. In a separate bowl, whisk together the buttermilk, vegetable oil, large eggs, and pure vanilla extract until the mixture is smooth and well combined. Buttermilk is a star ingredient here; its acidity reacts with the baking soda in the dry mixture, promoting a light and airy texture while also contributing to the cake’s overall moistness and a subtle tang that complements the rich chocolate flavor. For a deeper understanding of this versatile ingredient, you can read more about buttermilk on Wikipedia. Vegetable oil is preferred over butter in this recipe because it remains liquid at room temperature, contributing to a consistently moist crumb that stays tender for days. Butter, by contrast, can make cakes feel dense as it solidifies. The eggs provide structure and richness, binding the ingredients together, while the vanilla extract enhances the overall flavor profile, adding warmth and depth to the dark chocolate notes. Ensure all these components are thoroughly emulsified before introducing them to the dry mixture, ensuring a homogenous batter.
Hot Water: The Magic Secret
Pour Boiling Water In
This is arguably the most unique and magical step in crafting your exceptional Black Velvet Cake. Once the wet and dry ingredients have been gently combined, it’s time to introduce the boiling water. Slowly pour the hot water into the cake batter while continuously whisking. This seemingly unusual addition serves multiple crucial purposes. Firstly, the hot water helps to “bloom” the cocoa powder, intensifying its rich chocolate flavor and deepening the cake’s already striking dark color. Blooming cocoa powder releases more of its flavor compounds, making the chocolate taste even more pronounced and complex. Secondly, the hot water thins the batter considerably, which might seem counterintuitive, but this allows the leavening agents to work more effectively, contributing to a wonderfully light and airy, yet incredibly moist crumb. This technique is often seen in chocolate cake recipes for its ability to produce a consistently tender and flavorful result, making it a key secret to a truly outstanding black velvet cake.
Whisk Batter Until Smooth
After carefully pouring in the boiling water, the next step is to whisk the batter until it is completely smooth and free of any lumps. However, it’s vital to do this gently and avoid overmixing. Overmixing can develop the gluten in the flour too much, leading to a tough, dry cake rather than the desired fluffy texture and moist crumb. Whisk just until all the ingredients are fully incorporated and the batter achieves a uniform, liquid consistency. It will be quite thin, which is exactly how it should be. This smooth, thin batter is a hallmark of the Black Velvet Cake, promising an incredibly tender and moist final product. Take your time with this step, ensuring everything is well combined without agitating the mixture unnecessarily. This attention to detail will ensure that your cake bakes beautifully, delivering on its promise of a rich, decadent treat. Consider visiting our desserts category for more fantastic recipes.
Baking Your Black Velvet Cake
Divide Batter Evenly
With your perfectly prepared batter in hand, the next critical step for achieving symmetrical and professional-looking cake layers for your Black Velvet Cake is to divide the batter evenly among your prepared cake pans. Uneven distribution can lead to layers that bake at different rates, resulting in one layer being overbaked and dry, while another might be underbaked and prone to crumbling. For the most precise results, especially if you’re making a multi-layered cake, use a kitchen scale to weigh the batter into each pan. This guarantees that each layer will have the exact same amount of batter, ensuring they rise uniformly and bake to the same height and density. If a scale isn’t available, simply eyeball it, but try to be as accurate as possible. Evenly distributed batter allows for a consistent bake, which is fundamental to building a stable and beautiful cake structure once cooled and frosted. This attention to detail contributes significantly to the overall presentation and deliciousness of your cake.
Bake Until Toothpick Clean
Place your filled cake pans into the preheated oven and bake for the recommended time, keeping in mind that oven temperatures can vary. The key to knowing when your Black Velvet Cake is perfectly baked is the classic toothpick test. Insert a wooden toothpick into the center of the cake layers. If it comes out clean or with a few moist crumbs attached, your cake is done. If it comes out with wet batter, continue baking for a few more minutes and test again. Be careful not to overbake, as this can quickly turn a moist crumb into a dry, crumbly one. Overbaking is the enemy of a tender cake. The edges of the cake should be set and slightly pulling away from the sides of the pan, and the top should spring back lightly when gently pressed. Once baked to perfection, your cake layers will boast that deep dark color and be ready for the next crucial stage: cooling. For another great sweet treat, try our snickerdoodle cobbler.
Cooling for Perfect Texture
Rest 10 Minutes in Pans
Once your Black Velvet Cake layers emerge from the oven, fragrant and beautiful with their deep dark color, it’s tempting to remove them immediately from their pans. However, patience is a virtue at this stage. Allow the cakes to rest in their pans for about 10 to 15 minutes on a wire rack. This crucial resting period allows the cake structure to set and firm up slightly as it cools. The residual heat in the pans continues to cook the cake gently, but more importantly, it helps the layers to pull away naturally from the sides, making them much easier to invert without sticking or tearing. Attempting to remove hot cakes too soon can lead to breakage, especially with such a moist crumb. This brief rest period also prevents the cakes from cooling too rapidly, which can sometimes cause them to shrink or become denser. Trust the process; this short wait is an investment in flawless cake layers.
Cool Completely on Racks
After the initial rest in the pans, carefully invert the Black Velvet Cake layers onto a wire cooling rack. Gently remove the pans and any parchment paper. Now, allow the cake layers to cool completely on the wire racks. This step is non-negotiable for several reasons. Cooling on a rack ensures air circulates around all sides of the cake, preventing condensation from forming on the bottom, which could make the cake soggy. More importantly, attempting to frost or assemble a cake that is still warm will result in melted frosting and a sliding, messy structure. A completely cooled cake has fully set, making it much easier to handle, level, and frost neatly. This also allows the flavors to settle and the moist crumb to achieve its optimal texture.
Black Velvet Cake: Delightful Tips
Cream Cheese Frosting Pair
While the Black Velvet Cake stands stunningly on its own with its deep dark color and rich chocolate flavor, its true potential is often realized when paired with the right frosting. A classic cream cheese frosting is an absolutely divine companion. The tangy, slightly sweet, and incredibly creamy frosting provides a perfect contrast to the intense sweetness and profound cocoa notes of the cake. The slight acidity of the cream cheese cuts through the richness of the cake, creating a beautifully balanced flavor profile that leaves you wanting more. Its smooth texture also complements the fluffy texture and moist crumb of the cake layers, creating an irresistible mouthfeel. Opt for a frosting that isn’t too sweet to let the cake’s own chocolate brilliance shine through. The combination is a match made in dessert heaven, truly elevating this special occasion dessert to an unforgettable experience. Many bakers consider this pairing non-negotiable for the ultimate black velvet cake experience.
Make Day Before for Flavor
One of the best baking tips for enhancing the flavor and texture of your Black Velvet Cake is to make it a day in advance. While delicious on the day it’s baked, like many rich desserts, this cake actually improves with a little time. Allowing the cake to sit overnight, especially when frosted, gives the flavors a chance to meld and deepen, resulting in an even more complex and satisfying taste. The moist crumb also seems to become even more tender and settled, offering an incredibly smooth and luxurious feel with every bite. The frosting, particularly cream cheese frosting, has time to firm up slightly, making the cake easier to slice and serve. Store the assembled cake in an airtight container in the refrigerator overnight. Bring it back to room temperature for about an hour before serving to ensure the frosting is creamy and the cake’s fluffy texture is at its best. This simple step can truly elevate your home baking game, turning a great cake into an extraordinary one.
Storing Your Cake Safely
Use Airtight Container
Proper storage is paramount to maintaining the exceptional moist crumb and rich chocolate flavor of your Black Velvet Cake. Once cooled and frosted (or even unfrosted layers), the cake should always be stored in an airtight container. Exposure to air is the primary culprit behind a dry, stale cake. An airtight container prevents moisture loss, ensuring the cake remains tender and fresh for several days. If your cake is frosted with a cream cheese frosting, it should be refrigerated due to the dairy content. Place the entire cake, or individual slices, into an appropriate container, making sure the lid seals tightly. For unfrosted layers, you can wrap them tightly in plastic wrap before placing them in a container to further protect against drying out. This meticulous storage ensures that every slice of your Black Velvet Cake retains its decadent treat quality, allowing you to enjoy its deep dark color and fluffy texture for longer. Proper storage makes your home baking efforts last.
Nutrition of Each Slice
Calories, Sugar, Fat Info
Understanding the nutritional aspects of your Black Velvet Cake can help you enjoy this decadent treat mindfully. Given its rich chocolate flavor, moist crumb, and often generous creamy frosting, a single slice of Black Velvet Cake typically contains a significant amount of calories, sugar, and fat. The calories primarily come from the flour, sugar, oil, and cocoa powder in the cake itself, compounded by the butter, cream cheese, and powdered sugar in the frosting. Sugar content is naturally high, contributing to the cake’s delightful sweetness, while fat content is derived from the vegetable oil, eggs, and dairy products. It’s important to remember that this is a special occasion dessert meant for enjoyment, rather than an everyday staple. Moderation is key when indulging in such a rich and flavorful treat. Individual calorie, sugar, and fat counts will vary greatly depending on specific ingredient brands, exact recipe measurements, and serving size. Always consider the overall dietary context when consuming desserts.
Protein and Carb Details
Beyond calories, sugar, and fat, a slice of Black Velvet Cake also provides carbohydrates and some protein. The bulk of the carbohydrates comes from the flour and sugar, which are essential for providing energy. These simple carbohydrates contribute to the immediate satisfaction and energy boost associated with consuming desserts. Protein content is relatively modest, primarily sourced from the eggs and buttermilk in the cake, as well as the dairy in the cream cheese frosting. While not a significant source of daily protein, it adds to the overall macronutrient profile. Dietary fiber is present in small amounts, mainly from the cocoa powder and flour. As with other nutritional values, these figures are estimates and depend heavily on the specific recipe and portion size. This delicious Black Velvet Cake is indeed a rich chocolate flavor experience that balances its indulgence with a touch of general nutritional information, serving as a reminder to savor each moment. For more recipe ideas, follow us on Instagram and Pinterest.
Enjoy This Irresistible Cake
Serving Size and Ideas
Once your exquisite Black Velvet Cake is perfectly frosted and beautifully presented with its deep dark color and creamy frosting, it’s time to enjoy the fruits of your home baking labor. A standard serving size typically involves a slice that is about 1 to 1.5 inches wide, offering a generous portion without being overly indulgent. When serving, ensure your knife is clean between cuts to maintain neat slices, showcasing the cake’s beautiful layers and fluffy texture. For an extra touch of elegance, consider garnishing each slice. A sprinkle of cocoa powder, a dusting of powdered sugar, fresh berries (like raspberries or strawberries), or a small dollop of whipped cream can enhance both the visual appeal and the flavor experience. This special occasion dessert is perfect on its own, but a scoop of vanilla bean ice cream or a drizzle of chocolate sauce can take it to another level of decadent treat. Encourage guests to savor the rich chocolate flavor and moist crumb. Presenting it well truly completes the experience, making every bite a delight.
Recipe Summary: Quick View
For those who appreciate a quick glance at the logistical aspects of home baking, this summary provides the essential timings and yield for your Black Velvet Cake. This deep dark color, rich chocolate flavor, and moist crumb cake can be a wonderful addition to your repertoire of special occasion desserts, and knowing the time commitment upfront helps in planning your baking schedule effectively.
Prep and Cook Times
Prep Time: Approximately 30-40 minutes. This includes gathering and measuring all ingredients, sifting dry components, and preparing the pans. Taking your time here contributes to a smooth baking process and ensures every element is ready for combination.
Cook Time: Approximately 30-35 minutes per cake layer (for two 8-inch round pans). Actual baking time may vary based on your oven and pan size. Always rely on the toothpick test for perfect doneness to achieve that ideal fluffy texture.
Cooling Time: Roughly 2-3 hours, including the initial rest in pans and complete cooling on racks. This is crucial for structure and an easy frosting process. Allowing enough time here will prevent any mishaps.
Servings Per Recipe
This Black Velvet Cake recipe, typically made with two 8-inch round layers and a generous amount of creamy frosting, yields approximately 10-12 servings. This serving size makes it an ideal decadent treat for family gatherings, dinner parties, or any special occasion dessert where you want to impress. The rich chocolate flavor ensures that even a moderate slice is highly satisfying. Adjusting slice sizes can, of course, increase or decrease the total number of servings, but this general guideline helps with planning. Each serving promises a delightful blend of moist crumb and fluffy texture.
Master Black Velvet Cake
Simple Steps to Success
Mastering the Black Velvet Cake is well within reach for any home baker, whether you’re a novice or experienced. By following these simple steps, you can consistently achieve a show-stopping special occasion dessert with its characteristic deep dark color, rich chocolate flavor, and inviting moist crumb. The journey begins with meticulous preparation: gather your ingredients, ensure they are at room temperature, and precisely measure each one. The careful combination of dry and wet ingredients sets the stage, with Dutch-processed cocoa powder being key for that intense hue and flavor. Remember the magic of boiling water – it’s the secret ingredient that amplifies the chocolate and contributes to the cake’s unique fluffy texture and incredible moistness. Bake until just done, using the toothpick test, and then allow ample time for cooling, first in the pans and then completely on racks, to ensure perfect layers. Finally, pairing it with a tangy cream cheese frosting and perhaps making it a day ahead will truly elevate your Black Velvet Cake to a decadent treat that will be remembered long after the last bite. Each step, though simple, contributes significantly to a successful and delicious outcome. For more cooking inspiration, check out this southern-style collard green and potato stew recipe, showing that delicious outcomes can be achieved in many culinary areas. You can also learn more about Black Velvet Cake on Wikipedia.