
Peanut butter cookie bars are a truly delightful homemade dessert, loved for their chewy texture and comforting flavors. This easy recipe makes them a perfect sweet treat for any occasion. Whether it’s a family favorite or a simple baking project, these bars deliver delicious results every time.
Key Takeaways
- Whip up delicious peanut butter cookie bars with a straightforward recipe.
- Learn about key ingredients and simple baking steps for success.
- Find tips for achieving perfect texture and appealing golden brown edges.
- Explore customization options and smart storage solutions for freshness.
These cookie bars bring joy. They are simple to prepare. Rich flavors make them special. Everyone will love this treat. A delightful homemade pleasure.
Classic Peanut Butter Cookie Bars Recipe
Why This Dessert is So Loved
There’s something uniquely comforting about classic peanut butter cookie bars. This homemade dessert stands out as a genuine crowd-pleaser, delivering a perfect balance of sweet and savory notes that appeal to nearly everyone. Imagine sinking your teeth into a soft, chewy bar, rich with the distinct flavor of peanut butter, often studded with delicious chocolate chips that melt in your mouth. It’s not just a sweet treat; it’s a nostalgic taste of home, embodying the simple pleasures of baking.
What makes these peanut butter cookie bars a family favorite is their delightful combination of texture and taste. They offer a satisfying chewiness that sets them apart from individual cookies, making each bite substantial and enjoyable. Furthermore, the ease of preparation makes them an accessible project for bakers of all skill levels, from beginners to seasoned pros. Unlike some more intricate desserts, the process of creating these bars is straightforward, ensuring delicious results without unnecessary stress. Their versatility also contributes to their popularity; they can be enjoyed warm from the oven, at room temperature, or even chilled for a firmer bite. Whether served at a casual gathering, a potluck, or simply as an after-school snack, these bars consistently bring smiles and satisfied cravings, making them a truly beloved dessert.
Best Peanut Butter Cookie Bars Ingredients
Essential Items for Delicious Cookie Bars
Crafting the best peanut butter cookie bars starts with selecting quality ingredients. The foundation of these irresistible treats relies on a few key components that contribute to their unique flavor and desirable chewy texture. Naturally, the star of the show is peanut butter. For a classic taste, opt for creamy, shelf-stable peanut butter. Avoid natural varieties that require stirring, as their oil separation can affect the consistency of your dough. A good quality peanut butter ensures that rich, comforting flavor that makes these bars so appealing. You can learn more about the history and types of peanut butter on Wikipedia.
Beyond the peanut butter, you’ll need standard baking staples: all-purpose flour, granulated sugar, and brown sugar. The combination of both sugars is crucial; brown sugar adds moisture and contributes to the chewy texture, while granulated sugar provides sweetness and helps with spreading. Fresh eggs act as a binder, and vanilla extract enhances all the sweet flavors. Baking soda is your leavening agent, ensuring a slight lift without making the bars too cake-like. Finally, don’t forget the unsalted butter, softened to room temperature, which adds richness and helps create that desirable tender crumb. For an extra layer of deliciousness, most recipes call for chocolate chips. Semi-sweet chips are a popular choice, but milk chocolate or even dark chocolate chips can also be used to customize your perfect sweet treat. Consider these elements as the building blocks for your homemade dessert, ensuring every batch of peanut butter cookie bars is a resounding success.
Simple Steps for Cookie Bar Success
Preparing Your Pan and Oven
Before you even begin mixing, proper preparation is key to ensuring your peanut butter cookie bars bake evenly and don’t stick. First, preheat your oven to the specified temperature, usually around 350°F (175°C), to ensure it’s at the correct heat when the dough is ready. Next, prepare your baking pan. A 9×13-inch pan is standard for these bars. You can either grease it thoroughly with butter or non-stick spray, or line it with parchment paper, leaving an overhang on the sides. The parchment paper method is highly recommended as it makes lifting the baked bars out of the pan and cutting them much easier, ensuring beautifully clean squares.
Mixing Wet and Dry Ingredients
The mixing process for these cookie bars is straightforward. In one bowl, combine your dry ingredients: flour, baking soda, and a pinch of salt. Whisk them together to ensure even distribution. In a separate, larger bowl, cream together the softened butter, granulated sugar, and brown sugar until light and fluffy. This step incorporates air, contributing to the bars’ tender texture. Beat in the eggs one at a time, followed by the vanilla extract and the peanut butter, mixing until just combined. Gradually add the dry ingredients to the wet mixture, mixing on low speed until the flour streaks barely disappear. Don’t overmix; overmixing can lead to tough bars, something we’ll reiterate when discussing desserts later on.
Folding in the Chocolate Chips
Once your dough is mostly combined, it’s time for the delightful addition of chocolate chips. Gently fold them into the dough using a spatula. You want them distributed throughout the mixture without crushing them. This careful folding prevents overworking the dough, maintaining that desirable chewy texture. For a related treat, you might enjoy our peanut butter brownie swirl cookies, which also highlight the joy of chocolate and peanut butter together. Spread the finished dough evenly into your prepared pan. A rubber spatula or the back of a spoon lightly greased can help achieve an even layer, which is crucial for uniform baking.
Baking Your Perfect Peanut Butter Bars
Achieving Golden Brown Edges
Baking is where the magic happens, transforming your simple dough into delicious peanut butter cookie bars. Place your prepared pan into the preheated oven. The baking time typically ranges from 20 to 30 minutes, but this can vary depending on your oven and the exact thickness of your bars. It’s crucial not to overbake, as this can lead to dry, crumbly bars rather than the desired chewy texture. Keep an eye on them, especially after the 20-minute mark.
The key to achieving perfect peanut butter bars with delicious golden brown edges is vigilance. You’re looking for the edges to be set and lightly golden, while the center should still look slightly soft or just barely firm when gently pressed. A slight wobble in the very center is often a good sign that they are perfectly baked, as they will continue to set as they cool. The golden brown edges not only provide a delightful textural contrast—a slight crispness against the soft interior—but also indicate that the sugars have caramelized beautifully, deepening the flavor profile. If you’re a fan of crispy edges, you might also appreciate techniques for dishes like crispy cauliflower where achieving that perfect browning is also key. Once you see those tell-tale golden edges and a mostly set center, it’s time to remove your pan from the oven. Resist the temptation to cut into them immediately; proper cooling is the next vital step for perfect squares.
Cooling and Cutting Cookie Bar Squares
Patience is a virtue, especially when it comes to cooling your freshly baked peanut butter cookie bars. While it’s tempting to dive right into the warm, gooey goodness, allowing them to cool completely is absolutely essential for achieving clean, perfectly shaped squares. When the bars are still hot, they are delicate and prone to crumbling or tearing when cut. Cooling allows the fats and sugars to re-solidify, setting the structure of the bars and enhancing their chewy texture.
Once out of the oven, let the bars cool in the pan on a wire rack for at least 1 to 2 hours, or until they are completely at room temperature. If you used parchment paper, you can gently lift the entire slab of cooled bars out of the pan using the overhang. This makes cutting significantly easier and helps maintain the integrity of each square. Use a sharp knife for cutting. For the cleanest cuts, wipe the knife blade with a damp cloth or run it under hot water between each cut. This prevents the sticky residue from clinging to the knife and dragging through the subsequent cuts, ensuring your homemade dessert looks as good as it tastes. You can decide on the size of your squares, whether you prefer small, bite-sized pieces or larger, more substantial servings. Properly cooled and cut, these sweet treats are ready to be enjoyed.
Best Peanut Butter Cookie Bars Flavor Notes
Crunchy Versus Creamy Peanut Butter
The choice between crunchy and creamy peanut butter significantly impacts the texture and subtle flavor profile of your cookie bars. Using creamy peanut butter results in a consistently smooth and tender bar, allowing the rich, classic peanut butter flavor to shine through without any textural interruptions. This is often the preferred choice for those seeking a uniformly soft and chewy experience. However, if you enjoy a delightful textural contrast, switching to crunchy peanut butter introduces small, satisfying pieces of roasted peanuts throughout the bar. This adds an extra layer of crunch and a slightly intensified nutty flavor, making each bite more dynamic. Both options create a delicious snack; it simply comes down to personal preference for texture.
Adding Other Delicious Mix-ins
While chocolate chips are a beloved classic addition, peanut butter cookie bars are wonderfully adaptable to various mix-ins, allowing you to customize your sweet treat. Consider folding in peanut butter chips for an extra boost of peanut flavor, or a combination of both chocolate and peanut butter chips for the ultimate indulgence. White chocolate chips offer a different sweetness profile that pairs beautifully with the salty notes of peanut butter. For a more sophisticated touch, chopped nuts like pecans or walnuts can add a pleasant crunch and earthy undertone. Mini pretzels, when added to the dough, introduce a salty crunch that perfectly complements the sweetness, creating a delightful sweet-and-salty combination. Even candies, such as chopped peanut butter cups or M&M’s, can be incorporated for a festive and colorful twist. Don’t be afraid to explore more recipe ideas on Pinterest to spark your creativity and truly make these bars your own.
Storing Your Homemade Cookie Bars
Keeping Them Fresh Longer
To enjoy your homemade peanut butter cookie bars for days after baking, proper storage is essential. These delicious snacks maintain their best texture and flavor when stored correctly. The primary goal is to prevent them from drying out and to keep them fresh longer. Once your cookie bars are completely cooled and cut into squares, transfer them to an airtight container. This simple step is crucial as exposure to air is the main culprit behind stale baked goods.
Store the airtight container at room temperature for up to 3-4 days. Placing a piece of parchment paper or wax paper between layers of bars can prevent them from sticking together, especially if they have any soft toppings or frosting. For longer storage, you can refrigerate the bars for up to a week. If refrigerating, allow them to come to room temperature for about 15-30 minutes before serving to soften slightly and enhance their chewy texture. You can also freeze peanut butter cookie bars for extended freshness. Wrap individual squares tightly in plastic wrap, then place them in a freezer-safe bag or container. They can be stored in the freezer for up to 2-3 months. Thaw them at room temperature for a few hours or warm gently in the microwave for a quick, comforting treat. Proper storage ensures you always have a delightful homemade dessert on hand, ready for a quick snack or to share with loved ones.
Serving Ideas for Dessert Lovers
Enjoy Warm With Ice Cream
Peanut butter cookie bars are incredibly versatile, offering many delightful serving possibilities for any dessert lover. One of the most classic and irresistible ways to enjoy these bars is warm, paired with a scoop of vanilla ice cream. A quick zap in the microwave for 10-15 seconds will slightly warm the bar, making it soft and gooey, perfect for melting ice cream. The cold, creamy ice cream creates a superb contrast with the warm, chewy cookie bar, while the vanilla complements the rich peanut butter and chocolate flavors beautifully. You can also drizzle a little chocolate sauce or caramel over the top for an extra touch of decadence, turning a simple snack into an indulgent plated dessert.
Pairing with Drinks and Fruit
Beyond the classic ice cream pairing, these homemade dessert bars can be elevated with thoughtful drink and fruit combinations. For a comforting experience, serve them alongside a tall glass of cold milk, which is a timeless pairing with any cookie. Coffee and tea also make excellent companions, especially for an afternoon pick-me-up or an after-dinner sweet treat. The robustness of coffee can balance the sweetness of the bars, while a light, herbal tea offers a refreshing counterpoint. For a healthier touch or to add a burst of freshness, consider serving your peanut butter cookie bars with a side of fresh berries or sliced bananas. The slight tartness of raspberries or strawberries, or the natural sweetness of bananas, cuts through the richness of the bars, creating a balanced and satisfying dessert. This versatility makes them a perfect square for any occasion, from a casual family treat to a more elegant serving.
Ingredient Swaps for Cookie Bar Recipe
Trying Different Nut Butters
While peanut butter is the quintessential ingredient for these bars, the recipe is surprisingly adaptable to other nut butters, opening up a world of new flavor profiles. If you have dietary restrictions or simply want to try something different, consider swapping the peanut butter for almond butter, cashew butter, or even sunflower seed butter (SunButter) for a nut-free option. Each nut butter brings its unique flavor and slightly different consistency, so you might need minor adjustments to the dry ingredients to achieve the perfect chewy texture. Almond butter offers a milder, slightly sweeter taste, while cashew butter provides a creamier, richer profile. Sunflower seed butter, with its distinct flavor, makes these a safe sweet treat for those with nut allergies, ensuring everyone can enjoy a version of these comforting flavors.
Healthy Additions and Sweeteners
For those looking to make these peanut butter cookie bars a bit healthier without sacrificing deliciousness, several thoughtful swaps and additions can be made. You can reduce the amount of granulated sugar and brown sugar slightly, or experiment with natural sweeteners like maple syrup or honey, keeping in mind that liquid sweeteners will alter the dough consistency. Adding a scoop of flaxseed meal or chia seeds can boost fiber and omega-3s without significantly impacting the taste. For an added nutritional punch, finely grated zucchini or carrots can be folded into the dough—they add moisture and nutrients while remaining virtually undetectable in the final baked product, especially with the strong peanut butter flavor. Whole wheat flour can replace a portion of the all-purpose flour for increased fiber, though this might result in a slightly denser bar. Remember, these are simple baking tweaks that allow you to customize this family favorite to fit various dietary preferences.
Mastering The Best Peanut Butter Cookie Bars
Don’t Overmix for Tender Texture
Achieving truly exceptional peanut butter cookie bars often comes down to mastering a few key techniques, the most critical of which is avoiding overmixing. Once you add the dry ingredients to the wet, mix only until the flour streaks have just disappeared. Overmixing develops the gluten in the flour, leading to a tougher, denser bar instead of the desired soft and chewy texture. This is a common pitfall in baking many types of cookies and bars. A light hand and a keen eye will ensure your homemade dessert remains tender and delightful. Think of it as gently coaxing the ingredients together, rather than aggressively beating them. This careful approach is a hallmark of simple baking, yielding superior results for your peanut butter cookie bars every time.
How to Check for Doneness
Knowing exactly when your peanut butter cookie bars are perfectly baked is another crucial aspect of mastering this recipe. As mentioned earlier, doneness is indicated by several visual cues. The edges should be golden brown and appear set, pulling slightly away from the sides of the pan. The center, however, should still look a little soft or slightly underbaked. If you gently press the center, it should spring back slightly, or have a minimal wobble. An inserted toothpick might not come out entirely clean, but should have moist crumbs attached, not wet batter. If the toothpick comes out completely clean, your bars are likely overbaked and will be dry. Removing them from the oven at the ideal moment ensures a wonderfully moist and chewy texture throughout, making them a delicious snack. This skill comes with practice, but paying close attention to these signs will lead you to perfectly baked bars. For more daily inspiration and baking tips, make sure to follow us on Instagram.
Preparing Ahead for Easy Dessert
For those who love to plan or need a quick dessert solution, preparing your peanut butter cookie bars ahead of time is a fantastic strategy. This simple baking approach allows you to enjoy the convenience of a homemade treat without the last-minute rush. One excellent method is to prepare the dough in advance. Mix all the ingredients as directed in the recipe, right up to the point before baking. Then, press the dough firmly into your prepared baking pan, cover it tightly with plastic wrap, and refrigerate it for up to 2-3 days. When you’re ready to bake, simply remove the pan from the fridge, let it sit at room temperature for about 15-30 minutes while your oven preheats, and then bake as usual, adding a few extra minutes to the baking time if the dough is still quite cold. This readiness makes it easy to have a delicious snack available whenever the craving strikes.
Another option for preparing ahead is to bake the bars entirely and then freeze them. As discussed in the storage section, fully baked and cooled bars can be individually wrapped and frozen for up to 2-3 months. This is perfect for meal prepping desserts or ensuring you have a steady supply of these comforting flavors for unexpected guests or busy weeknights. Having pre-baked bars means you can pull out just what you need, thaw, and serve. Whether you’re preparing the dough or freezing the finished product, these make-ahead strategies ensure that these peanut butter cookie bars remain an easy recipe that fits seamlessly into your schedule, delivering perfect squares every time.
Customize Your Peanut Butter Cookie Bars
Extra Toppings and Deeper Flavors
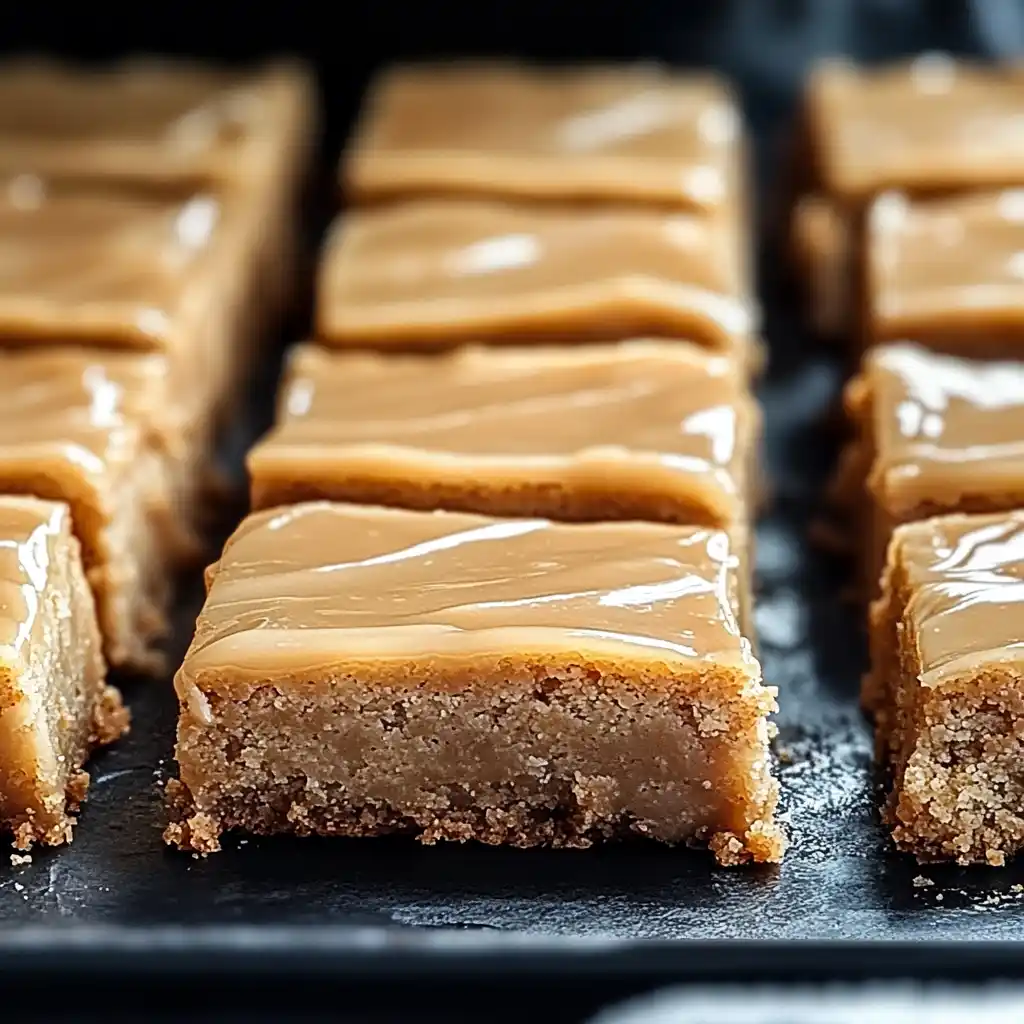
The beauty of peanut butter cookie bars lies not only in their inherent deliciousness but also in their incredible potential for customization. Beyond the mix-ins folded into the dough, an array of extra toppings can elevate these simple baking marvels to new heights of flavor and visual appeal. For a classic touch, a drizzle of melted chocolate, either semi-sweet or milk, can be artistic and adds an extra layer of chocolatey goodness. A sprinkle of flaky sea salt over the chocolate will beautifully enhance the peanut butter flavor, creating a sophisticated sweet-and-salty dynamic. For those who adore a richer peanut butter presence, a swirl of melted peanut butter on top immediately after baking, or even a simple sprinkle of crushed roasted peanuts, can intensify the nutty notes.
To really deepen the flavors, consider a homemade glaze or frosting. A simple powdered sugar glaze thinned with milk and a touch of vanilla can add a sweet, delicate finish. For a more indulgent option, a peanut butter frosting can turn these bars into an even more decadent homemade dessert, perfect for special occasions. Experiment with a caramel drizzle, or even a sprinkle of mini marshmallows broiled for a few seconds for a s’mores-like twist. The possibilities are endless, allowing you to transform this family favorite into something uniquely yours. Whether it’s adding a different type of chocolate chip—like our blueberry muffin cookies with streusel that show how simple additions can change a classic—or topping with candy pieces, customizing your peanut butter cookie bars is a fun way to express your culinary creativity and always deliver a truly satisfying sweet treat.
