
Strawberry Crunch Cheesecake is a heavenly dessert, combining creamy texture with a delightful crunch. This sweet treat offers tangy berry flavors atop a buttery crust. It’s an easy bake recipe perfect for impressing guests or enjoying a special moment with family. Get ready to create this homemade delight.
Key Takeaways
- Learn to make a beautiful, crunchy strawberry cheesecake from scratch.
- Detailed steps for creating the perfect crust, creamy filling, and signature topping.
- Essential tips for baking, cooling, and storing your delicious dessert effectively.
- Explore creative variations, including gluten-free, mini, and no-bake cheesecake options.
This cheesecake blends smooth creaminess with satisfying crunch. It’s a sweet, tangy, and truly irresistible dessert. A perfect treat for any berry lover. Making it yourself is rewarding. Enjoy every delectable bite.
Understanding This Delicious Crunch Cheesecake
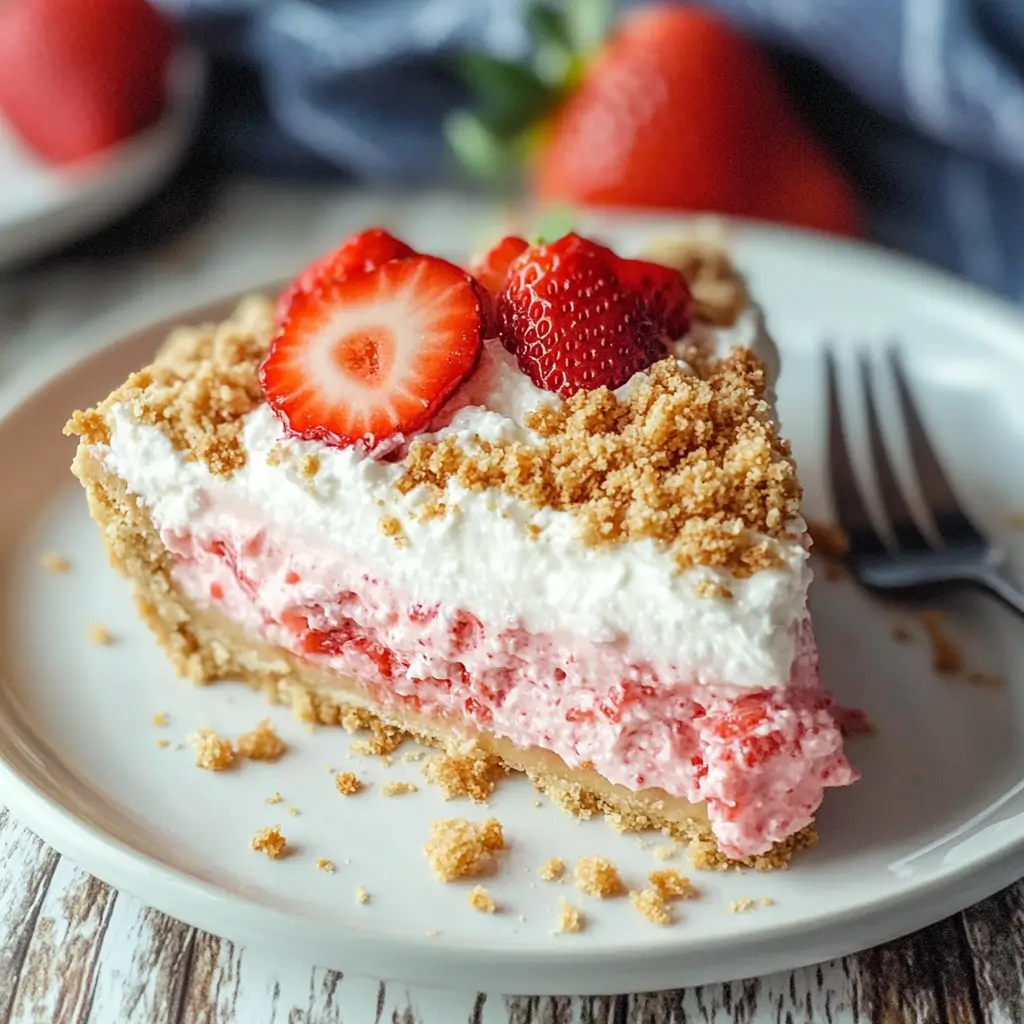
The Strawberry Crunch Cheesecake is more than just a dessert; it’s a celebration of textures and flavors that captivate the senses. Imagine a creamy, rich cheesecake base infused with sweet strawberry puree, sitting on a buttery, crisp cookie crust. This entire masterpiece is then crowned with a vibrant, crunchy topping made from golden cookies and freeze-dried strawberries. It’s a symphony of sweet, tangy, and buttery notes, making it a standout dessert that’s both familiar and exciting. This popular treat gained fame for its nostalgic appeal, reminiscent of classic ice cream bars, yet elevated to an elegant, homemade delight. It offers a wonderful alternative to traditional cheesecakes, providing an unexpected textural contrast that truly sets it apart.
A Perfect Dessert for You
Whether you’re hosting a dinner party, celebrating a special occasion, or simply craving a unique sweet treat, the Strawberry Crunch Cheesecake is an excellent choice. Its visually stunning appearance makes it a fantastic centerpiece, sure to draw compliments. Beyond its looks, the thoughtful combination of a smooth, rich filling with a delightful crunch offers a memorable eating experience. It’s robust enough to satisfy serious dessert lovers but also light enough not to overwhelm after a meal. This cheesecake is versatile, appealing to both adults and children, making it a family-friendly favorite. Plus, the process of making it is incredibly rewarding, allowing you to put a personal touch on a truly delicious creation.
Sweet and Tangy Flavors
The magic of this cheesecake lies in its balanced flavor profile. The sweetness of the creamy filling, derived from cream cheese and sugar, is perfectly complemented by the tangy burst of fresh or frozen strawberries. This interplay of sweet and tart prevents the dessert from being overly rich, ensuring each bite is refreshing. The strawberry puree incorporated into the filling and the freeze-dried strawberries in the topping intensify this fruity essence, creating a layered berry flavor throughout the cake. The golden cookie crust and crunchy topping add another dimension of sweetness and a buttery finish, culminating in a dessert that is complex, satisfying, and utterly irresistible.
Ingredients for This Special Recipe
Crafting the perfect Strawberry Crunch Cheesecake requires a careful selection of ingredients for each distinct layer. From the rich, creamy filling to the textural crunch topping, every component plays a crucial role in achieving that signature flavor and consistency. Using high-quality ingredients ensures a superior taste and a successful bake. Don’t cut corners here; the foundation of your delicious dessert depends on these choices. Familiarizing yourself with the list will help you organize your baking process and guarantee you have everything on hand for this delightful culinary adventure.
Creamy Filling Essentials
The heart of any cheesecake is its creamy filling, and for our Strawberry Crunch Cheesecake, certain items are non-negotiable. You’ll need several blocks of full-fat cream cheese, softened to room temperature for a smooth, lump-free mixture. Granulated sugar provides the sweetness, while large eggs add structure and richness. A splash of vanilla extract enhances the overall flavor profile. Additionally, sour cream or heavy cream is often included to add a slight tang and extra creaminess, contributing to that melt-in-your-mouth texture. For the distinctive strawberry flavor, you’ll prepare a vibrant strawberry puree from fresh or frozen berries, ensuring that delightful fruitiness permeates every bite of the cheesecake. This combination creates a velvety smooth and incredibly flavorful base.
Crunch Topping Items
The iconic “crunch” in this cheesecake comes from a unique and delicious topping. You’ll need Golden Oreos or Nilla Wafers, which will be crushed into fine crumbs to form the base of the crunch. Freeze-dried strawberries are a must, providing an intense, natural strawberry flavor and a beautiful pink hue, as well as a lovely crisp texture. A cereal like Cap’n Crunch Berries or Golden Grahams can also be incorporated to add more texture and a playful sweetness. Melted butter acts as the binding agent, holding the crumbles together and giving them a richer taste. Some recipes also call for a touch of strawberry gelatin mix to boost both color and flavor. This combination creates a delightful textural contrast against the smooth cheesecake.
Building the Cookie Crust
The foundation of your Strawberry Crunch Cheesecake is its cookie crust, providing a delightful base that complements the creamy filling and crunchy topping. A well-made crust is crucial for both taste and structural integrity. It adds a buttery, slightly salty counterpoint to the sweetness of the cheesecake and helps hold everything together when slicing. Taking the time to prepare the crust correctly ensures it won’t crumble excessively or become too soggy. This initial step sets the stage for a truly amazing dessert, promising a satisfying crunch with every forkful. For another delightful dessert that starts with a good base, check out our recipe for Peanut Butter Brownie Swirl Cookies.
Crushing Cookies Perfectly
Achieving the ideal cookie crust starts with perfectly crushed cookies. For this recipe, Golden Oreos or Nilla Wafers are excellent choices. You can use a food processor to quickly and evenly crush the cookies into fine crumbs, which is the most efficient method. If you don’t have a food processor, place the cookies in a large zip-top bag and use a rolling pin or the bottom of a heavy glass to crush them until they are uniformly fine. The finer the crumbs, the more compact and cohesive your crust will be. Avoid large chunks, as they can make the crust uneven and prone to breaking apart. Aim for a texture similar to fine sand, ensuring consistent distribution when mixed with butter.
Baking the Base
Once your cookies are perfectly crushed, combine them with melted unsalted butter. The amount of butter is crucial; too little, and the crust will be crumbly; too much, and it will be greasy. Mix thoroughly until all crumbs are moistened, resembling wet sand. Press this mixture firmly and evenly into the bottom of a 9-inch springform pan. Use the bottom of a flat glass or measuring cup to compact the crumbs, ensuring a dense, sturdy base. For best results, pre-bake the crust for about 8-10 minutes at 350°F (175°C). This brief bake helps to set the crust, making it crispier and preventing it from becoming soggy once the filling is added. Allow it to cool completely before pouring in the cheesecake mixture.
Mixing the Cheesecake Filling
The creamy, luscious filling is arguably the star of any cheesecake, and for our Strawberry Crunch version, precision in mixing is key. This stage combines the richness of cream cheese with the delicate sweetness of sugar and the tang of strawberries, creating a harmonious blend that will bake into a perfectly smooth texture. The goal is to achieve a homogeneous mixture without overmixing, which can introduce too much air and lead to cracks during baking. Following these steps carefully will ensure your cheesecake filling is nothing short of perfection, setting the stage for a truly memorable dessert. For another delightful recipe that depends on precise mixing, consider trying our Vanilla Bean Crème Brûlée Cheesecake Cupcakes.
Smooth Cream Cheese Mix
Start with full-fat block cream cheese that has been softened to room temperature. This is critical for achieving a smooth, lump-free batter. In a large mixing bowl, beat the softened cream cheese with granulated sugar until it is light, fluffy, and completely smooth. Use a stand mixer with a paddle attachment or a hand mixer on medium speed. Scrape down the sides of the bowl frequently to ensure everything is thoroughly combined. The key here is to mix until just smooth; overmixing at this stage can incorporate too much air, which can cause the cheesecake to puff up significantly in the oven and then fall, leading to cracks. Incorporate vanilla extract and sour cream (if using) now, mixing until just blended.
Adding Eggs Carefully
Eggs are essential for structure and richness in cheesecake. They act as a binder, helping the filling set beautifully. After your cream cheese and sugar are well combined, add the eggs one at a time. Beat on low speed until each egg is just incorporated before adding the next. This gentle approach prevents overmixing. Overbeating the eggs can incorporate too much air into the batter, which expands during baking and then contracts rapidly as the cheesecake cools, often resulting in a cracked surface. Mix just enough to combine, ensuring the batter remains dense and creamy, not airy. For more about this foundational ingredient, you can read about cream cheese on Wikipedia.
Puree for Strawberry Taste
To infuse your cheesecake with that irresistible strawberry flavor, you’ll create a vibrant strawberry puree. You can use either fresh or frozen strawberries. If using frozen, thaw them first. Blend the strawberries until completely smooth. For an even smoother consistency and to remove seeds, you can press the puree through a fine-mesh sieve. Gently fold this strawberry puree into your prepared cream cheese mixture. Be careful not to overmix, maintaining the smooth, thick consistency of the batter. This step not only adds a lovely pink hue but also provides a tangy, fruity burst that elevates the entire cheesecake, perfectly complementing the creamy base.
Baking Your Delicious Crunch Cheesecake
Baking a cheesecake can seem daunting, but with the right technique, you’ll achieve a beautifully set, crack-free dessert every time. The goal is to bake the cheesecake slowly and evenly, allowing it to cook through without drying out or browning too quickly. A gentle baking process ensures that the creamy texture you’ve worked so hard to create remains intact. Paying attention to detail during this stage is paramount for a professional-looking and tasting result. This section will guide you through the process, from preparing the pan to knowing exactly when your masterpiece is ready to emerge from the oven.
Pouring and Smoothing Filling
Once your crust is cooled, carefully pour the prepared cheesecake filling into the springform pan. Gently tap the pan on the counter a few times to release any air bubbles. Use an offset spatula or the back of a spoon to smooth the top of the filling, creating an even surface. For best results and to prevent cracks, consider using a water bath (bain-marie). Wrap the bottom and sides of your springform pan tightly with several layers of heavy-duty aluminum foil to prevent water seepage. Place the foil-wrapped pan into a larger roasting pan. Pour hot water into the roasting pan until it reaches about halfway up the sides of the springform pan. This creates a moist, even heat environment, which is crucial for a smooth, crack-free cheesecake.
Knowing When It’s Done
Cheesecake doneness can be tricky, as it continues to set as it cools. Bake your cheesecake in a preheated oven (usually around 325-350°F or 160-175°C) for the specified time in your recipe, often 60-75 minutes. To check for doneness, gently shake the pan. The edges should appear set, but the very center (a circle about 2-3 inches in diameter) should still have a slight jiggle, similar to gelatin. If the entire cheesecake is firm, it’s likely overbaked, which can lead to a dry texture and cracks. Resist the urge to open the oven door frequently, as sudden temperature changes can also cause cracks. Once done, turn off the oven and leave the cheesecake inside with the door ajar for initial cooling.
Cooling and Chilling Steps
The cooling and chilling process is just as crucial as the baking itself for achieving the perfect cheesecake texture and preventing cracks. Rushing these steps can result in a collapsed center, a rubbery consistency, or unsightly fissures across the top. Patience is truly a virtue when it comes to cheesecake, as these extended cooling periods allow the cheesecake to set properly, become firm, and develop its full flavor profile. Skipping these steps would be a disservice to all the effort you’ve put into creating this delicious crunch cheesecake. For more delightful dessert ideas, explore our full Desserts category!
Initial Oven Cool Down
Once your cheesecake is baked and passes the jiggle test, do not remove it from the oven immediately. Instead, turn off the oven and prop the door open slightly with a wooden spoon. Allow the cheesecake to cool gradually inside the oven for at least one hour. This slow cooling prevents drastic temperature changes that can cause the cheesecake to contract too quickly, leading to cracks. The residual heat in the oven gently continues the setting process while allowing the cake to adjust to cooler temperatures. This initial, controlled cool-down is a vital step for a flawless surface.
Chill Time for Firmness
After the oven cool down, remove the cheesecake from the oven and carefully remove the foil (if using a water bath). Let it cool completely on a wire rack at room temperature for another 1-2 hours. Once it’s completely cooled to room temperature, cover the cheesecake loosely with plastic wrap and transfer it to the refrigerator. This is where the magic truly happens. Chill the cheesecake for a minimum of 6-8 hours, but ideally overnight. This extended chill time allows the cheesecake to firm up, develop its creamy texture, and intensify its flavors. A well-chilled cheesecake is easier to slice and tastes significantly better. Do not apply the crunch topping until just before serving to maintain its crispness.
Making Strawberry Crunch Topping
The strawberry crunch topping is what truly makes this cheesecake a unique and unforgettable dessert. It adds an incredible textural contrast to the smooth, creamy filling and delivers a burst of vibrant strawberry flavor. This topping isn’t just an afterthought; it’s an integral component that brings the entire recipe together, offering a satisfying crispness in every bite. Preparing it correctly ensures a beautiful presentation and a delicious sensory experience. Learning to master this topping is key to replicating the famous strawberry crunch ice cream bar experience in a cheesecake format. This crunchy layer takes your cheesecake from delicious to extraordinary, making it a homemade delight that impresses.
Mixing Cereal and Cookies
To create the iconic strawberry crunch topping, you’ll combine a blend of crushed cookies and cereal. Start by finely crushing Golden Oreos or Nilla Wafers using a food processor or by hand in a sealed bag. Aim for fine crumbs, similar to those used for the crust. Next, add freeze-dried strawberries to the food processor and pulse until they are also finely crushed and incorporated with the cookie crumbs, imparting a natural pink color and intense berry flavor. For an extra layer of crunch and nostalgic taste, mix in a cereal like Cap’n Crunch Berries or Golden Grahams, either lightly crushed or left whole for larger pieces. Ensure all components are well combined, forming a colorful and fragrant mixture ready for the next step. You can learn more about strawberries on Wikipedia.
Adding Butter for Texture
The melted butter acts as the binding agent for your crunch topping, ensuring it holds together and adheres to the cheesecake without being too dry or too greasy. Once your cookie, freeze-dried strawberry, and cereal mixture is ready, pour in melted unsalted butter. Toss everything together until all the dry ingredients are evenly moistened. The mixture should clump together slightly when pressed. Some recipes also suggest adding a small amount of strawberry gelatin powder at this stage, which enhances the color and adds an extra layer of strawberry flavor. This butter-bound mixture creates a fantastic texture that is both crisp and slightly chewy, making it an irresistible part of the dessert.
Pressing Topping onto Cake
Timing is key for applying the strawberry crunch topping. It should be added just before serving, or a few hours before, to ensure it remains crispy and doesn’t soften from the moisture of the cheesecake. Once your cheesecake is fully chilled and firm, carefully release it from the springform pan. Gently press the prepared strawberry crunch mixture onto the top and sides of the cheesecake. You can use your hands or a spoon to evenly distribute and lightly press the crumbs, making sure they adhere well. This creates a beautiful, vibrant, and textural coating that truly defines this delicious crunch cheesecake. Avoid pressing too hard, which might damage the cheesecake surface.
Presenting Your Delicious Crunch Cheesecake
Presenting your Strawberry Crunch Cheesecake is the final step in showcasing your culinary artistry. A beautifully plated dessert enhances the dining experience, making it even more enjoyable for you and your guests. This section focuses on techniques for cutting clean slices and creative garnishing ideas that will elevate your cheesecake from a simple dessert to a stunning centerpiece. Thoughtful presentation demonstrates attention to detail and can truly make your homemade delight shine. Ensure your hard work is appreciated with these simple yet effective presentation tips. For another elegant dessert presentation, check out our Blueberry Muffin Cookies with Streusel recipe.
Easy Cutting and Serving
To achieve perfectly clean slices of your Strawberry Crunch Cheesecake, a few tricks can make all the difference. First and foremost, ensure the cheesecake is thoroughly chilled—preferably overnight. This firmness is crucial for clean cuts. Before slicing, run a sharp, thin-bladed knife under hot water, then wipe it dry. Make your cut, then clean and re-heat the knife for each subsequent slice. This prevents the cheesecake from sticking and dragging, resulting in smooth, pristine edges. Carefully lift each slice onto a serving plate using a pie server. For optimal enjoyment, allow slices to sit at room temperature for 10-15 minutes before serving to soften slightly and release their full flavor.
Garnishes for Extra Charm
Elevate the visual appeal of your Strawberry Crunch Cheesecake with thoughtful garnishes. Fresh strawberries, either sliced or whole, are a natural and beautiful choice, reinforcing the main flavor. A dollop of freshly whipped cream on each slice adds a touch of elegance and balances the richness of the cheesecake. A sprig of fresh mint can provide a pop of green color and a refreshing aroma. You could also drizzle a little strawberry sauce or a light dusting of powdered sugar over the plate for an extra touch of sophistication. These small additions not only make the dessert look more appealing but can also add subtle complementary flavors, making each serving a truly special homemade delight.
Storing Leftover Cheesecake
After enjoying your delicious Strawberry Crunch Cheesecake, you’ll likely have leftovers, and proper storage is key to maintaining its freshness and delightful taste. Cheesecake is a perishable dessert that requires specific handling to prevent spoilage and keep its texture intact. Whether you plan to enjoy it within a few days or save it for a longer period, understanding the best storage practices will ensure that every subsequent slice is as enjoyable as the first. This section provides practical advice for both short-term refrigeration and long-term freezing, helping you extend the life of your homemade delight. Keep your creamy dessert fresh for future enjoyment.
Fridge Life for Freshness
To keep your leftover Strawberry Crunch Cheesecake fresh in the refrigerator, it’s essential to store it properly. Place any remaining portions in an airtight container or cover the entire cheesecake tightly with plastic wrap. This prevents it from absorbing odors from other foods in the fridge and helps maintain its moisture content. When stored correctly, cheesecake will remain fresh and delicious for 3 to 5 days in the refrigerator. If the crunch topping was applied to the entire cake, it might soften slightly over time due to moisture from the cheesecake. For best results with the topping, it’s ideal to apply it to individual slices just before serving if you anticipate significant leftovers. For another great refrigerated dessert, consider our Quick Italian Cream Cake.
Freezing for Longer Enjoyment
If you wish to enjoy your Strawberry Crunch Cheesecake for an extended period, freezing is an excellent option. For best results, it’s often recommended to freeze the cheesecake without the crunch topping, adding it fresh when you’re ready to serve. You can freeze the entire cheesecake or individual slices. To freeze the whole cake, place it (uncovered) in the freezer until firm, about 1-2 hours. Then, wrap it tightly in several layers of plastic wrap, followed by a layer of aluminum foil. For individual slices, wrap each slice securely in plastic wrap and then foil. Frozen cheesecake can be stored for up to 1-2 months. To thaw, transfer the cheesecake to the refrigerator overnight. Add fresh crunch topping just before serving after it’s thawed.
Delicious Crunch Cheesecake Variations
While the classic Strawberry Crunch Cheesecake is a showstopper, the beauty of this recipe lies in its versatility. You can easily adapt it to suit different dietary needs, preferences, or occasions, creating unique versions that are just as delightful. Exploring variations allows you to put your own spin on this creamy dessert, making it even more personalized and exciting. Whether you’re looking for a healthier option, a bite-sized treat, or a completely different preparation method, these variations offer creative ways to enjoy the beloved strawberry crunch flavors. Don’t be afraid to experiment and find your new favorite homemade delight.
Gluten-Free Options
Making a gluten-free Strawberry Crunch Cheesecake is surprisingly simple. The main modification involves the crust and the crunch topping. For the crust, simply substitute regular Golden Oreos or Nilla Wafers with their gluten-free counterparts. Many brands now offer excellent gluten-free sandwich cookies or vanilla wafers that crush beautifully and provide the same buttery flavor. For the crunch topping, ensure any cereal you use, such as corn flakes or a gluten-free oat-based cereal, is certified gluten-free. Freeze-dried strawberries are naturally gluten-free. By making these few ingredient swaps, individuals with gluten sensitivities can fully enjoy this incredible dessert without compromising on taste or texture, creating a truly inclusive sweet treat.
Fun Mini Cheesecakes
Transforming your Strawberry Crunch Cheesecake into fun mini cheesecakes is a fantastic idea for portion control, parties, or individual servings. Instead of a springform pan, use a muffin tin lined with paper or silicone cupcake liners. Press a small amount of the cookie crust mixture into the bottom of each liner. Then, fill each liner with the cheesecake batter, leaving a little room at the top. The baking time will be significantly shorter, typically around 20-30 minutes, or until the edges are set and the centers have a slight jiggle. After cooling and chilling, top each mini cheesecake with a sprinkle of the strawberry crunch topping. These bite-sized delights are adorable, easy to serve, and perfect for gatherings, offering a charming spin on the classic.
No-Bake Cheesecake Idea
For those who prefer a less hands-on approach or want to avoid turning on the oven, a no-bake Strawberry Crunch Cheesecake is a wonderful alternative. The crust remains the same—crushed cookies mixed with melted butter, pressed into a pan and chilled. For the filling, you’ll typically combine cream cheese with powdered sugar, whipped heavy cream (stabilized with a touch of gelatin if desired), and strawberry puree. This mixture sets beautifully in the refrigerator without any baking. The texture will be lighter and fluffier than a traditional baked cheesecake, but it still delivers all the creamy, tangy goodness. Chill it for several hours, then apply the strawberry crunch topping before serving for a refreshing and easy bake dessert.
Helpful Tips for Strawberry Lovers
Achieving a truly exceptional Strawberry Crunch Cheesecake goes beyond just following the steps; it involves understanding the nuances of the ingredients and techniques. These helpful tips are specifically curated for strawberry lovers, ensuring your cheesecake not only tastes incredible but also captures the vibrant essence of fresh strawberries. From selecting the best dairy products to wisely using frozen berries, these insights will elevate your baking game and guarantee a perfect creamy dessert every time. Paying attention to these details will make your homemade delight truly stand out and impress any palate.
Best Cream Cheese for Smoothness
The quality of your cream cheese significantly impacts the smoothness and richness of your cheesecake filling. Always opt for full-fat, block cream cheese, not the spreadable kind that comes in tubs. Block cream cheese has a lower water content and a firmer texture, which is essential for a dense, creamy, and stable cheesecake. Ensure the cream cheese is completely softened to room temperature before you start mixing. Cold cream cheese will result in a lumpy batter, no matter how much you beat it. Taking this simple step ensures a velvety smooth and luxurious filling, the hallmark of any great creamy dessert.
Sour Cream for Good Flavor
Incorporating sour cream into your cheesecake filling is a secret weapon for enhanced flavor and texture. Sour cream adds a subtle tangy note that beautifully complements the sweetness of the cheesecake and the fruitiness of the strawberries, creating a more complex and balanced taste. Beyond flavor, it contributes to an incredibly moist and smooth texture, preventing the cheesecake from becoming too dense or dry. If you don’t have sour cream, plain full-fat Greek yogurt can be a good substitute, offering a similar tang and richness. Just be sure to use it at room temperature, like the cream cheese, for optimal blending.
Using Frozen Strawberries
Frozen strawberries are a convenient and often more affordable option for making strawberry puree, especially when fresh strawberries are not in season or are expensive. If using frozen strawberries, thaw them completely first. They will release a lot of liquid as they thaw, which you should drain off before blending to prevent your puree from being too watery. If your puree still seems a bit thin, you can gently simmer it in a saucepan for a few minutes to reduce some of the moisture, allowing it to cool completely before adding it to the cheesecake batter. This ensures a concentrated strawberry flavor without compromising the cheesecake’s texture.
Questions About Making Cheesecake
Making a cheesecake, especially a special one like the Strawberry Crunch Cheesecake, can bring up several questions for both novice and experienced bakers. Understanding these common queries can help clarify techniques, optimize preparation, and ensure a smooth baking process from start to finish. This section addresses frequently asked questions, providing clear, concise answers that will help you troubleshoot and plan your cheesecake-making adventure. Equipped with these insights, you’ll feel more confident in tackling this delicious crunch cheesecake, making it an enjoyable and successful experience. For more kitchen tips, follow Carina Recipes on Pinterest and Instagram!
Can I Make Crust Ahead?
Absolutely, preparing the cookie crust ahead of time is a fantastic way to streamline your cheesecake baking process. You can crush the cookies, mix them with butter, press them into the springform pan, and even pre-bake them days in advance. Once the pre-baked crust has cooled completely, wrap the entire pan tightly with plastic wrap or aluminum foil. It can be stored in the refrigerator for up to 3-4 days. You can also freeze a pre-baked crust for up to a month; just ensure it’s well-wrapped to prevent freezer burn. Thaw it in the refrigerator before pouring in your cheesecake filling. This make-ahead tip helps spread out the work and makes the overall cheesecake preparation much more manageable, reducing stress on baking day.
What Cereals Work Best?
For the signature “crunch” in your Strawberry Crunch Cheesecake topping, selecting the right cereal is key. Cereals that maintain their crispness and offer a complementary flavor profile are ideal. Popular choices include Cap’n Crunch Berries, which adds a vibrant color and a sweet, slightly fruity flavor, or Golden Grahams, which provides a honey-graham taste and excellent texture. Other options that work well are corn flakes (crushed for finer texture) or even frosted flakes, which lend a subtle sweetness. The goal is to find a cereal that contributes to the crunchy texture without overpowering the strawberry and creamy cheesecake flavors. Experiment with your favorites to find the perfect addition to your homemade delight, ensuring a satisfying crunch in every bite.