
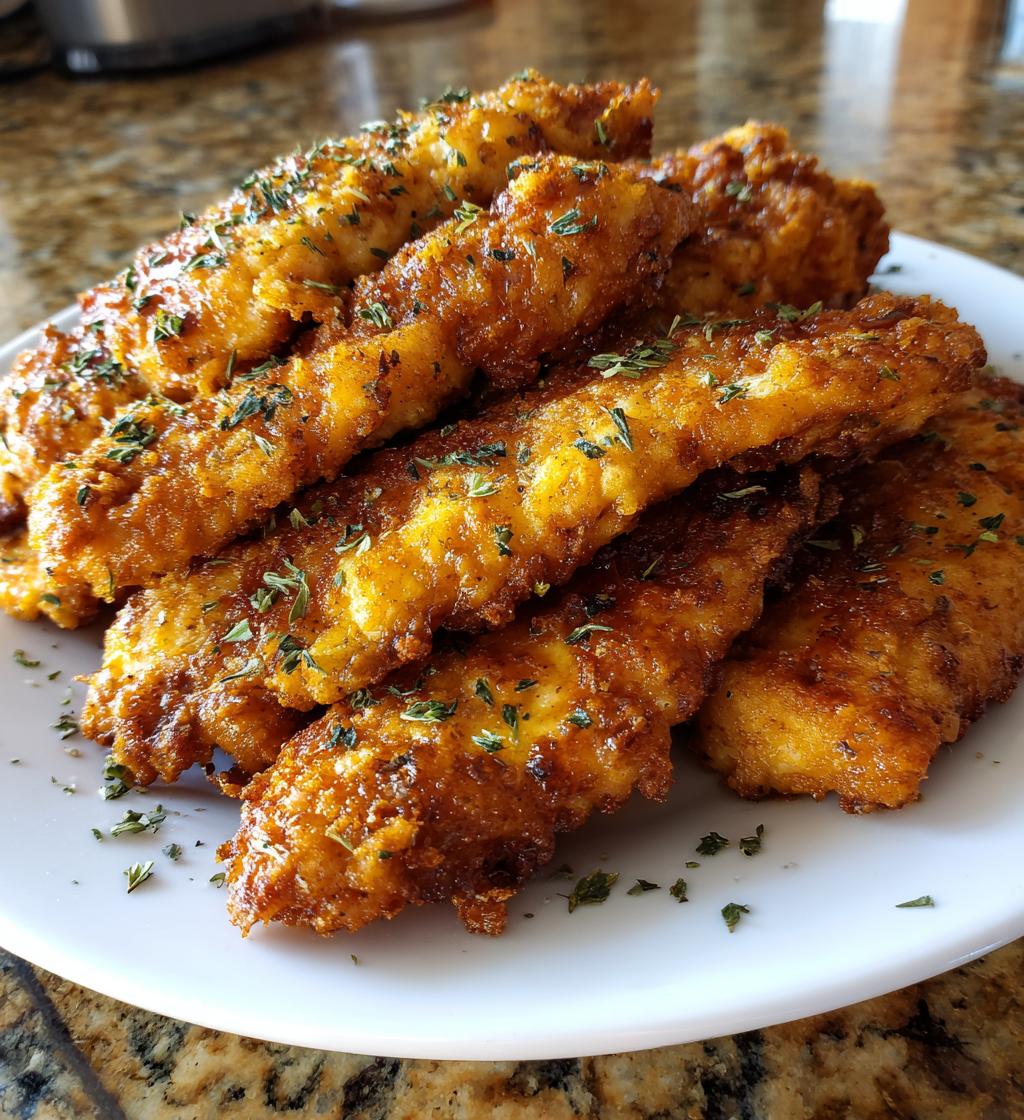
Copycat Cracker Barrel tenders bring that beloved comfort food taste right into your kitchen. Achieving that signature crispy, flavorful crust and juicy interior is simpler than you think. Our recipe reveals the secrets to recreating this classic dish perfectly, ensuring a delightful meal every time for crispy chicken lovers.
Key Takeaways
- Marinate chicken in buttermilk for exceptional tenderness.
- Craft a custom, well-spiced flour mixture for the perfect coating.
- Maintain the ideal oil temperature of 350°F for ultimate crispiness.
- Fry tenders in small batches to ensure even cooking and a golden-brown finish.
- Drain fried chicken properly on a wire rack to prevent sogginess.
- Customize your spice blend to personal taste for unique flavor variations.
Creating these tenders is rewarding. Patience with marinating pays off. Perfect oil temperature is key. Don’t overcrowd the pan. Enjoy a fantastic homemade meal.
Copycat Cracker Barrel Tenders Overview
Recreating the iconic taste of Cracker Barrel’s chicken tenders at home is a culinary delight that promises crispy, flavorful results. These tenders aren’t just fried chicken; they are a nostalgic trip back to comforting, homemade meals, often superior to fast-food alternatives. The beauty of a copycat recipe lies in its ability to deliver restaurant-quality food with ingredients you control, ensuring freshness and your preferred spice levels. This `fried chicken recipe` focuses on techniques that guarantee juicy meat and a perfectly seasoned, crunchy exterior, making it a staple for family dinners or casual get-togethers.
Prep and Cooking Times
Preparing these delicious tenders requires a thoughtful approach to ensure maximum flavor and tenderness. The active preparation time is relatively short, around 20-30 minutes, which includes cutting the chicken and mixing your spices. However, the most critical step, marinating, adds significant time. We recommend a minimum of one hour, but for truly outstanding results, plan for a 4-12 hour buttermilk soak. The actual cooking time, once the chicken is ready for the fryer, is quick, typically 15-20 minutes in total, frying in batches. This investment in prep time truly pays off, transforming ordinary chicken into something extraordinary.
Servings and Quick Facts
This recipe typically yields 4-6 generous servings, making it ideal for a family meal or a small gathering. The versatility of `homemade tenders` means you can easily scale the recipe up or down depending on your needs. For those who enjoy planning ahead, these tenders are also fantastic as leftovers, retaining much of their flavor when reheated properly. They are a universal crowd-pleaser, appealing to both kids and adults, and are often requested as a special treat. Remember, the key to success is following the specific steps diligently, especially concerning the marinating and frying temperatures, which differentiate a good tender from a truly great one.
Ingredients for These Crispy Tenders
Crafting the perfect Copycat Cracker Barrel tenders starts with selecting the right ingredients. Every component plays a vital role in achieving that sought-after texture and flavor. From the primary protein to the spices that create its signature crust, quality matters. This section breaks down what you’ll need, emphasizing ingredients that contribute to both the internal tenderness and external crispiness, ensuring your `crispy chicken` is a triumph.
Essential Chicken Tender List
The foundation of this recipe is, of course, the chicken. We recommend using boneless, skinless chicken breast tenders. If tenders aren’t available, you can easily slice full chicken breasts into 1-inch thick, 3-4 inch long strips. Aim for uniform size to ensure even cooking. Fresh, high-quality chicken will always yield the best results, providing a clean canvas for our `buttermilk chicken` magic. When purchasing, look for chicken that is plump and has a healthy, pink color. Avoid any pieces that appear dry or discolored, as these will not contribute to the juicy interior we are aiming for.
Buttermilk and Spice Needs
Buttermilk is a non-negotiable ingredient for this recipe, serving as the primary tenderizer and flavor enhancer. Its mild acidity works wonders on the chicken fibers, making them incredibly tender and moist. If you don’t have buttermilk, you can make a substitute by adding one tablespoon of white vinegar or lemon juice to a measuring cup, then filling the rest with regular milk to equal one cup, letting it sit for 5-10 minutes. For the spice blend, you’ll need all-purpose flour, salt, freshly ground black pepper, paprika (smoked or sweet), garlic powder, onion powder, and a touch of cayenne pepper for a subtle kick if desired. These spices combine to create a deeply flavorful coating that defines the classic `Cracker Barrel tenders` taste. Don’t be shy with the seasoning; a generous hand ensures a richly flavored crust.
Secret 1: Marinating for Tenderness
The first and arguably most crucial secret to achieving tender, juicy Copycat Cracker Barrel tenders lies in the marination process. This step is what transforms ordinary chicken into something extraordinarily succulent and flavorful. Skipping this stage would mean missing out on the core characteristic that makes these tenders so beloved. The science behind it is simple yet incredibly effective, impacting both the texture and the absorption of flavors into the meat, preparing it perfectly for its journey into the fryer. It’s a foundational element for any truly exceptional `fried chicken recipe`.
Buttermilk Soak: One Hour
A minimum of one hour in a buttermilk bath is essential. This duration allows the lactic acid in the buttermilk to begin breaking down the tough muscle fibers in the chicken, resulting in a noticeably more tender product. While an hour is good, for truly profound tenderness and flavor absorption, we highly recommend extending this soak. Place your chicken tenders in a non-reactive bowl or a resealable bag, pour enough buttermilk to fully submerge them, and refrigerate. Even a short soak like this significantly contributes to the moistness and tender texture of the finished `buttermilk chicken`.
Benefits of Long Marinade
For the absolute best results, a longer marinade, ideally 4 to 12 hours, offers significant benefits. The extended exposure to buttermilk allows for deeper penetration of its tenderizing properties and flavor. This means juicier chicken that practically melts in your mouth, along with a subtle tang that complements the savory spices. Furthermore, the buttermilk helps the seasoned flour coating adhere better to the chicken, ensuring a perfectly crispy crust. While marinating up to 24 hours is acceptable, anything beyond that might start to break down the chicken too much, leading to a mushy texture. A long marinade is the hallmark of truly succulent `homemade tenders`, elevating them far beyond simple fried chicken.
Crafting the Flavorful Flour Mix
The crunchy, seasoned crust is just as important as the tender chicken underneath when it comes to Copycat Cracker Barrel tenders. This section details how to create the perfect flour mixture, a blend of dry ingredients and spices that will adhere beautifully to your marinated chicken and fry up to a golden, irresistible crisp. The right combination not only delivers on taste but also contributes significantly to the overall texture, giving you that satisfying crunch with every bite. It’s the `secret recipe` to that iconic Cracker Barrel flavor profile.
Dry Ingredients Together
Start with a wide, shallow dish – a pie plate or a large baking dish works well for this – as it will make dredging the chicken much easier. Into this dish, measure out your all-purpose flour. The amount will depend on how many tenders you are making, but generally, 2-3 cups is a good starting point. To this, add your salt and freshly ground black pepper. Ensure these are thoroughly mixed into the flour before adding the other spices. A whisk is your best tool here, ensuring there are no clumps and that the seasoning is evenly distributed throughout the flour. This uniform distribution is key for consistent flavor on every piece of `crispy chicken`.
Spices for Perfect Coating
Now, for the flavor. To the flour mixture, incorporate paprika (sweet paprika for color and mild flavor, or smoked paprika for a deeper, earthier note), garlic powder, and onion powder. These aromatics are fundamental to the savory depth of Cracker Barrel’s tenders. For those who enjoy a little kick, a pinch or two of cayenne pepper can be added here – adjust to your preferred level of heat. Some enthusiasts also like to add a touch of dried oregano or thyme for an extra layer of complexity, but keep it subtle to maintain the classic profile. Whisk all these spices thoroughly into the flour until the mixture is uniform in color and texture. This perfectly spiced coating is what will transform your `buttermilk chicken` into an authentic Cracker Barrel experience.
Secret 2: Oil Temperature Perfected
Achieving that signature crispiness without a greasy finish is a hallmark of truly great Copycat Cracker Barrel tenders. This isn’t just about frying; it’s about controlling the environment in which the chicken cooks. The second crucial secret lies in perfecting your oil temperature. Maintaining the correct heat ensures the coating cooks quickly to a golden-brown crisp while the inside remains tender and juicy, preventing both sogginess and undercooked centers. This precision is what elevates a good `fried chicken recipe` to an outstanding one.
Aim for 350°F
The optimal temperature for frying these chicken tenders is a consistent 350°F (175°C). Using a deep-fry thermometer is highly recommended for accuracy. If the oil is too cold, the chicken will absorb too much oil, resulting in a greasy, heavy, and soggy tender. If the oil is too hot, the exterior will brown too quickly, potentially burning before the interior is fully cooked, leaving you with raw chicken inside and a burnt crust outside. It’s a delicate balance, but maintaining 350°F ensures a beautifully golden, `crispy chicken` exterior and a thoroughly cooked, moist interior. Remember that the temperature will drop slightly when you add the chicken, so aiming for 350-360°F before adding is wise.
Quick Test for Readiness
If you don’t have a thermometer, there are a couple of quick tests you can perform, though a thermometer is always preferred for safety and accuracy. One common method is to drop a tiny pinch of the seasoned flour mixture into the hot oil. If it immediately sizzles and floats to the surface, the oil is likely hot enough. Another classic test involves inserting the handle of a wooden spoon into the oil; if small bubbles form steadily around the wood, it’s generally ready. However, rely on these methods only as a rough estimate. For perfect `homemade tenders` and consistent results, investing in a reliable deep-fry thermometer is a worthwhile endeavor, providing peace of mind and superior fried chicken every time. Always exercise caution when working with hot oil to prevent splatters and burns.
Coating and Frying The Tenders
With your buttermilk-marinated chicken ready and your seasoned flour mixture prepped, it’s time to bring these elements together. The process of coating and frying is where the magic truly happens, transforming simple chicken strips into the golden, crispy delights you crave. This stage requires a bit of technique to ensure the breading adheres properly and the chicken cooks evenly to perfection, yielding those irresistible `Cracker Barrel tenders`. Pay close attention to each step for optimal results.
Dip Chicken into Flour
Working in batches, remove the chicken tenders from the buttermilk, allowing any excess to drip off. Transfer them directly into your seasoned flour mixture. For an extra crispy crust, you can implement a double-dredging technique: dip the chicken in flour, then back into a small bowl of buttermilk (or the remaining marinade), and finally back into the flour for a second coating. Ensure each tender is fully coated, pressing the flour mixture gently onto the chicken to help it adhere. Shake off any excess flour; a thin, even coating is what you’re after, not a thick, clumpy one. This step is crucial for developing that appealing `crispy chicken` exterior.
Fry Until Golden Brown
Carefully lower the coated tenders into the preheated 350°F oil, using tongs. Do not overcrowd the skillet, as this will drop the oil temperature and lead to soggy chicken (more on that in Secret 3). Fry the tenders for about 3-4 minutes per side, or until they are a beautiful golden brown and cooked through. The internal temperature should reach 165°F (74°C). You can check this with an instant-read meat thermometer inserted into the thickest part of a tender. The chicken should be perfectly juicy on the inside, encased in its crunchy, flavorful shell. This consistent frying time and temperature are key to a successful `fried chicken recipe` and delightful `homemade tenders`.
Secret 3: Don’t Overcrowd Skillet
This secret might seem simple, but it is incredibly powerful in determining the success of your Copycat Cracker Barrel tenders. Overcrowding the skillet is one of the most common mistakes in frying, and it can quickly turn your efforts into a greasy, soggy disappointment. Understanding why this happens and how to prevent it is crucial for achieving truly `crispy chicken` with a perfectly cooked interior. This tip is fundamental for any home chef tackling a `fried chicken recipe`.
Fry in Small Batches
When you add too many cold chicken tenders to your hot oil at once, the oil temperature drops significantly and rapidly. This temperature drop causes the chicken to essentially stew in oil rather than fry. Instead of forming an instant crispy crust, the breading becomes saturated with oil, leading to a greasy, soft exterior. To prevent this, always fry your chicken in small batches, allowing enough space between each piece. Typically, this means 3-4 tenders at a time, depending on the size of your skillet and the amount of oil. This method allows the oil temperature to recover quickly and remain consistent throughout the frying process, essential for achieving those ideal `Cracker Barrel tenders`.
Ensures Even Cooking
Frying in small batches doesn’t just keep the oil hot; it also ensures that each chicken tender has ample room to cook evenly on all sides. When crowded, tenders can stick together, and parts might not come into direct contact with the hot oil, leading to uneven cooking and inconsistent crispiness. By giving each tender its space, you guarantee a uniform golden-brown crust and a perfectly cooked interior across all your `homemade tenders`. Patience here is a virtue – taking a little extra time with smaller batches will yield superior results, making every bite of your `buttermilk chicken` a crispy, juicy delight. For more cooking tips, check out our frying methods category.
Secret 4: Drain Excess Oil Well
You’ve put in the effort to marinate, season, and perfectly fry your Copycat Cracker Barrel tenders to a beautiful golden crisp. The last thing you want is for them to become soggy or overly greasy before they even reach the plate. This is where the fourth secret comes into play: proper draining. This step is just as important as frying itself, as it ensures your `crispy chicken` maintains its desired texture and isn’t weighed down by excess oil. A well-drained tender is a truly delightful tender.
Use Paper Towels
As soon as your tenders are cooked to perfection, immediately transfer them from the hot oil. The best way to drain them is by placing them on a wire rack set over a baking sheet lined with several layers of paper towels. The wire rack allows air to circulate around the entire tender, preventing the bottom from steaming and becoming soggy, which can happen if you just place them directly on paper towels. The paper towels below will absorb any oil that drips off. Avoid piling the tenders on top of each other, as this can also trap steam and heat, compromising their crispiness. This method is fundamental for achieving restaurant-quality `Cracker Barrel tenders`.
Keeps Them Super Crispy
Draining your tenders properly is critical for maintaining their super crispy texture. Excess oil not only makes the chicken greasy but also softens the breading over time. By allowing them to drain and cool slightly on a wire rack, you ensure that the hot, moist steam escapes, preserving the integrity of that delicious, crunchy coating. This step completes the transformation of raw chicken into `homemade tenders` that boast an irresistible crispness, allowing you to enjoy the full flavor and texture profile without any unpleasant greasiness. For more delicious chicken dinners, you might enjoy our Crispy Parmesan Chicken.
Secret 5: Customize Your Spices
While the goal is to replicate the beloved Copycat Cracker Barrel tenders, there’s always room for personal expression and flavor experimentation. The basic spice blend provides a fantastic foundation, but you can easily tweak it to suit your palate or explore new dimensions of flavor. This fifth secret invites you to make the recipe truly your own, allowing for endless variations on your `fried chicken recipe` without sacrificing its core essence. It’s your chance to add a unique twist to a classic.
Add Cayenne for Heat
If you prefer your chicken with a bit more zing, cayenne pepper is your best friend. The basic recipe includes a hint of cayenne, but don’t hesitate to increase the amount to your desired level of heat. A quarter teaspoon provides a gentle warmth, half a teaspoon offers a noticeable kick, and a full teaspoon or more will truly bring the heat. You can also experiment with other chili powders like ancho chili for a smoky, milder heat, or a pinch of ghost pepper powder for extreme spice. This customization allows you to transform standard `buttermilk chicken` into a fiery delight, perfect for those who enjoy a spicier meal.
Try Smoked Paprika Too
Beyond heat, you can introduce other nuanced flavors. Smoked paprika, for instance, is an excellent addition that imparts a deep, smoky aroma and rich color to the coating, elevating the savory profile of your `homemade tenders`. Other spices like dried thyme, oregano, or a touch of rosemary can also add complexity. For an unexpected twist, consider a very small amount of white pepper for a different kind of subtle heat. Remember, a `secret recipe` is often about small, thoughtful adjustments that cater to individual tastes. Don’t be afraid to experiment with different spice combinations until you find your perfect blend. You can find more inspiration on our Carina Recipes Pinterest page.
Serving Copycat Cracker Barrel Tenders
After all the careful preparation and frying, the moment finally arrives to enjoy your homemade Copycat Cracker Barrel tenders. How you serve them can significantly enhance the dining experience, turning a simple meal into a memorable occasion. From complementary sauces to classic side dishes, thoughtful presentation rounds out the meal perfectly, celebrating the crispiness and flavor of your `crispy chicken`. A great serving strategy ensures every bite is savored.
Serve Hot with Sauce
These tenders are best enjoyed immediately after draining, while they are still piping hot and at their peak crispiness. The ideal accompaniment is a selection of dipping sauces. Classic choices include honey mustard, ranch, or barbecue sauce. For an authentic `Cracker Barrel tenders` experience, consider making a homemade honey mustard sauce by combining Dijon mustard, honey, mayonnaise, and a splash of apple cider vinegar. The contrast between the warm, crispy chicken and a cool, creamy sauce is simply irresistible, enhancing every bite. Serve them quickly to capture their best texture and flavor.
Delicious Side Dish Ideas
To complete your Copycat Cracker Barrel meal, pair your tenders with classic Southern-inspired side dishes. Creamy mashed potatoes and gravy, fresh green beans (perhaps seasoned with bacon), or a tangy coleslaw are all perfect choices that echo the restaurant’s comforting menu. French fries, mac and cheese, or even a simple side salad can also complement the tenders wonderfully, creating a well-rounded and satisfying meal. For another comforting chicken dish, try our Cheesy Chicken and Rice Casserole. Consider serving a variety of sides to please everyone at the table, making your `homemade tenders` the star of a delightful spread.
Storing Leftover Copycat Tenders Safely
While these Copycat Cracker Barrel tenders are so delicious that leftovers might be rare, it’s always good to know how to store them safely to maintain their quality and prevent foodborne illness. Proper storage ensures that any remaining `crispy chicken` can be enjoyed later, retaining as much of its flavor and texture as possible. Handling leftovers correctly is a key part of responsible home cooking, extending the life of your culinary creations. For general food safety guidelines, you can consult Wikipedia’s Food Safety page.
Keep in Airtight Container
Once the tenders have cooled completely to room temperature (this should take no more than two hours after cooking), transfer them to an airtight container. Sealing them tightly prevents exposure to air, which can dry out the chicken and encourage bacterial growth. A plastic container with a tight-fitting lid or a heavy-duty resealable bag works well. Ensuring they are cool before sealing is important; hot food sealed in a container can create condensation, leading to sogginess and potentially unsafe conditions.
Refrigerate for Best Quality
Store the airtight container of leftover `homemade tenders` in the refrigerator. They will remain safe to eat and maintain their best quality for 3-4 days. When reheating, avoid the microwave if you want to retain crispiness, as it tends to make fried foods soggy. Instead, reheat them in a preheated oven at 350°F (175°C) for 10-15 minutes, or in an air fryer at 375°F (190°C) for 5-8 minutes, until heated through and crispy again. This method will help revive that `fried chicken recipe` perfection. You can find more cooking inspiration on our Instagram account.
Nutrition for Copycat Cracker Barrel Tenders
When preparing Copycat Cracker Barrel tenders at home, you gain a significant advantage in understanding and controlling the nutritional content of your meal. While `Cracker Barrel tenders` are certainly an indulgent treat, knowing the approximate breakdown of calories, protein, fat, and carbohydrates can help you fit them into your dietary preferences. This section provides a general overview, acknowledging that exact values will vary based on specific ingredients and cooking methods. For a better understanding of the main ingredient, you can refer to the Wikipedia page on Chicken as food.
Calories and Protein Facts
A typical serving of 3-4 Copycat Cracker Barrel tenders (approximately 4-6 ounces of chicken) can range from 300 to 500 calories, depending on the size of the tenders, the amount of breading, and the oil absorption during frying. These tenders are an excellent source of protein, with a single serving often providing 25-35 grams or more. Protein is crucial for muscle repair, growth, and overall satiety, making these `buttermilk chicken` tenders a hearty and filling option. The homemade aspect allows for some control; using leaner chicken breasts and being mindful of excess breading can influence the final calorie count.
Fat and Carb Breakdown
The fat content in these `crispy chicken` tenders largely comes from the frying oil and any residual fat on the chicken. A serving can contain anywhere from 15-30 grams of fat, with a portion being saturated fat. Using a healthier frying oil and properly draining the tenders can help mitigate some of this. Carbohydrates primarily come from the flour breading. A typical serving might contain 20-30 grams of carbohydrates. While these `homemade tenders` are not a low-carb dish, making them at home gives you the option to experiment with lighter breading techniques or even alternative flours if you wish to adjust the carb count. Understanding these components helps in making informed dietary choices while still enjoying your favorite `fried chicken recipe`.