
Cool Whip Cookies are a fantastic sweet treat, offering incredible fluffiness with minimal effort. This easy cookie recipe requires only three simple ingredients, making it ideal for bakers of all skill levels. You’ll love how quickly these delightful cake mix cookies come together for any occasion.
Key Takeaways
- These delightful cookies require just three simple ingredients: Cool Whip, cake mix, and one egg.
- They are incredibly quick to prepare and bake, perfect for a spontaneous sweet treat.
- Expect a wonderfully fluffy texture that melts in your mouth with every bite.
- Versatile flavor options are available by simply changing your cake mix and adding various mix-ins.
- Both baked cookies and raw dough balls can be effectively stored and frozen for future enjoyment.
These cookies are truly a kitchen marvel. They combine minimal steps with maximum deliciousness. A perfect blend of convenience and joy. Simple ingredients yield extraordinary results. Bake happiness, one bite at a time.
Why You’ll Love Cool Whip Cookies
There’s a reason Cool Whip cookies have become such a beloved dessert recipe in kitchens everywhere. Their charm lies in their incredible simplicity combined with an irresistible outcome. These aren’t just any cookies; they are a delightful fusion of convenience and indulgence. Perfect for last-minute gatherings, a casual weeknight treat, or when you simply crave something sweet without the fuss, this easy cookie recipe delivers every time. Their tender, melt-in-your-mouth texture is a unique characteristic that sets them apart from traditional cookies, making them a true crowd-pleaser.
Just Three Easy Ingredients
Imagine whipping up a batch of homemade cookies with only three items from your pantry! That’s the magic of these simple ingredients. You won’t need a lengthy shopping list or complex measurements. The core components are a tub of Cool Whip, a box of your favorite cake mix, and a single egg. This minimalist approach means less time prepping and more time enjoying. It’s a fantastic entry point for novice bakers and a lifesaver for seasoned pros looking for a quick and rewarding project. The accessibility of the ingredients ensures you can make these delightful treats whenever the craving strikes.
Quick to Make, Super Fluffy
From start to finish, these cookies are incredibly quick to make, often ready to enjoy in under 30 minutes. The mixing process is straightforward, requiring minimal equipment and effort. But speed doesn’t compromise quality here; in fact, it enhances it. The secret to their super fluffy texture lies in the Cool Whip, which acts as a leavening agent and adds an unparalleled lightness to the dough. Each bite is airy, soft, and remarkably tender, unlike denser, chewier cookie varieties. This delightful fluffiness makes them a unique sweet treat, perfect with a cup of coffee or as an after-dinner indulgence. If you enjoy quick and fluffy desserts, you might also like our snickerdoodle cobbler, which offers a similar comforting experience with minimal fuss.
Gather Your Simple Cookie Ingredients
Embarking on your Cool Whip cookie journey starts with gathering the few, yet mighty, ingredients. The beauty of this recipe is its straightforward nature, requiring no obscure items or specialty store trips. Everything you need is readily available at your local grocery store, making this a hassle-free baking experience. Having your ingredients pre-measured and ready before you begin the mixing process will ensure a smooth and efficient preparation, letting you focus on the fun part: baking!
Cool Whip and Cake Mix
The stars of this easy cookie recipe are undoubtedly Cool Whip and your chosen cake mix. For the Cool Whip, you’ll need one 8-ounce tub, thawed. The thawing is crucial as it allows for proper incorporation into the dough, ensuring that light and fluffy texture we all adore. As for the cake mix, this is where your creativity can truly shine! A standard 15.25-ounce box of any flavor will work perfectly. Classic choices like yellow, vanilla, or chocolate are always a hit, but don’t shy away from venturing into more exciting options like strawberry, lemon, or even spice cake mixes for a seasonal twist. The cake mix not only provides the base flour but also a significant portion of the flavor and sweetness, simplifying the recipe immensely.
One Large Egg
The final component in this magical trio is a single large egg. The egg acts as a binder, helping to hold all the ingredients together and adding a touch of richness and structure to the cookies. It contributes to the overall texture, ensuring your cookies are cohesive and don’t crumble too easily. Make sure your egg is at room temperature if possible, as this helps it emulsify more readily with the other ingredients, leading to a smoother, more uniform dough. With these three simple ingredients, you’re well on your way to baking a batch of truly delicious and incredibly easy Cool Whip cookies.
How to Mix Cool Whip Cookies Dough
Creating the dough for your Cool Whip cookies is perhaps the easiest part of this entire process. It’s so simple, you might wonder why you haven’t tried it sooner! The key is gentle handling and proper preparation to ensure the light, fluffy texture that defines these delicious treats. There’s no need for extensive kneading or complicated steps; just a few easy actions will get your dough ready for baking in no time. For another quick and satisfying meal that’s easy to prepare, consider our easy honey garlic chicken.
Preheat Oven to 350°F
Before you even begin mixing, the first and most crucial step is to preheat your oven to 350°F (175°C). This ensures that when your cookie dough goes into the oven, it starts baking immediately and evenly. A properly preheated oven is vital for achieving the correct rise and texture in your cookies, preventing them from spreading too much or baking unevenly. While the oven warms up, you can prepare your baking sheets by lining them with parchment paper or silicone baking mats. This prevents sticking and makes cleanup a breeze, ensuring your fluffy cookies slide off easily once baked.
Combine Ingredients Gently
Once your oven is preheating, it’s time to bring your three simple cookie ingredients together. In a large mixing bowl, combine the thawed 8-ounce tub of Cool Whip, the 15.25-ounce box of cake mix (any flavor), and the one large egg. Using a spatula or a sturdy spoon, mix these ingredients until they are just combined. The dough will be thick and somewhat sticky, which is perfectly normal for these cake mix cookies. The most important tip here is to not overmix the dough. Overmixing can develop the gluten in the cake mix, leading to tougher cookies instead of the desired fluffy texture. Mix until no dry streaks of cake mix remain, and everything is uniformly incorporated.
Scoop Dough onto Sheet
With your dough perfectly mixed, it’s time to get it onto the baking sheet. For consistent cookie size and even baking, a small cookie scoop (about 1.5 tablespoons) works wonders. If you don’t have a scoop, two spoons can do the trick. Drop spoonfuls of dough about 2 inches apart on your prepared baking sheets. The cookies will spread slightly, so leaving enough space is important. You don’t need to flatten them; their natural shape will transform into perfectly rounded, fluffy cookies in the oven. The dough will feel a bit tacky, but resist the urge to add more flour, as this can alter the texture. The consistency is intentional for these soft, delightful treats.
Baking Your Fluffy Cool Whip Cookies
The anticipation builds as your perfectly scooped Cool Whip cookie dough awaits its transformation in the oven. Baking these cookies is a quick and satisfying process, yielding wonderfully fluffy and fragrant results in just a matter of minutes. The aroma that will soon fill your kitchen is truly one of the joys of baking these simple delights. Pay close attention to the baking time and visual cues to ensure each cookie reaches its peak of perfection, offering that tender, melt-in-your-mouth experience everyone loves.
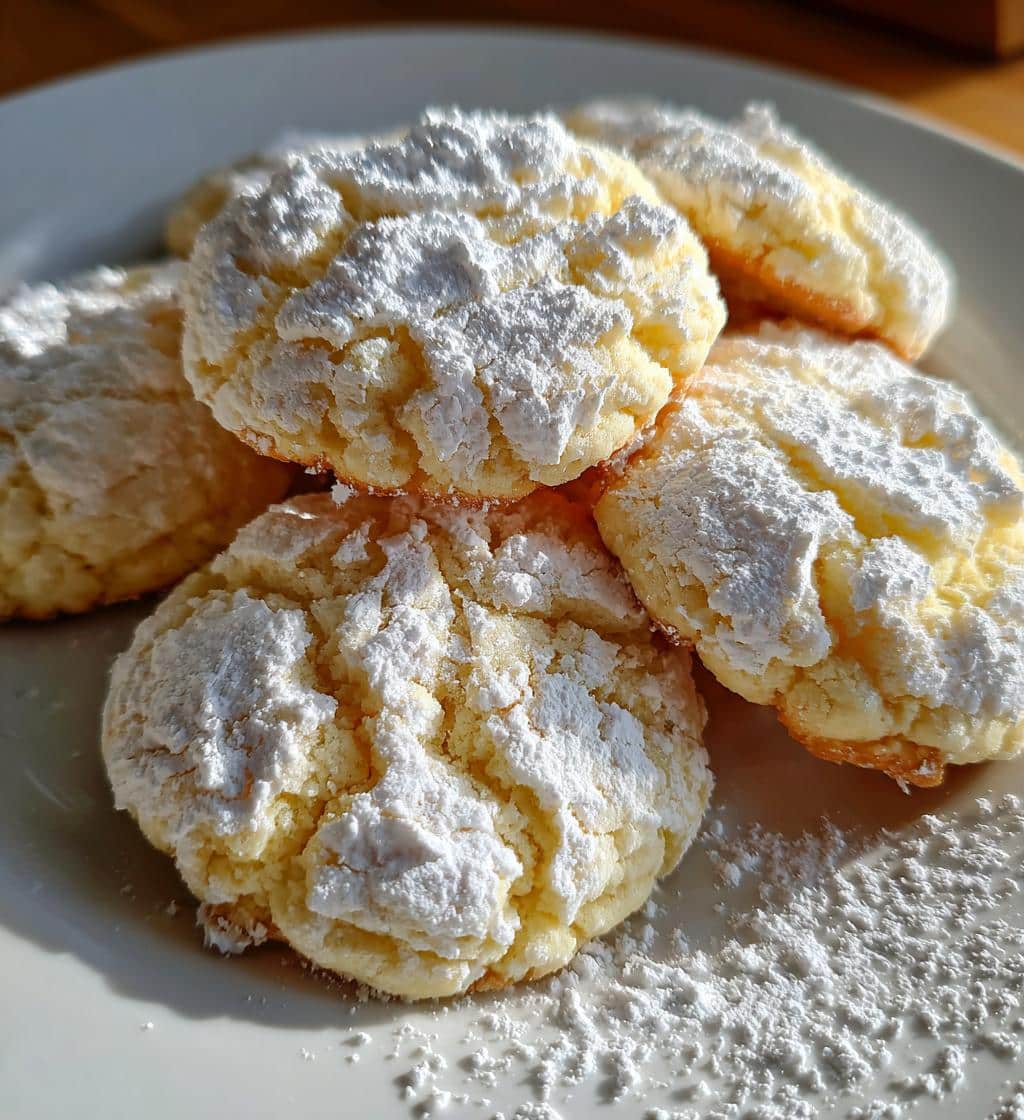
Dust with Powdered Sugar
Before your cookies go into the hot oven, there’s a charming little step that adds both visual appeal and a delicate sweetness: dusting them with powdered sugar. This is entirely optional but highly recommended, especially if you want that classic crinkled top look often associated with certain soft cookies. Simply place a small amount of powdered sugar (also known as confectioners’ sugar) in a shallow bowl. Gently roll each scooped dough ball in the powdered sugar, ensuring it’s lightly coated on all sides. As the cookies bake, the sugar will melt slightly and then firm up, creating a beautiful, slightly crackled surface that’s both attractive and adds an extra layer of sweetness and texture. This step also helps prevent the cookies from sticking too much to your hands when scooping, if you choose not to use a scoop.
Bake for 10-12 Minutes
Carefully transfer your sugar-dusted dough balls to the preheated 350°F (175°C) oven. The baking time for these fluffy cookies is remarkably short, typically ranging from 10 to 12 minutes. The exact time can vary slightly depending on your oven’s calibration and the size of your cookie scoops, so it’s always a good idea to keep an eye on them. You’ll know they’re done when the edges are lightly set and just barely golden, while the centers still look soft and slightly puffy. They might not look fully “done” in the middle, but remember that cookies continue to cook for a few minutes after they’re removed from the oven. Overbaking can lead to a drier, less fluffy texture, so err on the side of caution. Remove them promptly and prepare for the delicious aroma that will fill your home.
Cooling and Dusting Your Cookies
Once your Cool Whip cookies emerge from the oven, fragrant and beautifully puffed, the baking process isn’t quite finished. Proper cooling is just as important as the baking itself to ensure they achieve their perfect final texture and remain intact. Rushing this stage can lead to cookies that fall apart or lose their delicate structure, so a little patience here goes a long way. This final step sets them up for optimal enjoyment, allowing their flavors to fully develop and their soft centers to set.
Let Cookies Set Briefly
Immediately after taking your baking sheet out of the oven, resist the urge to move the cookies. They will be incredibly soft and delicate right after baking, and attempting to transfer them too soon might cause them to break or lose their shape. Allow the cookies to cool and set on the baking sheet for about 2-3 minutes. During this brief period, the residual heat from the baking sheet will continue to cook them gently, allowing their structure to firm up enough for a safe transfer. This short resting period is crucial for maintaining the integrity of these fluffy treats, ensuring they are sturdy enough for the next step. If you’re passionate about creating delightful sweets, explore more desserts on our site.
Transfer to Wire Rack
After their brief rest on the baking sheet, carefully transfer the slightly firmed-up Cool Whip cookies to a wire cooling rack. Using a thin, flat spatula is ideal for this task, gently sliding it under each cookie. Arranging them on a wire rack allows air to circulate around all sides of the cookies, which helps them cool down evenly and prevents the bottoms from becoming soggy. This continuous airflow is essential for achieving that consistent fluffy texture throughout. Let them cool completely on the rack before serving or storing. While warm cookies are tempting, fully cooled cookies will have the best texture and hold their shape beautifully. If desired, you can give them another light dusting of powdered sugar once cooled for an extra touch of sweetness and presentation.
Flavor Ideas for Cool Whip Cookies
The beauty of Cool Whip cookies extends far beyond their simple ingredient list; it’s also in their incredible versatility when it comes to flavor. The use of a standard cake mix as a base means you can literally unlock a world of different tastes with just one core recipe. This makes them a fantastic option for any occasion, holiday, or personal preference. Don’t be afraid to experiment and find your new favorite combination!
Try Different Cake Mixes
The type of cake mix you choose is the primary determinant of your cookie’s flavor profile. While classic vanilla or yellow cake mixes provide a wonderfully neutral canvas, think about all the other possibilities available. Want something bright and zesty? Go for a lemon cake mix. Craving rich chocolate? A devil’s food or chocolate fudge mix will do the trick. Seasonal mixes, like pumpkin spice or gingerbread, can transform these simple cookies into festive holiday treats. Even less common flavors like butter pecan, strawberry, or funfetti can create unique and exciting variations. Each box of cake mix offers a new adventure, allowing you to tailor your cookies to your mood or event with minimal effort.
Lemon, Chocolate, Red Velvet
Let’s dive into some specific popular choices. Lemon cake mix yields a wonderfully bright and tangy cookie, perfect for spring or summer. The zestiness cuts through the sweetness, creating a refreshing bite. You can even enhance this further with a drizzle of lemon glaze after baking. For the chocolate lovers, a chocolate cake mix creates deep, rich, and intensely flavored cookies that are incredibly satisfying. Pair them with chocolate chips or a dusting of cocoa powder for an extra chocolatey kick. And for those special occasions, or just because, red velvet cake mix produces stunningly vibrant, subtly cocoa-flavored cookies. The beautiful red hue makes them visually appealing, and they often taste best with a cream cheese frosting drizzle once cooled. These three are just a starting point; the possibilities truly are endless, making Cool Whip cookies a fun and customizable sweet treat for everyone.
Tips for Perfect Fluffy Cool Whip Cookies
Achieving that signature super fluffy texture in your Cool Whip cookies is not just about the ingredients; it’s also about technique. While this recipe is incredibly forgiving, a few simple tips can elevate your cookies from good to absolutely perfect. Paying attention to these small details will ensure every batch you bake comes out consistently delicious, airy, and soft, making them a true delight for anyone who tries them. These insights are key to mastering this easy cookie recipe and making it a consistent favorite.
Don’t Overmix the Dough
This is arguably the most crucial tip for maintaining the desired fluffy texture. When combining the Cool Whip, cake mix, and egg, mix only until the ingredients are just incorporated. As soon as you no longer see dry streaks of cake mix, stop mixing. Overmixing develops the gluten in the cake mix flour, which can lead to a tougher, chewier cookie instead of the delicate, soft texture you’re aiming for. Think of it as folding rather than beating. A gentle hand will yield the best results, ensuring your cookies remain light and airy. This subtle difference in technique makes a significant impact on the final outcome of these soft treats.
Adjust Baking Time as Needed
While the suggested baking time of 10-12 minutes is a great guideline, it’s important to remember that all ovens can vary. Factors like oven calibration, the specific type of baking sheet you’re using, and even the humidity in your kitchen can influence how quickly your cookies bake. Keep a close eye on your cookies, especially during their first batch. Look for edges that are just set and barely beginning to turn golden, while the centers still look soft. If they look underdone at 10 minutes, give them another minute or two. If they look perfectly done at 9 minutes, take them out! Remember, cookies continue to cook slightly from residual heat once removed from the oven. Slightly underbaked cookies are often softer and more fluffy than overbaked ones, which can become dry and crumbly. Trust your judgment and your oven’s unique personality to get the perfect bake every time.
Adding Fun Mix-Ins to Cookies
While Cool Whip cookies are fantastic on their own, their simple base makes them an excellent canvas for creative additions. Integrating various mix-ins can transform a basic sweet treat into something truly extraordinary, adding layers of texture, flavor, and visual appeal. This is where you can truly personalize your cake mix cookies, catering to different tastes and making each batch unique. Don’t be shy about experimenting with your favorite additions to make these already delicious cookies even more special.
Include Chocolate Chips
Chocolate chips are a classic cookie mix-in for a reason: they’re universally loved! Adding about 1/2 to 1 cup of chocolate chips to your Cool Whip cookie dough before scooping can elevate the flavor and add delightful pockets of melted chocolate. You can use any type of chocolate chip—milk chocolate for a sweeter cookie, semi-sweet for a balanced flavor, or dark chocolate for a richer experience. White chocolate chips also work wonderfully, especially with red velvet or lemon cake mixes. The small burst of chocolate in each bite complements the fluffy texture of the cookie beautifully, making it an even more indulgent treat. This simple addition ensures these homemade cookies become a consistent favorite.
Sprinkles or Chopped Nuts
For those looking to add a pop of color and extra crunch, sprinkles or chopped nuts are excellent choices. Sprinkles, especially colorful nonpareils or jimmies, can turn your Cool Whip cookies into a festive party dessert perfect for birthdays or holidays. Mix them directly into the dough for a speckled effect, or roll the dough balls in sprinkles before baking for a vibrant coating. They add a fun, playful element that kids and adults alike will adore. If you prefer a more sophisticated crunch, chopped nuts like walnuts, pecans, or almonds are a fantastic option. They provide a pleasant textural contrast to the soft cookie and add a nutty depth of flavor. Toasting the nuts lightly before adding them can enhance their aroma and taste even further. Just be mindful of any nut allergies if you’re baking for a crowd. These mix-ins allow for endless customization, ensuring your easy cookie recipe always feels fresh and exciting.
Storing Leftover Cool Whip Cookies Fresh
Once you’ve baked a batch of these delightful Cool Whip cookies, you might find yourself with a few (or many) leftover. Ensuring they stay fresh and retain their signature fluffy texture is key to enjoying them for days to come. Proper storage prevents them from drying out or becoming stale, preserving that wonderful homemade cookie taste. These simple storage tips will help you keep your sweet treat tasting its best, ready to enjoy whenever a craving strikes.
Airtight Container at Room Temp
For optimal freshness, Cool Whip cookies should be stored in an airtight container at room temperature. A cookie jar with a tight-fitting lid, a plastic food storage container, or even a resealable plastic bag will work perfectly. The airtight seal is crucial because it protects the cookies from exposure to air, which can quickly dry them out and make them hard. Place the cookies in a single layer or separate layers with parchment paper to prevent them from sticking together. While they contain Cool Whip, once baked, they are stable at room temperature and do not require refrigeration. Storing them this way helps maintain their soft, fluffy texture for several days.
Enjoy Within Five Days
When stored properly in an airtight container at room temperature, your Cool Whip cookies will remain fresh and delicious for up to five days. While they might still be edible beyond this timeframe, their quality, particularly their signature fluffy texture, will begin to diminish. For the best taste and softest bite, aim to enjoy them within this five-day window. If you find yourself with more cookies than you can realistically eat within this period, consider freezing them. Freezing is an excellent option for extending their shelf life significantly, allowing you to enjoy a homemade sweet treat whenever you desire, without compromising on flavor or texture. This makes them a great party dessert to prepare in advance.
Freezing Cookies for Later Enjoyment
One of the fantastic benefits of Cool Whip cookies is how well they freeze, offering incredible flexibility for future enjoyment. Whether you want to prepare a large batch in advance or simply save some for a rainy day, freezing allows you to extend the life of these delicious treats without sacrificing flavor or texture. This makes them an ideal option for meal prepping desserts or ensuring you always have a sweet treat on hand for unexpected guests or cravings.
Freeze Baked Cookies
If you have leftover baked Cool Whip cookies, freezing them is a simple and effective way to preserve their freshness. First, ensure the cookies are completely cooled. Place them in a single layer on a baking sheet and flash freeze them for about 30-60 minutes until they are firm. This prevents them from sticking together when stored. Once firm, transfer the frozen cookies to a freezer-safe airtight container or a heavy-duty freezer bag, layering them with parchment paper if necessary. Label the container with the date. Baked Cool Whip cookies can be frozen for up to 2-3 months. When you’re ready to enjoy them, simply let them thaw at room temperature for an hour or two, or follow the reheating instructions below.
Dough Balls Can Be Frozen
Another excellent option for future baking is to freeze the raw Cool Whip cookie dough balls. This allows you to bake fresh cookies whenever you want, with minimal effort. After scooping your dough balls (and optionally rolling them in powdered sugar), place them in a single layer on a parchment-lined baking sheet. Flash freeze them for 1-2 hours until they are completely solid. Once frozen, transfer the dough balls to a freezer-safe airtight container or a heavy-duty freezer bag. Be sure to label them with the date and baking instructions (e.g., bake at 350°F for 12-15 minutes). Frozen dough balls can be stored for up to 3 months. This method is perfect for having fresh-baked cake mix cookies on demand without the full preparation time.
Reheating Frozen Cool Whip Cookies
The convenience of freezing Cool Whip cookies or their dough means you’re never far from a warm, fresh-baked sweet treat. Reheating them properly ensures they regain their delightful texture and flavor, just like they were freshly made. Whether you’re pulling baked cookies or raw dough balls from the freezer, a few simple steps will bring them back to life, ready to satisfy your craving for a soft, fluffy cookie. For another delightful baked treat, consider trying funnel cake bites.
Bake Straight from Freezer
One of the best features of these frozen treats is that you can often bake them straight from the freezer. If you’ve frozen raw dough balls, preheat your oven to 350°F (175°C). Place the frozen dough balls on a parchment-lined baking sheet, spaced about 2 inches apart. You might need to add a few extra minutes to the baking time compared to fresh dough, typically 12-15 minutes, but keep an eye on them. They are done when the edges are lightly set and the centers still look soft. For pre-baked frozen cookies, you can also warm them up in the oven. Place them on a baking sheet and bake at 300°F (150°C) for just 5-7 minutes, until warmed through. This method is fantastic for a quick, comforting dessert.
Warm for a Few Minutes
Even if you’re not fully re-baking, a quick warming can vastly improve the enjoyment of thawed Cool Whip cookies. If you’ve thawed baked cookies at room temperature, warming them for just a few minutes can make them taste fresh from the oven. You can pop them in a microwave for 10-15 seconds per cookie for a soft, warm center, or in a toaster oven for 2-3 minutes until gently heated. The slight warmth enhances their fluffy texture and brings out their wonderful aroma, making for an even more satisfying sweet treat. This quick warmth truly elevates the experience of enjoying these already delicious cake mix cookies, ensuring every bite is as good as the first.
Quick Nutrition Facts Per Cookie
Understanding the general nutritional value of your homemade cookies can be helpful for meal planning or simply staying informed. While exact figures will vary based on the specific cake mix flavor chosen, the brand of Cool Whip, and any added mix-ins, we can provide approximate values for a standard Cool Whip cookie. These values are estimates and should be used as a general guideline. For precise nutritional information, it’s recommended to calculate based on the specific ingredients and brands you use. Visit us on Pinterest and Instagram for more easy recipes!
Calories and Carbohydrates
A typical Cool Whip cookie, made with a standard cake mix and without additional mix-ins, contains approximately 70-90 calories per cookie. The majority of these calories come from carbohydrates, primarily sugars from the cake mix. You can expect around 12-18 grams of carbohydrates per cookie. This quick nutrition fact highlights that while they are a delicious sweet treat, they are best enjoyed in moderation as part of a balanced diet. The simplicity of the ingredients helps keep the overall profile relatively light for a dessert, especially when compared to more elaborate cookies.
Fat and Protein
In terms of fat content, each Cool Whip cookie typically contains about 2-4 grams of fat. This includes both saturated and unsaturated fats, largely derived from the Cool Whip and any oils or fats present in the cake mix. The protein content is quite low, usually less than 1 gram per cookie. These quick nutrition facts provide a general idea, allowing you to enjoy your fluffy cookies with a better understanding of their contribution to your daily intake. Remember that adding mix-ins like chocolate chips or nuts will increase these values, especially fat and calories, so adjust your estimates accordingly.