
Amazing Chocolate Toffee Thumbprint Cookies offer a delightful combination of rich chocolate ganache, buttery shortbread, and crunchy toffee sprinkles. This homemade dessert recipe provides easy baking tips to create perfect sweet treats, ideal for any occasion. Follow our cookie recipe for delightful results every time.
Key Takeaways
- Master baking perfect thumbprint cookies.
- Understand dough chilling for best texture.
- Learn to make rich chocolate ganache.
- Get tips for storing and customizing your cookies.
- Prevent common cookie spreading issues.
Baking these cookies is pure joy. They taste incredibly delicious. Perfect for sharing with loved ones. Simple steps yield amazing results. Sweeten your day with this treat.
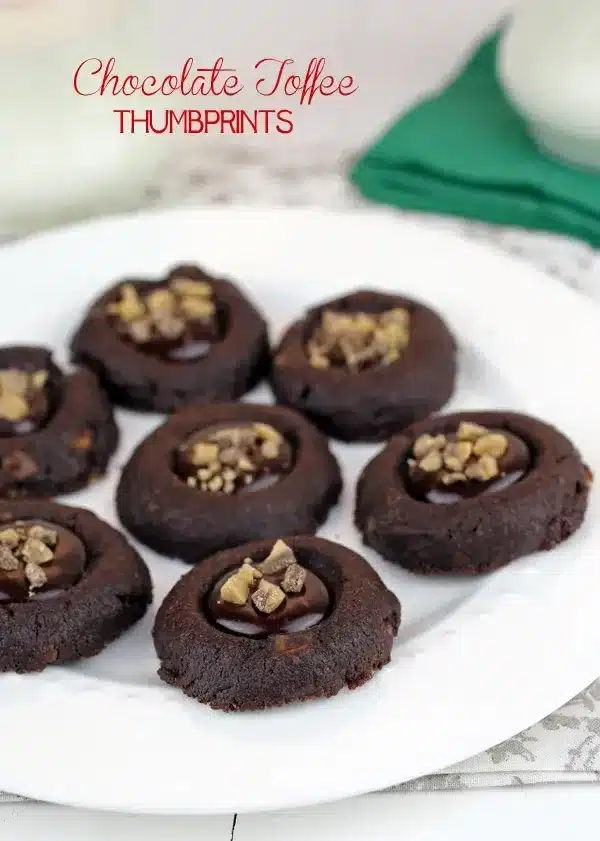
Amazing Chocolate Toffee Thumbprint Cookies
Amazing Chocolate Toffee Thumbprint Cookies are a true crowd-pleaser, combining the best elements of classic shortbread with decadent chocolate and crunchy toffee. These homemade dessert cookies feature a tender, buttery dough that melts in your mouth, perfectly complementing the rich, smooth chocolate ganache filling. Each bite delivers a delightful contrast: the soft cookie, the luscious filling, and the satisfying crunch of golden toffee bits sprinkled on top. They are not just cookies; they are tiny masterpieces of flavor and texture, making them a fantastic addition to any holiday platter, a thoughtful homemade gift, or a special treat for family and friends.
Why these cookies are loved
The popularity of these thumbprint cookies stems from their irresistible combination of flavors and textures. The shortbread base is subtly sweet and holds its shape beautifully, making it an excellent vehicle for the luxurious ganache. The toffee adds a layer of buttery caramel notes and a delightful chew, elevating the entire experience. Furthermore, their charming appearance, with the distinct well holding the filling, makes them visually appealing. They are relatively easy to make, yet impressive enough to serve at any gathering, from casual get-togethers to elegant parties. For more delicious dessert ideas, consider our quick Italian cream cake or these incredible snickerdoodle cobbler, perfect for satisfying any sweet craving. You can find more desserts on our site, too.
Gathering Your Thumbprint Ingredients
Successful baking begins with the right ingredients. For these delightful chocolate toffee thumbprint cookies, quality matters, as each component contributes to the final taste and texture. Ensure your butter is softened to room temperature for optimal creaming, and use a good quality vanilla extract for the best flavor. Having all your ingredients pre-measured and ready before you start mixing will streamline the process and help prevent any last-minute scrambling, making your easy baking experience even smoother.
Dry ingredients for dough
The dry ingredients form the structural backbone of your cookie dough. You’ll need all-purpose flour, which provides the tender crumb, and a pinch of salt to balance the sweetness and enhance the flavors. For a subtle lift without making the cookies too airy, some recipes might include a small amount of baking powder. Sifting these ingredients together ensures they are evenly distributed, preventing lumps and creating a consistently smooth dough. This step is crucial for achieving that signature shortbread texture.
Wet ingredients for dough
The wet ingredients bring richness and moisture to the dough. Unsalted butter is paramount; its creamy texture contributes to the tenderness and flavor. Granulated sugar provides sweetness and helps with the browning, while a touch of an egg yolk adds richness and helps bind the dough without making it too cake-like. Pure vanilla extract is essential for its aromatic depth, complementing the chocolate and toffee beautifully. Ensure your butter is perfectly softened, but not melted, for the best dough consistency, as this impacts the overall structure of your thumbprint cookies.
Mixing the Cookie Dough
The mixing process is fundamental to the texture and consistency of your chocolate toffee thumbprint cookies. Proper technique ensures a light, tender crumb that holds its shape during baking while remaining delightfully soft. Patience and attention to detail during these steps will pay off with perfectly structured cookies, making your homemade dessert truly stand out. Avoid overmixing, as this can develop the gluten in the flour too much, leading to tough cookies instead of tender ones.
Combining dry ingredients first
Before introducing the wet ingredients, it’s vital to properly combine your dry components. In a medium bowl, whisk together the flour, salt, and any leavening agents like baking powder. This step ensures that these ingredients are uniformly distributed throughout the dough. An even distribution means consistent texture and flavor in every cookie. Whisking also helps to aerate the flour slightly, which can contribute to a more tender finished cookie. Set this mixture aside once combined.
Beating butter and sugar
In a separate, larger bowl, using an electric mixer, cream together the softened unsalted butter and granulated sugar until the mixture is light, fluffy, and pale in color. This process, often referred to as creaming, incorporates air into the butter, which is crucial for creating a tender cookie. Scrape down the sides of the bowl frequently to ensure all butter and sugar are thoroughly combined. Once light and fluffy, beat in the egg yolk and vanilla extract until just incorporated. Do not overmix after adding the egg, as this can lead to excessive gluten development. Gradually add the dry ingredients to the wet mixture, mixing on low speed until just combined. The dough should come together but still be soft. This foundational step is a key baking tip for achieving the perfect consistency.
Shaping Your Chocolate Toffee Dough
Shaping the dough for your thumbprint cookies is a delicate step that directly impacts their final appearance and texture. Precision here ensures each cookie is uniform, bakes evenly, and has the perfect indentation for your rich chocolate ganache filling. Take your time to create neat, consistent balls, as this contributes to the overall aesthetic appeal of these sweet treats. A little care now means beautiful cookies later.
Rolling into 1-inch balls
Once your dough is thoroughly mixed, it’s time to form the individual cookies. Scoop out portions of dough, about 1 tablespoon each, and roll them gently between the palms of your hands to form smooth, 1-inch balls. Aim for uniformity in size so that all cookies bake at the same rate. If the dough feels too sticky to handle, you can lightly flour your hands or chill the dough briefly. Place the rolled balls onto a baking sheet lined with parchment paper, leaving about 2 inches between each cookie to allow for slight spreading during baking. This careful rolling is part of the easy baking process, ensuring beautiful cookies.
Pressing wells for filling
After rolling the dough balls, it’s time to create the signature “thumbprint” indentation. You can use your thumb, a rounded tablespoon, or the back of a small measuring spoon to gently press a well into the center of each dough ball. Be careful not to press all the way through to the baking sheet. The well should be deep enough to hold a good amount of chocolate ganache, but still leave a substantial cookie border. If the edges of the well crack too much, gently pinch them back together. This step is crucial for transforming simple dough balls into classic thumbprint cookies ready for their luscious filling.
Chilling Dough for Success
Chilling your cookie dough might seem like an extra step, but it is a critical one for achieving perfectly shaped and textured chocolate toffee thumbprint cookies. This simple practice is a secret weapon in the world of baking, offering multiple benefits that elevate your homemade dessert from good to truly exceptional. Skipping this step can lead to undesirable outcomes, especially with buttery doughs like this one. It’s an important baking tip for consistent results.
Benefits of chilling dough
There are several compelling reasons to chill your cookie dough. First, and perhaps most importantly, it helps to prevent spreading. When butter is cold, it melts more slowly in the oven, allowing the cookie structure to set before the butter fully liquefies. This results in thicker, chewier cookies that hold their shape. Second, chilling allows the flavors in the dough to meld and deepen, enhancing the overall taste of your sweet treats. Third, cold dough is much easier to handle, making the rolling and shaping process less sticky and more manageable. Finally, chilling re-solidifies any softened butter, ensuring your cookies bake more evenly. A minimum of 30 minutes, or even an hour, in the refrigerator can make a significant difference in the final quality of your thumbprint cookies, contributing to a truly delightful cookie recipe.
Baking Your Thumbprint Cookies
Baking is where the magic happens, transforming raw dough into golden, fragrant chocolate toffee thumbprint cookies. Paying close attention to oven temperature and timing is paramount to ensure your cookies are perfectly cooked through, tender, and beautifully golden brown without being overbaked. A properly baked cookie forms the ideal base for the rich ganache and crunchy toffee sprinkles. This stage requires precision to achieve the desired texture and appearance.
Oven temperature and timing
Preheat your oven to the recommended temperature, typically around 350°F (175°C), and allow it to come to temperature fully before placing your cookies inside. Baking on a preheated oven ensures consistent heat distribution from the start. Arrange the chilled cookie dough balls on parchment-lined baking sheets, leaving enough space between them for even air circulation. Bake for approximately 10-12 minutes, or until the edges are lightly golden. The centers may still look a little soft, but they will firm up as they cool. Overbaking can lead to dry, crumbly cookies, so keep a close eye on them, especially during the last few minutes.
Re-pressing warm cookies
Immediately upon removing the cookies from the oven, you may notice that the wells you created earlier have puffed up slightly. This is normal, but it means you’ll need to re-press them to ensure there’s still enough space for your delicious chocolate ganache filling. Gently use the back of a small measuring spoon or a similar rounded object to re-indent the centers of the warm cookies. Be gentle but firm enough to create a distinct well. Performing this step while the cookies are still warm and pliable prevents cracking and ensures a perfect pocket for the filling. Let the cookies cool completely on the baking sheet before moving them to a wire rack. For other sweet treats that benefit from careful baking, check out our recipe for peanut butter brownie swirl cookies.
Making the Rich Chocolate Filling
The chocolate ganache filling is the heart of these amazing chocolate toffee thumbprint cookies, providing a luxurious, smooth contrast to the crisp cookie base. Learning to make a proper ganache is a valuable skill for any home baker, transforming simple ingredients into a decadent confection. This homemade dessert requires a ganache that is rich, shiny, and sets beautifully in the cookie wells. The key lies in the correct proportions and temperature control, ensuring a luscious finish to your sweet treats.
Heating cream for ganache
To start your ganache, measure out heavy cream and pour it into a small saucepan. Heat the cream over medium heat until it just begins to simmer around the edges, but do not allow it to boil vigorously. You’ll see small bubbles forming. This gentle heating ensures the cream is hot enough to melt the chocolate effectively without scorching. Once the cream is heated, immediately remove it from the heat. The warmth of the cream is what will create that beautifully smooth and emulsified ganache, ready to complement your toffee sprinkles.
Whisking chocolate and sugar
While the cream is heating, prepare your chocolate. Finely chop your chosen chocolate type (dark, milk, or semisweet) and place it in a heatproof bowl. You can add a tablespoon of powdered sugar at this stage if you desire a slightly sweeter ganache, although it’s often optional, as the chocolate itself provides plenty of sweetness. Pour the hot cream directly over the chopped chocolate and sugar. Let it sit undisturbed for about 5 minutes to allow the residual heat from the cream to melt the chocolate. Then, starting from the center of the bowl, gently whisk the mixture in small circles, gradually expanding outwards until the chocolate is completely melted and the ganache is smooth, shiny, and fully emulsified. Avoid aggressive whisking, which can incorporate too much air. This creates the perfect ganache filling, essential for your chocolate toffee thumbprint cookies.
Finishing Your Chocolate Toffee Thumbprint
The final touches are what truly bring your chocolate toffee thumbprint cookies to life, transforming them into visually stunning and utterly delicious sweet treats. This stage is about careful assembly and adding that signature crunch, ensuring each cookie is perfect for display and enjoyment. A little attention to detail here makes all the difference in presentation and taste, solidifying their status as a beloved homemade dessert.
Spoon ganache into wells
Once your cookies are completely cooled and your chocolate ganache has cooled slightly (it should still be pourable but not piping hot), it’s time to fill the wells. Carefully spoon or pipe the ganache into each indentation. For a cleaner look, a piping bag with a small round tip works wonders, but a small spoon or even a Ziploc bag with a corner snipped off will do the trick. Fill the wells generously, allowing the ganache to settle and create a smooth, glossy surface. Aim for a consistent amount in each cookie for uniform presentation.
Adding final toffee sprinkles
Immediately after filling the wells with ganache, sprinkle the crushed toffee bits over the chocolate. The slightly warm and still-liquid ganache will help the toffee bits adhere firmly. Be generous with your toffee sprinkles, as they add both visual appeal and a delightful crunch that contrasts wonderfully with the smooth chocolate and tender cookie. Allow the cookies to set at room temperature or in the refrigerator for about 30 minutes to an hour, until the ganache is firm. This ensures the filling won’t smudge and the toffee bits are securely in place, creating truly amazing chocolate toffee thumbprint cookies ready to be savored.
Storing Your Chocolate Toffee Thumbprint
Proper storage is key to maintaining the freshness, texture, and flavor of your amazing chocolate toffee thumbprint cookies. Whether you plan to enjoy them over a few days or save them for a special occasion, understanding the best storage methods will ensure your homemade dessert remains as delicious as the day it was baked. Good cookie storage practices prevent them from drying out or losing their appeal, keeping these sweet treats at their best.
Room temperature storage
For short-term storage, chocolate toffee thumbprint cookies can be kept at room temperature for up to 3-4 days. Store them in an airtight container to prevent them from becoming stale. It’s often best to place a piece of parchment paper between layers of cookies to prevent the ganache from sticking. Keep the container in a cool, dry place away from direct sunlight or heat sources, which could melt the chocolate filling. If your home is particularly warm, or if the ganache is especially soft, you might consider refrigerating them even for short-term storage, though this can sometimes alter the cookie’s texture slightly.
Freezing cookies for later
Thumbprint cookies freeze exceptionally well, making them perfect for meal prepping desserts or enjoying sweet treats long after baking. To freeze, arrange the fully cooled and set cookies in a single layer on a baking sheet and flash freeze for about an hour until firm. Once firm, transfer them to an airtight freezer-safe container or a heavy-duty freezer bag, again placing parchment paper between layers. They can be stored in the freezer for up to 2-3 months. When ready to enjoy, simply thaw them at room temperature for a few hours. This cookie storage method ensures you always have a delightful treat on hand.
Customizing Filling Chocolate Types
One of the joys of making chocolate toffee thumbprint cookies is the ability to customize them to your exact taste preferences. The choice of chocolate for your ganache filling can significantly alter the flavor profile of the entire homemade dessert. Experimenting with different chocolate types allows you to fine-tune the sweetness and intensity, ensuring these sweet treats are perfectly suited to your palate. This flexibility makes the cookie recipe even more versatile and enjoyable to create.
Dark, milk, or semisweet
When it comes to ganache, your chocolate type choice is crucial. Dark chocolate, with its higher cocoa content (typically 60% or more), will yield a richer, more intense, and slightly bitter filling, which beautifully balances the sweetness of the shortbread and toffee. This option is perfect for those who appreciate a sophisticated, less sweet profile. Milk chocolate, on the other hand, offers a creamier, sweeter, and milder flavor. It’s a great choice for those who prefer a classic, comforting sweetness and a smoother mouthfeel. Semisweet chocolate provides a middle ground, offering a good balance of sweetness and chocolate intensity, making it a popular and versatile choice for many bakers. Consider your audience and personal preference when selecting, as each chocolate type will create a distinctly different, yet equally delicious, thumbprint cookie experience.
Toffee Bit Alternatives for Cookies
While classic toffee sprinkles add a wonderful texture and caramel flavor to chocolate toffee thumbprint cookies, sometimes you might want to try something different, or you simply don’t have toffee bits on hand. Substituting ingredients can open up a world of new flavor combinations, allowing you to personalize this easy baking cookie recipe further. Don’t be afraid to get creative with these sweet treats; the base cookie is versatile enough to pair with many different toppings. This customization adds to the joy of making your homemade dessert.
Tasty substitute ideas
If you’re looking for alternatives to traditional toffee bits, consider these delicious ideas:
- Chopped Nuts: Finely chopped pecans, walnuts, almonds, or hazelnuts can add a lovely crunch and a nutty depth of flavor. Toasting them lightly beforehand will enhance their taste.
- Mini Chocolate Chips: While your ganache is already chocolatey, a sprinkle of mini chocolate chips (milk, dark, or white) on top can add an extra layer of chocolate texture and visual appeal.
- Sprinkles: Colorful sprinkles can make these cookies more festive and fun, especially for celebrations or when baking with kids.
- Sea Salt Flakes: A delicate sprinkle of flaky sea salt can beautifully contrast and enhance the sweetness of the chocolate and the buttery cookie, offering a sophisticated touch.
- Other Crushed Candies: Consider crushing other favorite candies, such as peppermint candies for a holiday twist, or even a different type of chocolate bar for a unique texture.
Each of these alternatives offers a unique twist, ensuring your thumbprint cookies are always exciting and tailor-made to your preferences.
Troubleshooting Cookie Spreading
One of the most common frustrations in baking is when cookies spread too much, losing their shape and becoming flat. For thumbprint cookies, maintaining a good, thick shape is crucial for holding the ganache filling. Understanding the reasons behind cookie spreading and knowing how to prevent it is a valuable baking tip that ensures your chocolate toffee thumbprint cookies turn out perfectly every time. This insight is essential for consistent, beautiful sweet treats.
Butter temperature is key
The temperature of your butter significantly impacts how much your cookies spread. If your butter is too warm or melted, it will cause the dough to spread rapidly in the oven before the cookie structure has a chance to set. Always use softened, but still cool, butter for creaming. If your kitchen is warm, or if you’ve been handling the dough extensively, it’s a good idea to chill the dough again before baking. This re-solidifies the butter, ensuring it melts more slowly and allows the cookie to maintain its shape. Properly conditioned butter is a cornerstone of an excellent cookie recipe.
Proper oven preheating
An oven that isn’t fully preheated can also contribute to cookie spreading. When cookies enter a lukewarm oven, they slowly heat up, giving the butter more time to melt before the dough sets. This results in wider, flatter cookies. Always preheat your oven to the specified temperature and allow it to sit at that temperature for at least 10-15 minutes after the indicator light signals it’s ready. This ensures the oven interior, including the baking stone or racks, is uniformly hot. Using an oven thermometer can help verify your oven’s accuracy. Correct oven temperature is a fundamental baking principle, whether you’re making cookies or a savory main course. Keep your homemade dessert beautiful and intact!
