
Chocolate peanut butter banana bread is a delightful twist on a classic comfort food. This simple, one-bowl recipe brings together the rich flavors of chocolate and peanut butter with the natural sweetness of ripe bananas. It’s an easy baking project that yields a moist, flavorful loaf, perfect for any time you desire a homemade sweet treat or a satisfying breakfast.
Key Takeaways
- Easy one-bowl recipe for minimal cleanup.
- Combines rich chocolate and creamy peanut butter with banana.
- Simple ingredients result in a moist, delicious loaf.
- Versatile for breakfast, snack, or dessert.
- Stores and freezes well for convenience.
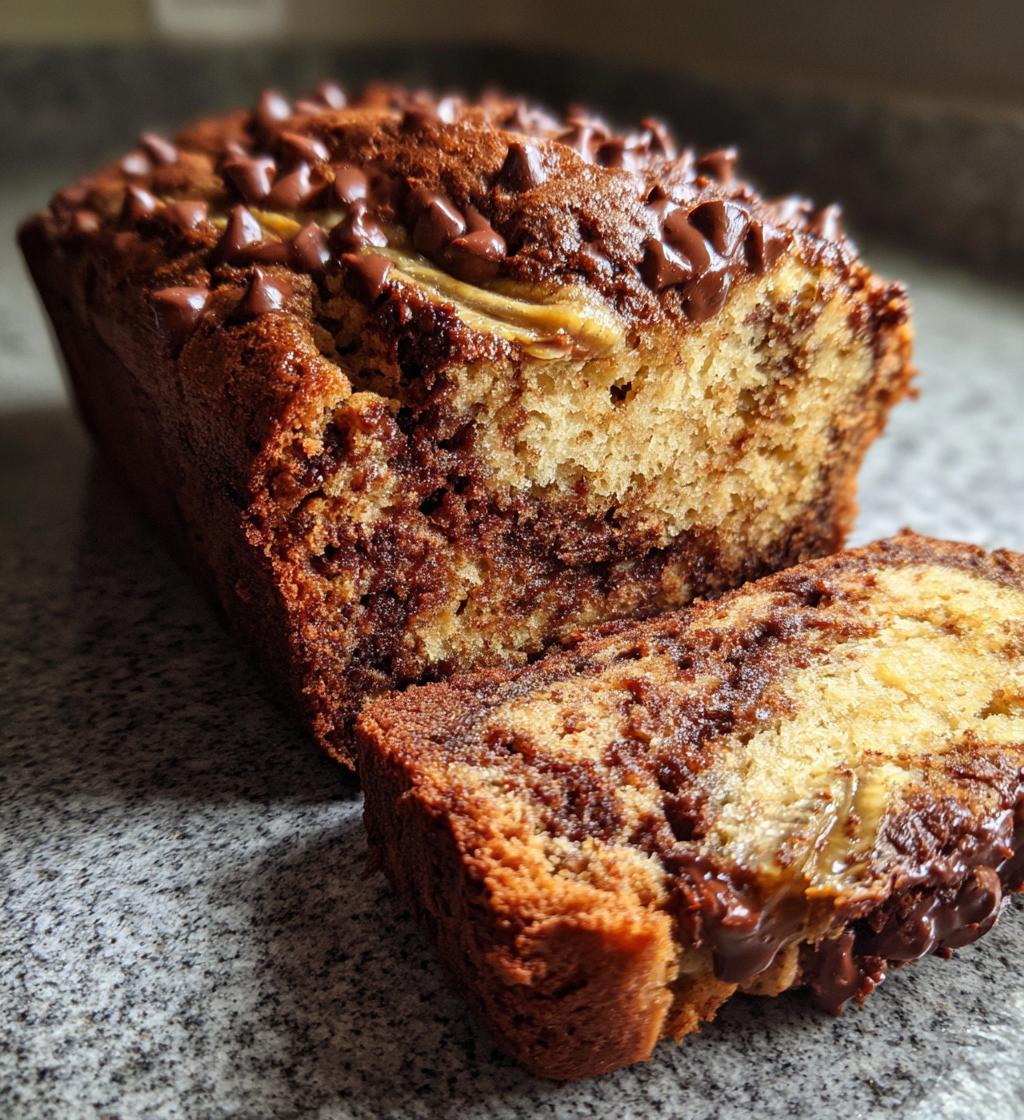
A perfect blend awaits. Ripe bananas provide natural sweetness. Chocolate and peanut butter marry perfectly. This bread offers comforting flavors. Enjoy a slice of pure bliss.
Your Easy Banana Bread Bliss
There’s nothing quite like the comforting aroma of fresh-baked goods filling your home, and this chocolate peanut butter banana bread promises exactly that. This delightful creation takes the traditional banana bread you love and infuses it with irresistible swirls of rich cocoa and creamy peanut butter, creating a truly unique and satisfying experience. It’s more than just a recipe; it’s an invitation to create a simple, yet utterly delicious, homemade bread that everyone will adore. Forget complicated processes; this is designed for ease and maximum flavor payoff.
Quick One Bowl Delight
One of the best features of this particular banana bread recipe is its simplicity. Designed as a quick one-bowl delight, it significantly reduces cleanup time, making your baking experience even more enjoyable. You won’t need an army of mixing bowls; just a single large bowl will suffice for combining all the wet and dry ingredients. This streamlined approach makes it perfect for busy weeknights or a spontaneous baking session on a lazy weekend afternoon. Even novice bakers will find this method incredibly approachable, leading to a beautifully baked moist banana bread without the fuss.
Perfect Any Time Treat
This isn’t just a breakfast item; this chocolate peanut butter banana bread stands out as a truly perfect any time treat. Imagine enjoying a warm slice with your morning coffee, a midday pick-me-up, or a satisfying dessert after dinner. Its robust flavor profile means it can be paired with almost anything – a smear of extra peanut butter, a drizzle of honey, or simply enjoyed on its own. It’s a versatile sweet treat that caters to various cravings throughout the day, ensuring you always have something delicious on hand. Consider serving it alongside a fruit salad for a balanced breakfast or as a standalone slice for an afternoon snack. For more delicious dessert ideas, check out our desserts category.
Gather Simple Recipe Ingredients
Before you dive into the delightful process of baking, the first crucial step is to gather all your simple recipe ingredients. A well-organized mise en place ensures a smooth and stress-free baking experience. For this chocolate peanut butter banana bread, you’ll find that most items are likely already in your pantry or fridge, which is part of what makes this easy baking project so appealing. Having everything measured and ready saves time and helps prevent any last-minute scrambling, letting you focus purely on the joy of creation.
Wet Mix Staples You Need
The foundation of any great banana bread lies in its wet ingredients, and for this version, we’re combining some classic wet mix staples you need with a few extra special additions. You’ll start with those wonderfully ripe bananas, which are key for natural sweetness and moisture. The riper, the better – look for bananas with plenty of brown spots! Alongside them, you’ll need melted butter, an egg to bind everything, a splash of vanilla extract for warmth, and milk to achieve the perfect consistency. Don’t forget the creamy peanut butter, which adds a distinct nutty flavor and richness, making this loaf truly exceptional.
Dry Mix Essentials Added
Balancing the wet ingredients are the dry mix essentials added to give the bread its structure and unique chocolate flavor. For this part, you’ll combine all-purpose flour, granulated sugar for extra sweetness, and cocoa powder to introduce that deep, decadent chocolate note. Baking soda and a pinch of salt are also vital; baking soda acts as a leavening agent, ensuring your loaf cake rises beautifully, while salt enhances all the other flavors, preventing the bread from tasting flat. Ensure these dry ingredients are well combined before adding them to the wet mixture, as this helps distribute the leavening evenly throughout the batter for a consistent bake. This attention to detail ensures your homemade bread is consistently perfect every time.
Mixing Chocolate Peanut Butter Batter
Now comes the fun part – bringing all those wonderful ingredients together to form your delicious chocolate peanut butter batter. This stage is where the magic truly happens, transforming individual components into a cohesive and fragrant mixture that promises a delectable outcome. The key to a successful banana bread lies in proper mixing, ensuring everything is well incorporated without overmixing, which can lead to a tough texture. This one-bowl recipe simplifies the process, allowing you to create a smooth, enticing batter with minimal effort and maximum satisfaction. Get ready to smell the delicious aroma even before it hits the oven!
Mash Those Ripe Bananas
The very first step in preparing your wet ingredients is to mash those ripe bananas. As mentioned, the riper your bananas are, the sweeter and more flavorful your bread will be. Their soft texture makes them easy to mash with a fork directly in your large mixing bowl. Aim for a consistency that still has a few small lumps; this adds wonderful pockets of banana flavor and texture to the finished loaf. Over-mashing can release too much liquid, so a slightly lumpy consistency is ideal. This simple act of mashing starts the foundation for your incredibly moist banana bread.
Stir in Sweet Wet Flavors
Once your bananas are perfectly mashed, it’s time to stir in sweet wet flavors that will complement them beautifully. Add the melted butter, granulated sugar, egg, milk, vanilla extract, and, of course, the star ingredient – creamy peanut butter – to the bowl. Use a whisk or a sturdy spatula to combine these ingredients thoroughly until smooth and well blended. The mixture will take on a lovely light brown hue, and you’ll immediately begin to catch hints of the sweet, nutty, and fruity aromas. This creamy base is crucial for the overall moisture and richness of your moist banana bread. For a different kind of sweet, savory, and rich main course, you might enjoy trying our Creamy Baked Mac and Cheese.
Combine All Dry Ingredients
While the wet mixture is standing by, the next critical step is to combine all dry ingredients properly. This might seem like a minor detail, but it’s essential for achieving a consistent texture and even rise in your bread. By whisking the dry components together in a separate bowl (or ensuring they are well mixed if you’re truly sticking to one bowl, though a quick whisk separately is often recommended), you prevent pockets of leavening agents or flour, which can lead to an uneven bake. This thorough pre-mixing ensures that every slice of your homemade bread will be uniformly delicious.
Flour and Cocoa Together
Start by bringing the flour and cocoa together. Measure out your all-purpose flour and unsweetened cocoa powder, then sift them into a medium-sized bowl. Sifting isn’t always strictly necessary, but it helps to aerate the flour and remove any lumps from the cocoa powder, which can be quite stubborn. This step ensures a lighter texture and a more evenly distributed chocolate flavor throughout your chocolate peanut butter banana bread. Gently whisk them together until no streaks of white flour or dark cocoa are visible, creating a uniform, chocolatey base.
Baking Helpers Added
Once the flour and cocoa are combined, it’s time for the baking helpers added. Incorporate the granulated sugar, baking soda, and salt into the flour and cocoa mixture. Whisk everything together very well for about 30 seconds. This ensures that the leavening agent (baking soda) and salt are evenly dispersed. Even distribution of baking soda is particularly important for an even rise and proper crumb structure. The salt, though a small amount, plays a significant role in enhancing all the sweet and savory notes present, elevating the overall taste of your sweet treat. For another delightful sweet baked good, explore our recipe for Peanut Butter Brownie Swirl Cookies.
Adding Dry Mix to Wet
The moment of truth arrives when you begin adding dry mix to wet ingredients. This step requires a delicate touch to ensure your chocolate peanut butter banana bread achieves its signature moist and tender crumb. The goal is to combine the ingredients just enough to integrate them, without overmixing. Overmixing can develop the gluten in the flour too much, leading to a tough, chewy bread rather than the soft, cake-like texture we’re aiming for. Take your time, and remember that a few lumps are perfectly acceptable and even desirable for a truly rustic feel.
Gently Stir Batter Together
Once the dry ingredients are gradually incorporated into the wet mixture, it’s time to gently stir batter together. Use a rubber spatula or a wooden spoon for this task. Start by folding the ingredients from the bottom up, scraping the sides of the bowl to ensure no dry pockets remain. Mix only until the flour streaks have just disappeared. It’s okay if there are a few small lumps of flour or banana; these will typically bake out and contribute to the bread’s delightful texture. This gentle approach is key to maintaining the tender nature of your finished moist banana bread, creating a beautiful harmony of flavors and textures.
Fold in Chocolate Chips
To truly elevate your chocolate peanut butter banana bread, the final ingredient to incorporate is a generous helping of chocolate chips. This step adds an extra layer of decadence and bursts of melty chocolate throughout the loaf. Whether you prefer semi-sweet, milk, or dark chocolate, these delightful morsels will complement the rich flavors of banana and peanut butter beautifully. This is where your bread transforms from simply delicious to irresistibly indulgent, making it a standout sweet treat that’s hard to resist. The contrast of the creamy batter with the solid chocolate adds textural interest too, enhancing the overall eating experience.
Sweet Morsels Go Last
It’s important that these sweet morsels go last. After your batter is mostly combined, gently fold in the chocolate chips using your rubber spatula. Distribute them evenly throughout the batter with just a few turns. Overmixing at this stage can not only develop gluten but also cause the chocolate chips to sink to the bottom of the loaf cake during baking. A light hand ensures they remain suspended throughout the bread, guaranteeing chocolatey goodness in every single slice. This simple technique is part of the secret to successful easy baking, ensuring a visually appealing and consistently flavorful result. For another delightful dessert, try our Vanilla Bean Creme Brulee Cheesecake Cupcakes.
Prepare Pan and Preheat Oven
Proper preparation before baking is just as important as the mixing process itself. Before your beautiful chocolate peanut butter banana bread batter is ready for the oven, you need to ensure both your baking vessel and the oven itself are perfectly set. This foresight prevents sticky situations and guarantees an even bake, ensuring your loaf cake emerges golden brown and perfectly cooked. Taking these preliminary steps ensures a smooth transition from mixing bowl to oven, setting the stage for baking success.
Grease Your Loaf Pan
To prevent your delicious bread from sticking, you must grease your loaf pan thoroughly. You can use butter, shortening, or a non-stick cooking spray for this purpose. Be sure to cover all the inner surfaces, including the bottom and sides. For extra insurance, many bakers also lightly flour the greased pan, tapping out any excess. Alternatively, lining the pan with parchment paper, leaving an overhang on the longer sides, makes for incredibly easy removal once the bread is baked and cooled. This crucial step ensures your homemade bread releases cleanly and beautifully from the pan.
Preheat Oven to 350°F
Simultaneously with preparing your pan, it’s vital to preheat oven to 350°F (175°C). A properly preheated oven ensures that your bread starts baking at the correct temperature immediately, which is critical for proper leavening and crust development. If you place your batter into a cold oven, the baking soda won’t activate as effectively, potentially resulting in a denser, less airy loaf. Give your oven ample time, typically 15-20 minutes after it signals it’s reached temperature, to ensure it’s fully and evenly heated throughout. Learn more about the science of baking soda and other leavening agents on Wikipedia’s leavening agent page.
Baking Your Chocolate Peanut Butter Bread
The moment has arrived to transform your carefully prepared batter into a golden-brown masterpiece. Baking your chocolate peanut butter bread is where patience truly pays off. The kitchen will soon fill with an incredibly inviting aroma, a blend of rich cocoa, sweet banana, and nutty peanut butter – a true testament to the deliciousness to come. This stage requires a bit of monitoring, but for the most part, the oven will do the heavy lifting, crafting a perfectly baked loaf for you to enjoy. Just imagine the first slice of this irresistible homemade bread.
Time for the Oven
Carefully pour your prepared chocolate peanut butter batter into the greased loaf pan. Distribute it evenly, smoothing the top with a spatula if necessary. Once filled, gently place the pan into the preheated 350°F (175°C) oven. Try to center it to ensure even heat circulation around the pan. Avoid opening the oven door unnecessarily during the first 40-50 minutes of baking, as sudden temperature drops can cause the bread to fall. Let the heat work its magic, allowing the bread to rise beautifully and develop its structure. This Instagram post showcases a similar beautiful bake.
Bake for 60 Minutes
Generally, you will bake for 60 minutes. However, baking times can vary slightly depending on your oven’s calibration and the material of your loaf pan. It’s a good idea to start checking for doneness around the 55-minute mark. You’ll notice the edges becoming firm and pulling slightly away from the sides of the pan, and the top will be a deep golden brown. The surface might also show some cracks, which is perfectly normal for a rustic moist banana bread. Keep an eye on it, but resist the urge to peek too often!
Know When Bread is Baked
Ensuring your chocolate peanut butter banana bread is perfectly baked through is crucial for both taste and texture. An underbaked loaf can be gooey in the center, while an overbaked one might be dry. Learning to know when bread is baked to perfection means you’ll consistently achieve that ideal moist crumb and delicious flavor. This simple skill is invaluable for any baker, ensuring every batch of your homemade bread meets your expectations.
Toothpick Test Works Best
The most reliable method to determine if your bread is fully cooked is the classic toothpick test works best. Around the 60-minute mark, carefully insert a wooden skewer or toothpick into the very center of the loaf cake. If it comes out clean, with no wet batter attached, your bread is done. If there are wet crumbs or liquid batter, return the bread to the oven for another 5-10 minutes, then test again. Remember that melted chocolate chips might stick to the toothpick, so look for raw batter rather than just melted chocolate. A clean toothpick means you’re just moments away from cooling your delightful creation. For additional information on baking techniques, refer to Wikipedia’s baking page.
Cooling Chocolate Peanut Butter Bread Bliss
Once your glorious chocolate peanut butter banana bread emerges from the oven, fragrant and golden, it might be tempting to slice right into it. However, the cooling process is just as vital as the baking itself for achieving the best possible texture and flavor. Rushing this stage can lead to a less stable loaf and a less enjoyable eating experience. Proper cooling banana bread allows the internal structure to set and the flavors to fully meld, ensuring that every slice is perfect.
Let It Rest First
Immediately after removing the loaf from the oven, let it rest first in the pan for about 10-15 minutes. This crucial resting period allows the bread to firm up slightly and prevents it from crumbling when you remove it. During this time, the residual heat in the pan continues to cook the bread gently, ensuring an even finish. After 10-15 minutes, carefully invert the pan onto a wire rack, then flip the bread right-side up onto the rack. This allows air to circulate around all sides, preventing the bottom from becoming soggy, a key step in successful easy baking.
Cool Before Slicing
The final, and perhaps most challenging, step is to truly cool before slicing. Allow your moist banana bread to cool completely on the wire rack, ideally for at least 1-2 hours, or even longer if possible. Slicing warm bread can result in a gummy texture and crumbly slices because the internal structure hasn’t fully set. As it cools, the starches in the bread firm up, and the flavors deepen. This patience will be rewarded with perfectly formed, beautifully moist slices of your delicious sweet treat. For more quick and easy recipes, visit our Carina Recipes Pinterest page.
Storing and Freezing Your Loaf
One of the many joys of baking a delicious homemade bread like this chocolate peanut butter banana bread is having plenty to enjoy for days, or even weeks. Proper storing and freezing your loaf ensures that its wonderful flavor and moist texture are preserved, allowing you to savor every last bite. Whether you have a few slices left over or decide to bake an extra loaf for future enjoyment, these tips will help maintain its deliciousness. Enjoying it over time makes it an even more valuable sweet treat.
Keep Leftovers Fresh
To keep leftovers fresh, once your banana bread has completely cooled, wrap it tightly in plastic wrap or aluminum foil. You can also place it in an airtight container. Stored at room temperature, it will remain fresh and delicious for 2-3 days. For slightly longer storage, you can refrigerate it for up to a week, though chilling can sometimes alter the texture slightly. Always ensure it’s fully cooled before wrapping, as trapping warmth can create condensation and make the bread soggy.
Freezes Well for Later
If you’ve baked a large batch or simply want to enjoy a slice of this delightful loaf cake far into the future, you’ll be pleased to know it freezes well for later. For best results, slice the cooled bread and then wrap individual slices tightly in plastic wrap, followed by a layer of aluminum foil, or place them in freezer-safe bags. This prevents freezer burn. You can freeze the entire loaf too, wrapped similarly. Frozen banana bread can last for up to 2-3 months. When ready to enjoy, simply thaw a slice at room temperature or gently warm it in the microwave or toaster oven for a quick breakfast or snack.
Enjoying Your Delicious Banana Bread
The journey from ripe bananas to a magnificent chocolate peanut butter banana bread culminates in the joyous act of savoring your creation. This section focuses on the various ways to maximize your enjoyment of this delectable homemade bread, transforming it from a simple baked good into a truly memorable experience. Whether it’s a quiet moment with a cup of tea or sharing it with loved ones, this bread is designed to bring happiness. Its versatility makes it suitable for almost any occasion, proving it’s more than just a loaf cake.
Quick Look at Nutrition
While this chocolate peanut butter banana bread is undeniably a sweet treat, it also offers some inherent goodness. Bananas provide potassium and dietary fiber, while peanut butter contributes protein and healthy fats. Cocoa powder, rich in antioxidants, adds another layer of benefits. Of course, it also contains sugar and butter, so enjoying it in moderation as part of a balanced diet is key. This quick look at nutrition helps you appreciate the various components that make up this flavorful and satisfying breakfast or dessert option, striking a balance between indulgence and wholesome ingredients.
Try with Almond Butter
For those looking to slightly alter the flavor profile or perhaps introduce a different nut butter, you can try with almond butter. While the recipe is designed around peanut butter, a spread of almond butter on a slice of this chocolate banana bread can offer a subtle, sophisticated twist. Its milder, slightly sweeter flavor can complement the chocolate and banana beautifully, offering a nuanced taste experience. You could also experiment with other nut butters, like cashew butter, or even a drizzle of honey or maple syrup. Enjoy this versatile snack or dessert exactly how you like it!