
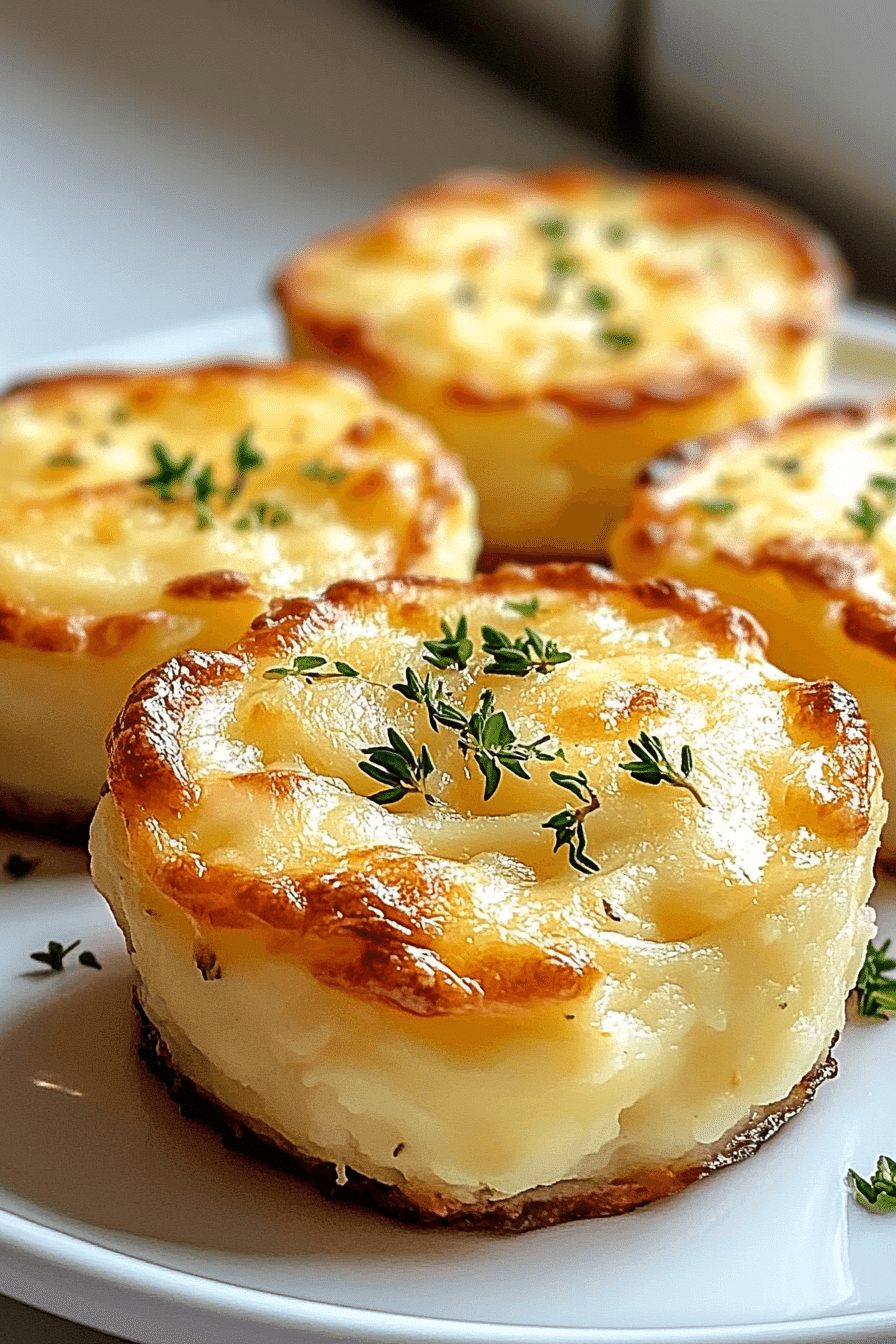
Cheesy Mashed Potato Puffs are a delightful and simple treat perfect for any occasion. These golden, savory bites make an excellent appetizer or a fun side dish. You’ll love their crispy exterior and creamy, flavorful interior. They are a true crowd-pleaser.
Key Takeaways
- Cheesy Mashed Potato Puffs are a quick, easy, and kid-friendly appetizer or side dish.
- Using chilled mashed potatoes ensures the best texture and helps the puffs hold their shape.
- Simple ingredients are combined, shaped, and rolled in Parmesan for extra crispiness.
- Bake until golden brown for a perfect crispy exterior and fluffy interior.
- Puffs can be made ahead, frozen, and customized with various cheeses and seasonings.
These puffs are incredibly versatile. A fantastic way to use leftover potatoes. They are crispy, creamy, and oh-so-flavorful. Kids and adults alike adore them. Simple to make, always a hit.
Why Make Cheesy Mashed Potato Puffs?
Cheesy Mashed Potato Puffs offer a fantastic blend of comfort food and elegant presentation, making them an ideal addition to almost any meal or gathering. They transform humble mashed potatoes into something truly special, elevating a simple side into a standalone delight. Their inherent versatility allows them to pair seamlessly with various main courses, from roasted meats to lighter salads, while also shining brightly as a featured item on a party platter. The appeal lies not just in their delicious flavor but also in their inviting texture—a perfectly crispy exterior giving way to a warm, fluffy, and cheesy interior. Moreover, the process of making them is surprisingly straightforward, proving that gourmet-tasting food doesn’t always require complex culinary skills. For more delightful starters, explore our collection of appetizers.
Quick and Easy Appetizer
When you need a crowd-pleasing dish without spending hours in the kitchen, cheesy mashed potato puffs are your go-to. This recipe is designed for efficiency, ensuring that you can whip up a batch quickly, making them perfect for unexpected guests or busy weeknights. The steps are intuitive, involving minimal prep and straightforward baking. From combining the ingredients to serving them hot from the oven, the entire process is streamlined, allowing you more time to enjoy your company or relax. They’re a savory alternative to typical party fare, offering a satisfying bite that everyone appreciates. Their size makes them easy to handle, and their rich flavor profile means they disappear fast!
Kid-Friendly Cheesy Treat
It’s no secret that kids love cheese and potatoes, and these puffs combine both in a fun, bite-sized package. The cheesy goodness and soft texture inside are irresistible to younger palates, while the crispy outer layer adds an exciting crunch. Their small, spherical shape makes them easy for little hands to pick up and enjoy, reducing mess and making mealtime more engaging. You might even find them asking for seconds (or thirds!). They can be a clever way to introduce new seasonings or even a bit of finely minced vegetable, hidden within the familiar comfort of potatoes and cheese, transforming them into a delightful and wholesome snack or side dish that appeals to even the pickiest eaters.
Gathering Ingredients for Potato Puffs
Creating perfect cheesy mashed potato puffs starts with selecting the right ingredients. The quality and type of each component significantly influence the final taste and texture of your puffs. While the recipe is forgiving, a little attention to detail in your ingredient selection can elevate your results from good to outstanding. Always opt for fresh, high-quality dairy products and, if possible, freshly grated cheeses for the best flavor infusion. The type of potato also matters; starchy varieties like Russet or Idaho are ideal for mashing due to their fluffy texture. Understanding each ingredient’s role will help you achieve that desired crispy exterior and creamy, flavorful interior that defines a truly great potato puff.
What You Will Need
To begin your cheesy mashed potato puff adventure, gather the following key ingredients. You’ll need a generous amount of mashed potatoes, preferably plain or lightly seasoned, as the base. For that irresistible cheesy flavor, you’ll want finely grated Parmesan cheese (or a blend of your favorite cheeses) both for mixing into the potatoes and for the outer coating. An egg acts as a binder, helping the puffs hold their shape during baking. All-purpose flour provides structure and a delicate crispness. Seasonings like salt, black pepper, and garlic powder are essential for enhancing the overall savory profile. Butter or cooking spray will be needed for greasing the muffin pan, ensuring easy removal and a beautiful golden crust. Having everything pre-measured and within reach will make the preparation process smooth and enjoyable, setting you up for success in creating these delectable treats.
Chilled Potato is Best
One of the most crucial tips for achieving perfectly shaped and crispy potato puffs is to use *chilled* mashed potatoes. While it might seem counterintuitive to use cold potatoes, this step is vital for several reasons. Cold mashed potatoes are much firmer and less sticky than warm or freshly made ones. This firmness allows them to hold their shape better when you form them into balls, preventing them from spreading too much during baking. The lower temperature also contributes to a better contrast when they hit the hot oven, leading to a crispier exterior. If you’re making the mashed potatoes specifically for this recipe, prepare them in advance and let them cool completely in the refrigerator for at least a few hours, or ideally, overnight. This pre-planning makes a significant difference in the final texture and presentation of your golden brown puffs.
Simple Steps for Mashed Potato Puffs
Making mashed potato puffs doesn’t require advanced culinary skills. The process is designed to be accessible, allowing home cooks of all levels to achieve delicious results. Starting with proper oven preparation and pan greasing sets the foundation for perfectly cooked and easily removable puffs. The key is to follow each step methodically, ensuring that the environment for baking is optimal before your potato mixture even enters the oven. These initial, simple steps are critical for success, preventing sticking and promoting even cooking. Once these foundational tasks are completed, the rest of the process flows smoothly, leading you closer to enjoying your warm, cheesy creations. For another comforting baked dish, try our creamy baked mac and cheese.
Preheat Oven to 400°F
Preheating your oven to the correct temperature is a non-negotiable step for almost any baking recipe, and cheesy mashed potato puffs are no exception. Set your oven to 400°F (200°C) and allow it ample time to reach and maintain this temperature. A properly preheated oven ensures that the puffs begin baking immediately at the desired heat, which is crucial for achieving that coveted crispy outer layer and even internal cooking. If the oven isn’t hot enough, the puffs might spread more, take longer to cook, and end up dense rather than light and fluffy. Use an oven thermometer if you suspect your oven’s thermostat might be off, ensuring accuracy for the best results.
Grease Your Muffin Pan
To prevent your delicious potato puffs from sticking and to ensure easy removal, properly greasing your muffin pan is essential. You can use butter, cooking spray, or even a light brushing of vegetable oil. If using butter, make sure to coat every crevice of each muffin cup thoroughly. Cooking spray offers a quick and even coating. Don’t skimp on this step, especially if your muffin pan isn’t non-stick. A well-greased pan not only prevents sticking but also contributes to the beautiful golden-brown crust on the bottom and sides of the puffs. This attention to detail ensures your puffs come out looking as good as they taste, ready to be served without hassle.
Prepping Your Cheesy Potato Puff Mix
The heart of your cheesy mashed potato puffs lies in the mix. Combining the right ingredients in the correct order is key to developing a uniform flavor and a texture that will bake beautifully. This stage is where all the individual flavors come together, transforming simple mashed potatoes into a delectable base for your puffs. Careful mixing ensures that every bite is bursting with cheesy goodness and proper seasoning. While it’s tempting to rush, taking your time here will pay dividends in the final product, leading to consistent results every time you make them. A well-prepared mix is the foundation for perfectly shaped and delicious potato puffs.
Combine All Dry Ingredients
Before adding the star ingredient, the mashed potatoes, it’s a good practice to combine all your dry ingredients. In a medium-sized bowl, whisk together the all-purpose flour, salt, black pepper, and garlic powder. This initial step ensures that the seasonings and flour are evenly distributed throughout the mixture, preventing clumps of seasoning and guaranteeing a consistent flavor in every puff. An even distribution of flour is also crucial for the structural integrity of the puffs, helping them to hold their shape during baking and contributing to their crispy texture. A few quick stirs are all it takes to get this foundational blend ready for the wet components.
Add Egg and Stir Well
Once your dry ingredients are well combined, it’s time to introduce the egg and the chilled mashed potatoes. Start by adding the beaten egg directly into the bowl with the mashed potatoes. The egg serves as a crucial binding agent, helping to hold the potato mixture together. Without it, the puffs would be crumbly and fall apart easily. Gently fold in the egg until it’s just incorporated. Overmixing can lead to a gluey texture, so aim for a light hand. This step, combined with the chilled potatoes, forms the perfect pliable dough that is easy to shape and will bake into delightful, fluffy puffs. This simple yet vital action ensures your potato mixture is ready for shaping.
Shaping and Coating Potato Puffs
The visual appeal of your cheesy mashed potato puffs is just as important as their taste. This stage is where the raw mixture transforms into the recognizable, bite-sized treats you’re aiming for. Proper shaping ensures even cooking and an attractive presentation, while the outer coating adds an extra layer of flavor and crucial crispness. Don’t underestimate the power of a good coating—it’s what helps create that irresistible golden-brown crust. Taking a little extra time during this phase will result in beautifully uniform puffs that are a delight to look at and even more delightful to eat. It’s a simple process, but attention to detail here makes a big difference.
Form Small Potato Balls
With your potato mixture ready, it’s time to transform it into individual puffs. Using a small scoop or simply your hands, take about a tablespoon or two of the mixture and gently roll it into a compact ball. Aim for uniformity in size, as this ensures even baking. If the mixture is a bit sticky, lightly moistening your hands can help. Don’t press too hard; just enough to create a firm, round shape. These small, consistent balls are the perfect size for appetizers or side dishes, offering a satisfying bite without being overly filling. This step is quite therapeutic and signals that you’re just a few steps away from enjoying your homemade treats.
Roll in Parmesan Cheese
Once your potato balls are formed, the next step is to give them their signature crispy, cheesy crust. Roll each potato ball generously in a bowl of finely grated Parmesan cheese. The Parmesan cheese doesn’t just add an extra layer of savory flavor; it also becomes wonderfully crispy and golden brown when baked, contributing significantly to the texture. Ensure each ball is fully coated, as this creates a delicious barrier that locks in moisture while allowing the exterior to crisp up beautifully. This step is a fantastic way to boost the overall cheese factor and achieve that desirable crunch. For another crispy side dish, check out our recipe for crispy cauliflower.
Place in Muffin Pan
After coating each potato ball in Parmesan cheese, carefully place them into the prepared muffin pan. Arrange them in individual cups, ensuring there’s enough space around each puff for air circulation, which is crucial for even baking and achieving that all-important crispiness. Avoid overcrowding the pan. If you have a mini muffin pan, these smaller sizes are especially adorable and perfect for bite-sized snacking. If you only have a standard muffin pan, you can place one puff in each cup, or if making larger puffs, you might fill alternating cups. This strategic placement ensures that each puff has the best chance to brown evenly and develop its perfect texture, ready for its transformation in the oven.
Baking Your Golden Potato Puffs
The baking phase is where the magic truly happens, transforming your raw potato mixture into irresistibly golden and crispy puffs. Achieving the perfect bake involves more than just setting a timer; it requires observation and understanding of how your oven works. The high temperature is essential for creating that desirable crunch, while careful monitoring prevents overcooking. This stage brings together all your previous efforts, culminating in a dish that is both visually appealing and deliciously satisfying. Pay close attention to the visual cues, and you’ll be rewarded with a batch of perfectly baked cheesy mashed potato puffs that are ready to impress.
Bake Until Golden Brown
Place your muffin pan, filled with Parmesan-coated potato balls, into the preheated 400°F (200°C) oven. The baking time will typically range from 20 to 25 minutes, but the key indicator of readiness is their appearance. You’re looking for a beautiful, deep golden-brown color on the outside. This rich hue signifies that the Parmesan cheese has caramelized, creating a crispy, flavorful crust, and that the interior is heated through and fluffy. If your oven has a convection setting, you might achieve an even crispier result in a slightly shorter time. Rotate the pan halfway through baking if your oven tends to have hot spots, ensuring uniform browning across all puffs. This step is crucial for achieving that delightful crunch, so embrace the visual cues for perfect results.
Watch Them Closely
While the suggested baking time provides a good guideline, ovens can vary significantly, and the exact timing may depend on the size of your potato puffs and the moisture content of your mashed potatoes. Therefore, it’s vital to watch them closely, especially during the last 5 to 10 minutes of baking. Keep an eye on the edges and tops; once they start turning golden, they can quickly go from perfectly browned to slightly burnt. A little vigilance will prevent any overcooking and ensure that your puffs are crispy on the outside and wonderfully tender within. This attentive approach ensures that every single cheesy mashed potato puff reaches its optimal state of deliciousness, ready to be enjoyed as soon as they’ve cooled a bit.
Serving Delicious Mashed Potato Puffs
After all the careful preparation and baking, the moment to serve your cheesy mashed potato puffs has arrived. Proper handling and serving techniques will ensure that your guests or family enjoy them at their absolute best. Serving them warm is key to appreciating their creamy interior and crispy exterior, while a moment of cooling before removal helps them retain their perfect shape. These puffs are a fantastic standalone treat but also pair wonderfully with a variety of dips or as a side to a main course. Share your delicious creations and culinary journey with others by tagging us on Instagram or finding more inspiration on Pinterest.
Cool Before Removing Puffs
Once your cheesy mashed potato puffs emerge from the oven, glowing with a beautiful golden-brown crust, resist the immediate urge to remove them from the muffin pan. Allow them to cool in the pan for about 5 to 10 minutes. This brief cooling period is crucial because it allows the puffs to firm up slightly, making them much easier to remove without breaking or crumbling. The residual heat in the pan will also continue to cook them gently, further crisping the bottoms. Using a small spoon or a butter knife to gently loosen the edges, carefully transfer the puffs to a serving platter. This patience ensures they retain their perfect shape and presentation.
Serve While Still Warm
The optimal way to enjoy cheesy mashed potato puffs is to serve them while they are still warm, ideally straight from the oven after their short cooling period. When warm, the interior is wonderfully soft and creamy, and the cheese is delightfully melty, contrasting beautifully with the crispy, golden-brown exterior. They lose some of their charm if served cold, as the texture can become a bit dense. If you need to prepare them ahead of time, consider a quick reheat in the oven just before serving to restore their warmth and crispness. These puffs are perfect on their own, or they can be accompanied by a dollop of sour cream, chives, or your favorite dipping sauce. They make an excellent side dish for something like Crispy Parmesan Chicken.
Tips for Perfect Potato Puffs
Even though cheesy mashed potato puffs are relatively simple to make, a few insider tips can elevate your results from good to truly exceptional. These minor adjustments in your preparation and mixing techniques can significantly impact the final texture, ensuring your puffs are consistently light, airy, and beautifully crispy. Paying attention to these details will help you avoid common pitfalls and achieve a professional-quality finish every time. From the initial potato choice to the final mix, these pointers are designed to guide you toward puff perfection, making your culinary efforts even more rewarding and your dish an absolute crowd-pleaser.
Use Chilled Mashed Potatoes
As previously mentioned, reiterating the importance of chilled mashed potatoes cannot be overstated. This is arguably the most critical tip for achieving perfectly shaped and texturally superior puffs. Cold potatoes are firmer and less starchy, making them easier to handle and less prone to spreading during baking. If you are making fresh mashed potatoes for this recipe, ensure they are completely cooled, ideally refrigerated for several hours or overnight, before proceeding. This step is a game-changer for consistency and crispness. Using warm potatoes often results in a softer, less defined puff that struggles to hold its shape.
Don’t Overmix the Batter
When combining the mashed potatoes with the other ingredients, exercise a gentle hand and avoid overmixing the batter. Overmixing can activate the starches in the potatoes, leading to a gluey, dense, or gummy texture rather than the desired light and fluffy interior. Mix just until the ingredients are combined and no dry streaks of flour remain. A spatula or your hands are often better tools than an electric mixer for this step, allowing for more control. The goal is a cohesive, pliable mixture that still retains some of the inherent fluffiness of well-made mashed potatoes. Gentle mixing ensures a tender interior that perfectly complements the crispy exterior.
Make Ahead and Reheat Puffs
The convenience of cheesy mashed potato puffs extends beyond their simple preparation; they are also fantastic for making ahead and reheating. This quality makes them an ideal choice for meal prepping, entertaining, or simply ensuring you always have a delicious snack ready. Whether you prepare them a day in advance or freeze a batch for later, these puffs retain much of their original charm when properly stored and reheated. Understanding the best methods for both storage and reheating will allow you to enjoy their comforting flavor and delightful texture without compromising on quality, making them a truly versatile addition to your culinary repertoire.
Prepare and Store Ahead
To prepare your potato puffs ahead of time, you have a couple of options. You can make the potato mixture, form the balls, and roll them in Parmesan cheese, then arrange them on a baking sheet lined with parchment paper. Cover loosely with plastic wrap and refrigerate for up to 24 hours before baking. Alternatively, for longer storage, you can freeze them unbaked. After rolling in Parmesan, place the balls on a baking sheet and freeze until solid. Once frozen, transfer them to an airtight freezer-safe bag or container. They can be stored in the freezer for up to 2-3 months. When ready to bake, you can bake them directly from frozen, adding a few extra minutes to the baking time.
Reheating Instructions for Puffs
If you have leftover baked potato puffs or are reheating a batch made ahead, the best method for reheating is in the oven or an air fryer. To reheat in the oven, preheat it to 350°F (175°C). Place the puffs on a baking sheet and bake for 10-15 minutes, or until heated through and crispy again. For an air fryer, set it to 350°F (175°C) and air fry for 5-8 minutes, shaking the basket halfway through, until they are hot and crispy. Avoid reheating in the microwave, as this can make them soft and rubbery, losing their desirable crispy texture. A quick oven or air fryer refresh will bring them back to their warm, crispy glory, almost as good as freshly baked.
Customizing Your Potato Puff Flavor
While the classic cheesy mashed potato puff is a delight on its own, one of its greatest strengths is its adaptability. This recipe serves as an excellent base for culinary creativity, allowing you to experiment with various spices, herbs, and cheese combinations to suit your personal preferences or complement a specific meal. Customizing the flavor profile is a fantastic way to keep things interesting and to make the dish uniquely yours. Don’t be afraid to step outside the traditional bounds and explore new avenues of taste. A little adventurousness in your seasoning choices can transform a familiar favorite into an exciting new culinary experience, ensuring these puffs never get boring.
Add Paprika or Cayenne
For those who enjoy a little extra kick or a smoky depth, incorporating spices like paprika or cayenne pepper can significantly enhance the flavor of your potato puffs. A pinch of smoked paprika can add a warm, earthy undertone and a beautiful reddish hue, making them even more visually appealing. If you prefer a bit of heat, a dash of cayenne pepper will provide a subtle warmth that elevates the savory notes without being overpowering. Start with a small amount and taste the mixture before adding more, as spice levels can vary. These additions are an easy way to customize the puffs to suit different palates, transforming them from a simple side into a more complex and exciting dish.
Try Different Cheeses
While Parmesan cheese provides a fantastic salty and crispy crust, don’t limit your cheesy mashed potato puff experience to just one type of cheese. The interior of the puffs is a perfect canvas for exploring a variety of cheeses. Consider adding shredded sharp cheddar for a more pronounced tang, Monterey Jack for a milder, meltier quality, or even a blend of Italian cheeses for a gourmet touch. For a smoky flavor, incorporate some smoked gouda. Experiment with different combinations to find your favorite blend. Just ensure the cheeses you choose melt well and complement the potato base. The right cheese choice can transform the entire character of the puff, offering endless possibilities for flavor exploration.
Nutrition Facts for Potato Puffs
Cheesy Mashed Potato Puffs, while delicious, are generally considered a comfort food. Nutritional content can vary significantly based on the specific ingredients used, such as the type of potatoes, the amount of butter and cheese, and whether whole milk or cream is added to the mashed potato base. Typically, a serving would provide carbohydrates from the potatoes, some protein from the cheese and egg, and fats from butter and cheese. They also offer some dietary fiber and essential vitamins and minerals inherent in potatoes, such as Vitamin C and potassium. For a precise nutritional breakdown, it’s always best to calculate based on your exact recipe and ingredient quantities. This information provides a general idea of what to expect, allowing you to enjoy these treats in moderation.
FAQs About Cheesy Potato Puffs
When creating a new recipe or adapting an old favorite, questions often arise about storage, preparation, and versatility. Cheesy Mashed Potato Puffs are no exception. Understanding how to properly store leftovers or prepare them in advance can save time and reduce food waste, making them an even more convenient addition to your meal rotation. These frequently asked questions address common concerns, providing practical answers that ensure your potato puff experience is as seamless and enjoyable as possible. Knowing these tips will empower you to make the most of your delicious creations, from the moment they’re baked to their final delicious bite.
Can I Freeze These Puffs?
Yes, cheesy mashed potato puffs freeze beautifully, making them an excellent make-ahead option. You can freeze them either baked or unbaked. For unbaked puffs, form the balls, roll them in Parmesan, then arrange them in a single layer on a parchment-lined baking sheet and freeze until solid. Once frozen, transfer them to an airtight freezer-safe bag or container for up to 2-3 months. Bake from frozen, adding about 5-10 minutes to the baking time. For baked and cooled puffs, flash freeze them on a baking sheet until solid, then transfer to a freezer bag. Reheat frozen baked puffs in a 350°F (175°C) oven for 15-20 minutes, or until heated through and crispy. Freezing is a great way to ensure you always have these delightful treats on hand.
Best Way to Store Leftovers?
If you have any leftover cheesy mashed potato puffs (a rare occurrence, perhaps!), the best way to store them is in an airtight container in the refrigerator. They will remain fresh and delicious for 3-4 days. When you’re ready to enjoy them again, avoid the microwave if you want to preserve their crispy texture. The best method for reheating leftovers is in the oven or an air fryer. Preheat your oven to 350°F (175°C) and bake the puffs for 10-15 minutes, or until they are warmed through and the exterior has regained its crispness. Similarly, an air fryer at 350°F (175°C) for 5-8 minutes will yield excellent results, providing that delightful crunch once more.