
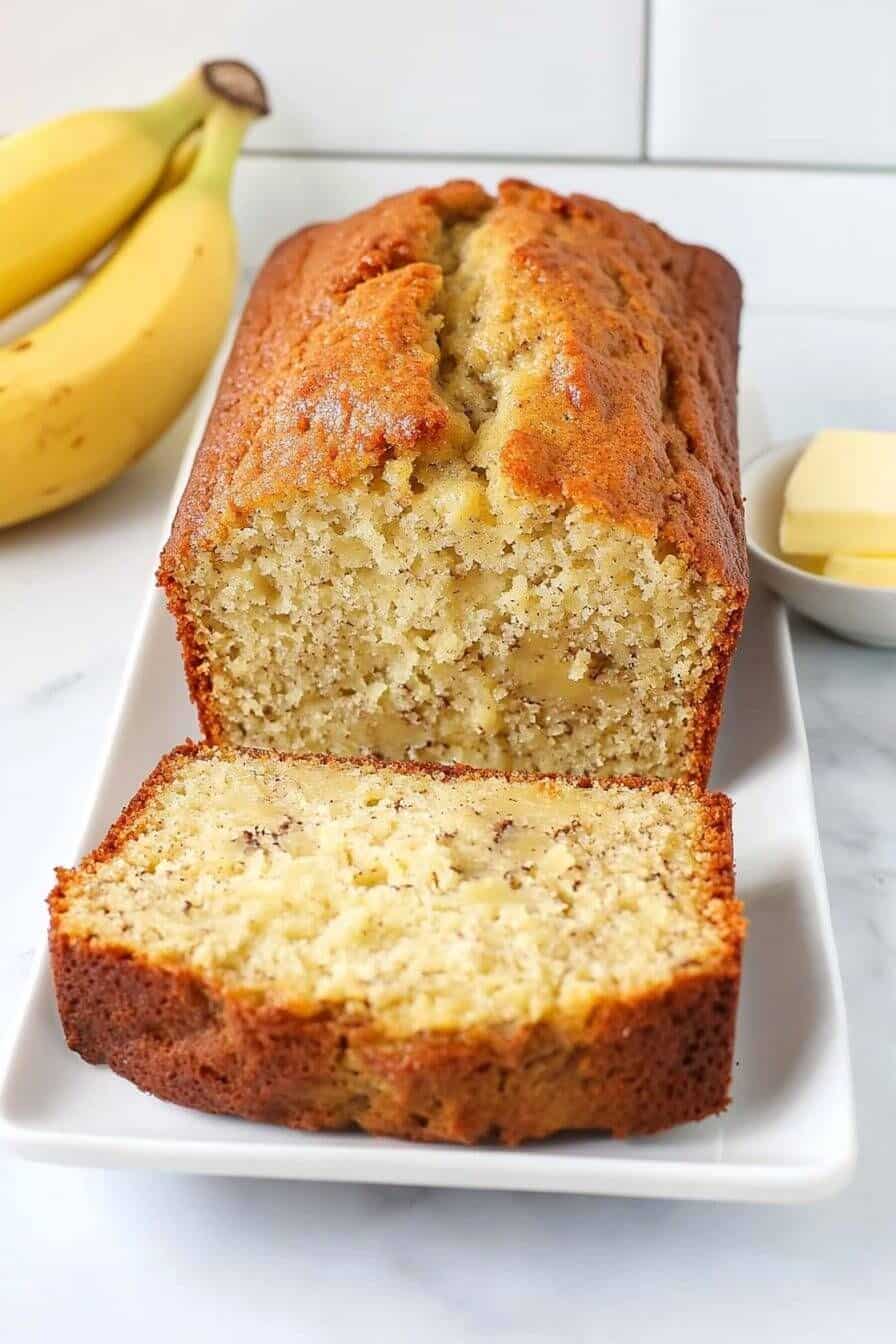
Hawaiian banana bread is a delightful twist on a classic, infusing tropical notes into a beloved treat. This moist pineapple coconut loaf recipe combines ripe bananas with the sweet tang of pineapple and rich coconut. It’s an easy banana bread that will transport your taste buds to paradise.
Key Takeaways
- This recipe creates exceptionally moist Hawaiian banana bread using ripe bananas and crushed pineapple.
- Careful mixing, especially avoiding overmixing, is crucial for a tender crumb.
- Shredded coconut adds a delightful texture and tropical flavor.
- Proper cooling ensures easy slicing and the best texture.
Making this moist pineapple coconut loaf is a simple joy. Fresh, ripe ingredients are key. Baking perfection awaits your kitchen. Enjoy a slice of tropical bliss. It’s truly a sweet treat.
Get Ready for Delicious Bread
There’s nothing quite like the comforting aroma of freshly baked bread wafting through your home. This Hawaiian banana bread recipe takes that comforting feeling and elevates it with a delightful tropical twist. Forget plain old banana bread; we’re talking about a moist, flavorful loaf infused with the sweetness of ripe bananas, the tangy juiciness of crushed pineapple, and the irresistible texture of shredded coconut. This easy banana bread recipe promises a truly special treat, perfect for breakfast, a snack, or even a simple dessert.
Understand Recipe Overview
Our goal is to create a bakery-style banana bread that’s both simple to make and incredibly satisfying. The process involves creaming butter and sugar, blending in eggs and fruit, then gently combining wet and dry ingredients. The key to its signature moist tropical bread quality lies in the balance of ingredients and the careful steps we’ll follow. You’ll find that the addition of pineapple and coconut makes all the difference, transforming a classic into a memorable Hawaiian delight. For another delightful breakfast option, consider making Hawaiian Roll French Toast.
Learn About Prep Times
Preparation for this Hawaiian banana bread is surprisingly quick, making it an ideal choice for busy mornings or an impromptu baking session. Expect about 15-20 minutes of active prep time, which includes gathering ingredients, mashing bananas, and mixing the batter. The baking time will be approximately 50-60 minutes, followed by a crucial cooling period. While the prep is fast, the anticipation of enjoying a warm slice of homemade banana bread makes every moment worthwhile. This quick and simple process ensures you can enjoy a delicious homemade treat without extensive kitchen time.
Make Moist Hawaiian Banana Bread
Achieving a moist tropical bread loaf isn’t a mystery; it’s a science, and this recipe has it perfected. Many factors contribute to the incredible texture and flavor of this pineapple coconut loaf, making it stand out from typical banana bread versions. We’ve fine-tuned the ingredient ratios and techniques to ensure every slice is soft, tender, and bursting with flavor. The combination of ingredients not only adds to the taste but also to the bread’s delightful consistency.
Why This Recipe Works
This Hawaiian banana bread recipe truly works its magic because of several crucial elements. Firstly, the use of very ripe bananas is non-negotiable; their natural sweetness and moisture are foundational. Secondly, crushed pineapple, often overlooked in other recipes, acts as a secret weapon, adding significant moisture and a subtle tang that complements the banana perfectly. Finally, the inclusion of shredded coconut doesn’t just add a tropical flavor; it also contributes to the bread’s overall tenderness and unique texture. The fat from the butter and the sugar content also play a vital role in keeping the bread soft and preventing it from drying out. This meticulous balance ensures a consistently moist and flavorful result every time you bake it.
Simple Steps for Success
Even if you’re a novice baker, you can achieve amazing results with this easy banana bread recipe. The steps are straightforward and designed for success. Begin by creaming your butter and sugar until light and fluffy—this incorporates air and creates a tender crumb. Next, integrate your wet ingredients, paying attention to the order. Then, gently fold in your dry ingredients, being careful not to overmix, which can lead to a tough loaf. The final step involves incorporating the shredded coconut, ensuring it’s evenly distributed throughout the batter. Each step is detailed, ensuring that even a beginner can create a delicious, bakery-style banana bread. Don’t forget to visit our Pinterest page for more baking inspiration.
Gathering Your Ingredients
The foundation of any great recipe lies in the quality and preparation of its ingredients. For this moist tropical bread, having everything measured and ready before you start mixing will make the baking process smooth and enjoyable. This practice, known as mise en place, is especially helpful when baking, ensuring you don’t miss a step or an ingredient. Each component plays a vital role in creating the perfect pineapple coconut loaf.
Softened Butter and Sugar
Starting with softened butter is crucial for achieving that light, fluffy texture when creaming it with sugar. Butter at room temperature (not melted!) incorporates air much more effectively, contributing to the bread’s tender crumb. Granulated sugar not only provides sweetness but also helps to aerate the butter, creating a stable base for the batter. Some recipes might call for brown sugar, but for this particular Hawaiian banana bread recipe, white granulated sugar helps to achieve a lighter texture and allows the tropical fruit flavors to shine through more distinctly. Make sure your butter has been sitting out for at least 30-60 minutes before you begin.
Ripe Banana and Pineapple
The star of the show, ripe bananas, are what give this loaf its signature flavor and much of its moisture. Look for bananas with plenty of brown spots; these are sweeter and mash more easily. The riper they are, the more intense the banana flavor will be. Crushed pineapple, preferably well-drained but with a little juice reserved (as we’ll see later), adds an incredible burst of moisture and tang. This combination elevates the flavor profile, creating a truly unique and delicious tropical bread. You can learn more about the versatile fruit banana on Wikipedia.
Flour, Baking Aids, Salt
All-purpose flour forms the structure of our bread. When combined with baking soda and baking powder, these leavening agents ensure the loaf rises beautifully and has a tender, airy texture. Baking soda reacts with acidic ingredients (like the pineapple juice and bananas) to create lift, while baking powder provides additional leavening. A pinch of salt is vital; it doesn’t just add seasoning but also enhances the flavors of all the other ingredients, balancing the sweetness and making the fruit notes pop. Always sift your dry ingredients together to ensure even distribution and to prevent lumps in your final batter, contributing to a truly bakery-style banana bread.
Mixing Wet Batter Smoothly
The process of creating the wet batter is where the magic begins, laying the groundwork for the incredibly moist and flavorful Hawaiian banana bread. Each step in this phase is crucial for ensuring the final texture and consistency of your pineapple coconut loaf. Patience and technique here will pay off immensely when you slice into your perfectly baked bread.
Creaming Butter and Sugar
This initial step is paramount for a light and tender crumb. In a large mixing bowl, combine your softened butter and granulated sugar. Using an electric mixer, beat them together on medium speed until the mixture is visibly light in color and fluffy in texture. This process, often referred to as “creaming,” incorporates air into the butter, which then creates pockets of air in the batter, leading to a softer bread. Continue mixing for about 2-3 minutes, scraping down the sides of the bowl occasionally to ensure everything is thoroughly combined. This careful creaming sets the stage for a truly bakery-style banana bread.
Adding Eggs One by One
Once the butter and sugar are perfectly creamed, it’s time to incorporate the eggs. Add them one at a time, beating well after each addition until fully incorporated. Adding eggs individually allows them to emulsify properly with the butter mixture, preventing the batter from curdling and ensuring a smooth, cohesive consistency. Eggs also contribute to the bread’s structure, richness, and moisture, making this a vital step in achieving that perfect moist tropical bread. Don’t rush this part; take your time to beat thoroughly after each egg.
Stirring in Fruit Juiciness
Now comes the tropical infusion! Gently fold in your mashed ripe bananas and the well-drained crushed pineapple. If you reserved a little pineapple juice, now is the time to add a tablespoon or two, as it significantly enhances the moisture without making the batter too thin. Stir just until these ingredients are combined; overmixing at this stage can start to develop the gluten in the flour too early, which we want to avoid for a tender loaf. The natural sweetness and moisture from these fruits are what make this Hawaiian banana bread so incredibly flavorful and soft. This careful addition of fruit ensures a delightful, easy banana bread.
Combining Dry Mix Carefully
While the wet ingredients bring the flavor and moisture, the dry ingredients provide the structure and the necessary lift for your Hawaiian banana bread. The way these ingredients are prepared and combined is just as important as the wet mix. Taking a few extra moments here ensures a smooth batter and a perfectly risen, moist tropical bread, preventing dense spots or an uneven texture in your finished pineapple coconut loaf.
Sifting Flour and Powders
Sifting your dry ingredients together is a step that many skip, but it’s crucial for achieving a light and airy texture in your easy banana bread. In a separate bowl, sift together the all-purpose flour, baking soda, and baking powder. Sifting serves several purposes: it aerates the flour, which makes the bread tender; it removes any lumps; and most importantly, it ensures that the leavening agents are evenly distributed throughout the flour. This prevents pockets of baking soda or powder, which can lead to an uneven rise or bitter spots in your loaf. A well-sifted mix guarantees a consistent and superior texture for your bakery-style banana bread.
Including a Pinch of Salt
Never underestimate the power of a simple pinch of salt in baking. While it might seem counterintuitive to add salt to a sweet dessert, its role is not just to make things salty. Instead, salt acts as a flavor enhancer, intensifying the sweetness of the bananas and pineapple and balancing the overall profile of your Hawaiian banana bread. It prevents the bread from tasting bland or overly sweet, adding depth and complexity to every bite. Additionally, salt strengthens the gluten structure in the dough, which contributes to a better texture. So, ensure that small but mighty pinch of salt is included in your dry mix for a truly well-rounded and delicious pineapple coconut loaf.
Gently Combining Wet, Dry
This stage is where your Hawaiian banana bread batter truly comes together, and it’s perhaps the most critical step for ensuring a tender, moist tropical bread. The goal is to combine the wet and dry ingredients just enough so that no streaks of flour remain, but absolutely no more. Overmixing is the enemy of a soft and fluffy loaf, so proceed with a light hand and a keen eye. This delicate balance is what separates a good pineapple coconut loaf from an extraordinary one.
Avoid Overmixing Batter
Once your wet ingredients and dry ingredients are prepared, it’s time to bring them together. Add the dry mixture to the wet mixture in three additions, folding gently with a spatula after each addition. The key here is to mix only until the flour streaks have just disappeared. As soon as you see no more dry flour, stop mixing immediately. Why is this so important? When flour is mixed excessively, the gluten strands begin to develop and strengthen. While gluten is desirable in some breads (like chewy artisan loaves), it results in a tough, dense, and less tender quick bread like our Hawaiian banana bread. For a truly moist, easy banana bread, a light hand is essential. This careful approach helps maintain the integrity of the batter and ensures your bakery-style banana bread has that coveted soft crumb. Once you’re done, consider checking out other dessert recipes on our site, like Peanut Butter Brownie Swirl Cookies, for more sweet inspirations.
Folding in Shredded Coconut
The addition of shredded coconut is the final touch that truly defines this as a Hawaiian banana bread. It introduces a wonderful textural element and a distinct tropical flavor that complements the banana and pineapple beautifully. This step is all about integration, ensuring every bite of your moist tropical bread carries that sweet, nutty essence. It’s a hallmark ingredient for any pineapple coconut loaf worth its name, bringing an authentic island flair.
Distributing Coconut Evenly
Once your wet and dry ingredients are gently combined, it’s time to fold in the shredded coconut. You can use either sweetened or unsweetened coconut, depending on your preference for sweetness. If using unsweetened, you might find the bread a little less sweet, allowing the fruit flavors to shine even more. Add the shredded coconut to the batter and, using your spatula, gently fold it in until it is evenly distributed. Be careful not to overmix during this stage either; the goal is simply to incorporate the coconut without further working the gluten. Even distribution ensures that every slice of your easy banana bread will have that delightful chewiness and tropical aroma. This small but significant addition transforms a simple banana bread into a truly exotic and bakery-style banana bread. For other delicious baked goods, you might enjoy our Quick Italian Cream Cake.
Baking Your Loaf Perfectly
With the batter mixed to perfection, the next crucial step is baking your Hawaiian banana bread. Proper preparation of your loaf pan and accurate baking techniques are essential to ensure your moist tropical bread comes out golden brown, beautifully risen, and cooked all the way through. This phase transforms your delightful pineapple coconut loaf batter into a mouth-watering reality.
Preparing Your Loaf Pan
Before pouring in your meticulously prepared batter, ensure your loaf pan is properly prepared. Grease an 8×4-inch or 9×5-inch loaf pan with butter or cooking spray, then dust it lightly with flour. This creates a non-stick surface, ensuring your easy banana bread releases cleanly after baking. You can also line the pan with parchment paper, leaving an overhang on the longer sides; this creates “handles” that make it incredibly easy to lift the baked bread out of the pan. Once the pan is ready, pour the batter into it, spreading it evenly with your spatula. This careful preparation guarantees a smooth transition from pan to cooling rack, preserving the beautiful shape of your bakery-style banana bread.
Checking for Doneness
Bake your Hawaiian banana bread in a preheated oven at the specified temperature (usually 350°F or 175°C) for approximately 50-60 minutes. Baking times can vary slightly depending on your oven and the size of your loaf pan, so it’s essential to check for doneness. The best way to do this is by inserting a wooden skewer or toothpick into the center of the loaf. If it comes out clean or with only a few moist crumbs attached, your bread is done. If it comes out with wet batter, continue baking for another 5-10 minutes and check again. The top should be a beautiful golden-brown, and the edges should be slightly pulled away from the sides of the pan. For more information on baking techniques, you can consult baking on Wikipedia.
Tips for Moist Hawaiian Bread
Achieving that signature moist tropical bread texture is the hallmark of a truly great Hawaiian banana bread. While the recipe itself is designed for success, a few key tips can further guarantee a consistently perfect, tender, and delicious pineapple coconut loaf every single time. These insights will help you avoid common baking pitfalls and elevate your easy banana bread to a truly bakery-style standard.
Use Ripe Bananas Always
This cannot be stressed enough: the ripeness of your bananas is absolutely paramount. Green or even yellow bananas simply won’t do. You need bananas that are heavily speckled with brown, almost entirely brown, or even black. These bananas are not only significantly sweeter, but their starch has converted into sugar, and they contain more moisture, which is crucial for the bread’s texture. Ripe bananas also mash much more easily and integrate better into the batter, contributing to the rich, deep banana flavor that defines this Hawaiian banana bread recipe. If your bananas aren’t ripe enough, you can speed up the process by baking them in their peels at a low temperature (300°F/150°C) for 15-20 minutes until they turn black.
Proper Oven Temperature
Maintaining the correct oven temperature is another non-negotiable tip for achieving a moist banana bread. An oven that is too hot can cause the crust to set too quickly, preventing the bread from rising properly and leading to a dry interior. Conversely, an oven that is too cool might result in a dense, uncooked loaf. Always preheat your oven fully before placing the bread inside. Consider using an oven thermometer to verify your oven’s accuracy, as many ovens can run hotter or colder than their display indicates. Baking at the recommended temperature of 350°F (175°C) ensures an even bake, allowing the bread to cook thoroughly without drying out, resulting in that perfectly moist tropical bread with a beautiful golden crust. This precision helps ensure a consistently high-quality homemade banana bread.
Pineapple Makes Bread So Moist
While ripe bananas are crucial, the true secret weapon in our Hawaiian banana bread for achieving unparalleled moisture and a delightful tang is the crushed pineapple. This often-underestimated ingredient elevates the pineapple coconut loaf from a simple banana bread to a moist tropical bread masterpiece. It’s the ingredient that truly makes this recipe stand out and gives it its signature island flair, transforming a common baked good into a truly unique treat.
Crushed Pineapple Secrets
Using crushed pineapple is key, not just for flavor, but primarily for its moisture content. The small pieces distribute evenly throughout the batter, ensuring that moisture is present in every bite. When selecting crushed pineapple, choose canned varieties that are packed in juice, not syrup, to control the sugar content and maintain a natural fruit flavor. While you drain most of the juice, the residual moisture clinging to the pineapple pieces is exactly what we need. This delicate balance prevents the bread from becoming soggy while still delivering a powerful hydrating punch, making it a remarkably easy banana bread to keep moist.
Juice Adds Extra Moisture
The juice from the crushed pineapple plays a significant role in making this a truly moist tropical bread. While you should drain the majority of the juice, don’t discard it entirely. Reserving a tablespoon or two to add back into the wet ingredients can dramatically increase the bread’s moisture without altering the batter’s consistency too much. This subtle addition of pineapple juice complements the banana, creating a more complex flavor profile and an even more tender crumb. It’s this thoughtful inclusion of juice that contributes significantly to the bakery-style banana bread texture, ensuring every slice is wonderfully soft and never dry. Remember to share your creations on Instagram!
Cooling for Best Slicing
The baking process doesn’t truly end when you pull your Hawaiian banana bread from the oven. The cooling stage is just as vital for achieving the perfect texture and ensuring easy, clean slices. Rushing this step can lead to a crumbly loaf or a doughy center, even if it was baked perfectly. Patience during cooling is key to enjoying your moist tropical bread at its very best, presenting a beautiful pineapple coconut loaf.
Resting Bread in Pan
Once your easy banana bread is out of the oven, resist the urge to immediately remove it from the pan. Allow the loaf to rest in its baking pan for about 10-15 minutes. During this time, the bread continues to cook slightly from the residual heat, and the internal structure sets. This resting period also allows the moisture to redistribute evenly throughout the loaf, preventing a soggy bottom and ensuring a consistently moist texture. Attempting to remove it too soon can cause the bread to stick to the pan or even fall apart due to its delicate, hot state. This initial rest contributes significantly to a bakery-style banana bread finish.
Transfer to Wire Rack
After its brief rest in the pan, carefully invert the Hawaiian banana bread onto a wire cooling rack. If you used parchment paper handles, simply lift it out. Allow the bread to cool completely on the wire rack before attempting to slice it. This can take anywhere from 1 to 2 hours, or even longer depending on the ambient temperature. Cooling on a wire rack ensures air circulation all around the loaf, preventing condensation from forming on the bottom, which could make it soggy. Slicing a warm loaf will result in a sticky, gummy texture and messy crumbs. A fully cooled loaf will slice cleanly, offering that perfect, moist tropical bread experience you worked so hard to achieve. For more bread ideas, browse our general bread category.
Enjoying Banana Bread With Pineapple
Finally, the moment you’ve been waiting for! Your perfectly baked, beautifully moist Hawaiian banana bread is ready to be savored. This pineapple coconut loaf isn’t just a simple baked good; it’s a taste of paradise, a delightful treat that brings sunshine to any meal or moment. Whether you enjoy it plain or with a spread, its rich flavors and tender texture are sure to please.
Perfect Breakfast or Snack
This easy banana bread is incredibly versatile, making it an ideal choice for various occasions. Start your day with a slice alongside your morning coffee or tea for a wholesome and delicious breakfast. The combination of fruit and carbohydrates provides sustained energy. It’s also a fantastic snack option for any time of day, satisfying sweet cravings without being overly indulgent. Pack a slice in your lunchbox, enjoy it after school, or simply grab a piece when you need a little pick-me-up. Its convenient nature and delightful flavor make it a family favorite that everyone will appreciate, embodying the best of a homemade banana bread.
Tropical Twist on Classic
What sets this Hawaiian banana bread apart is its vibrant tropical twist on the beloved classic. The addition of crushed pineapple and shredded coconut transforms a familiar comfort food into an exotic sensation. The natural sweetness of ripe bananas blends seamlessly with the tangy juiciness of pineapple, while the coconut adds a subtle chew and fragrant aroma. This isn’t just a banana bread; it’s a moist tropical bread that transports your senses to a sunny beach with every bite. It’s a wonderful way to bring a taste of the islands into your home, perfect for sharing with loved ones or enjoying all to yourself. Get ready to fall in love with this unique bakery-style banana bread!