
Fluffy Chocolate Steamed Buns are a delightful treat, perfect for any occasion. This steamed bun recipe will walk you through creating soft, sweet dough pillows filled with rich chocolate. Enjoy homemade steamed buns that are surprisingly easy to make and guaranteed to impress your family and friends with their incredible texture.
Key Takeaways
- Achieve perfectly fluffy chocolate steamed buns with clear, step-by-step instructions.
- Understand the critical role of yeast activation and proper dough kneading for optimal texture.
- Learn about key ingredients and smart tips for enhancing flavor and ensuring a successful bake.
- Explore delicious filling variations and best practices for storing your homemade buns.
These buns offer comforting sweetness. They are surprisingly simple to master. Fresh ingredients make a difference. Steaming keeps them soft. Enjoy this delightful treat.
Make Irresistibly Fluffy Chocolate Steamed Buns
What You’ll Need: Ingredients
To create these wonderful fluffy chocolate steamed buns, gathering your ingredients beforehand is key. You’ll need standard pantry items like all-purpose flour, granulated sugar, active dry yeast, baking powder, and salt. For the richness, prepare some good quality unsweetened cocoa powder, whole milk, vegetable oil, and a generous amount of chocolate chips—milk or semi-sweet work perfectly. Ensure all ingredients are at room temperature, especially the milk, as this greatly aids in yeast activation and dough development. Having everything measured and ready will streamline your baking process, making the experience more enjoyable and less stressful. This foundational step is crucial for achieving that desired soft, chewy texture in your homemade steamed buns.
Quick Prep & Cook Times
Efficiency is key when making delicious treats like these. The total preparation time for your chocolate buns, including mixing and initial kneading, typically ranges from 20 to 30 minutes. The dough will then require a crucial rising period, which can take anywhere from 60 to 90 minutes, depending on the warmth of your kitchen environment. After shaping and filling, a second, shorter rise of about 20-30 minutes is needed. Finally, the steaming process itself is quite fast, with each batch taking approximately 10-12 minutes. This means you can have warm, freshly steamed buns ready to enjoy in just over two hours from start to finish. The hands-on time is relatively minimal, making this a rewarding project for any home baker.
Key Ingredients for Your Steamed Buns
Wet Ingredients for Dough
The wet ingredients are fundamental to creating a pliable and soft sweet dough. Whole milk, warmed to an ideal temperature (around 105-115°F or 40-46°C), is crucial for activating the yeast without killing it. This warmth allows the yeast to thrive and produce the carbon dioxide needed for a light, airy bun. Vegetable oil adds moisture and tenderness, preventing the buns from drying out and contributing to their irresistible fluffiness. A touch of vinegar, while optional, can slightly improve the dough’s elasticity and whiteness, though it’s less critical for chocolate-colored dough. These components combine to form the perfect foundation for your fluffy buns, ensuring they remain moist and tender after steaming. The right balance here is key for that signature texture.
Dry Ingredients for Flavor
Beyond structure, dry ingredients infuse your buns with their signature flavor. All-purpose flour provides the necessary gluten structure, but for truly soft buns, using a lower protein flour or even a cake flour blend can yield an even more delicate crumb. Granulated sugar not only sweetens the dough but also feeds the yeast, aiding in its activity and the overall rise. Unsweetened cocoa powder is what gives these chocolate buns their deep, rich color and flavor. Ensure it’s good quality for the best taste. Baking powder acts as a leavening agent during steaming, contributing to the final puffiness, while a pinch of salt balances the sweetness and enhances all the other flavors. Properly measuring these dry components ensures consistent results every time you make this steamed bun recipe. For more dessert inspirations, check out our Quick Italian Cream Cake.
Delicious Chocolate Chips Inside
No chocolate steamed bun is complete without a generous filling of delicious chocolate chips. The type of chocolate chips you choose can significantly impact the final taste. Semi-sweet chocolate chips are a popular choice, offering a balanced sweetness that complements the slightly sweet dough. Milk chocolate chips will provide a creamier, sweeter center, while dark chocolate chips can add a more intense, sophisticated cocoa flavor. You can even mix different types for a complex chocolate experience. Ensure the chips are small enough to be easily sealed within the dough without tearing it, but large enough to melt into a luscious puddle during steaming. These pockets of melted chocolate are what make each bite of these homemade steamed buns truly special and decadent.
Step-by-Step: Crafting Your Fluffy Buns
Activate Yeast, Mix Dry Stuff
The journey to perfect fluffy buns begins with activating your yeast. In a small bowl, combine your warm milk (not hot!), a pinch of sugar, and the active dry yeast. Let this mixture sit for 5-10 minutes until it becomes foamy, indicating the yeast is alive and ready to work its magic. This critical step ensures your dough will rise properly. In a separate, larger bowl, whisk together your dry ingredients: flour, cocoa powder, remaining sugar, baking powder, and salt. Make sure these are thoroughly combined to distribute the leavening and flavor evenly. This meticulous preparation prevents pockets of unmixed ingredients and sets the stage for a smooth, homogenous dough that will yield exceptional homemade steamed buns.
Combine Wet and Dry Mixes
Once your yeast is active and your dry ingredients are mixed, it’s time to bring everything together. Create a well in the center of your dry ingredients and pour in the activated yeast mixture and the vegetable oil. Begin stirring with a wooden spoon or spatula, gradually incorporating the dry ingredients into the wet. Continue mixing until a shaggy dough forms and most of the flour is hydrated. At this point, you can turn the dough out onto a lightly floured surface or continue mixing in the bowl. The goal is to avoid over-mixing at this stage; simply get the ingredients to come together before the serious kneading begins. This initial combination is vital for the eventual smooth texture of your sweet dough.
Kneading Dough for Perfect Texture
How to Get Smooth Dough
Kneading is perhaps the most crucial step for achieving the irresistibly fluffy texture of these chocolate buns. Once your dough is shaggy, transfer it to a lightly floured surface. Begin kneading by pressing down with the heels of your hands, stretching the dough away from you, then folding it back over itself. Rotate the dough and repeat this process. Continue kneading for 8-10 minutes. The dough will initially be sticky, but as you knead, it will become smoother, more elastic, and less tacky. This process develops the gluten, creating a strong yet pliable structure that will trap the gases produced by the yeast, resulting in light and airy buns. For a deeper understanding of yeast and its role, refer to this Wikipedia article on yeast.
Test Dough for Elasticity
Knowing when to stop kneading is as important as the kneading itself. The “windowpane test” is an excellent indicator of properly developed gluten. Take a small piece of dough and gently stretch it between your fingers. If the dough can be stretched thinly enough that light passes through it without tearing—forming a translucent “windowpane”—then your dough has sufficient elasticity. If it tears easily, continue kneading for a few more minutes and retest. A well-kneaded dough will also spring back slowly when poked with a finger and feel soft and supple. This elasticity is what gives your fluffy buns their characteristic chewiness and ability to hold their shape while steaming, making for perfect homemade chocolate buns every time.
The All-Important Dough Rise
Letting Dough Double in Size
After all the careful kneading, the dough rise is where the magic truly begins. Place your kneaded dough in a lightly oiled bowl, turning it once to coat, then cover the bowl tightly with plastic wrap or a damp cloth. Find a warm, draft-free spot in your kitchen—a slightly warmed oven (turned off!) or a sunny windowsill works well. Allow the dough to rise for 60-90 minutes, or until it has visibly doubled in size. This primary fermentation allows the yeast to produce carbon dioxide, creating air pockets that contribute to the buns’ light and airy texture. Patience during this stage is vital; rushing it will result in dense buns. This rise is fundamental to achieving truly fluffy buns.
Gentle Punch Down After Rise
Once your dough has successfully doubled, it’s time for the gentle punch down. This step isn’t about deflating the dough completely but rather about releasing some of the larger gas pockets and redistributing the yeast for a more even texture. Gently press your fist into the center of the risen dough, then fold the edges towards the center a few times. This brief kneading helps to strengthen the gluten structure further and ensures a finer, more uniform crumb in the finished chocolate buns. It also prepares the dough for shaping, making it easier to handle and preventing overly large air bubbles that could distort the bun’s appearance. This stage sets the dough up for its final transformation into delicious steamed treats.
Shaping and Filling Chocolate Buns
Dividing and Flattening Dough
With the dough ready, it’s time for shaping. Gently turn the dough out onto a lightly floured surface and divide it into equal portions, typically 10-12 pieces, for standard-sized buns. A kitchen scale can help ensure uniform sizing, leading to consistent cooking and presentation. Roll each piece into a smooth ball, then flatten it into a circle approximately 3-4 inches (7-10 cm) in diameter, with edges slightly thinner than the center. This specific shaping technique creates a sturdy base for the filling while allowing the edges to seal easily. Proper division and flattening are key to creating uniformly beautiful homemade steamed buns, ensuring each one has the perfect shape and texture after steaming.
Sealing Chocolate Chips Inside
Now for the best part: adding the chocolate! Place a generous spoonful of chocolate chips (or your chosen dessert filling) in the center of each flattened dough circle. Be careful not to overfill, as this can make sealing difficult and lead to leakage during steaming. Gather the edges of the dough around the filling, pinching them together tightly at the top to create a secure seam. Ensure there are no gaps, as any openings can cause the chocolate to leak out during steaming. Once sealed, gently roll the bun between your palms to smooth out the surface and create a neat, round shape. Place the shaped buns on individual squares of parchment paper to prevent sticking in the steamer. This careful sealing ensures a delightful molten chocolate surprise in every bite of your fluffy chocolate steamed buns.
Steaming Your Delicious Buns
Steamer Setup and Timing
Steaming is the gentle cooking method that gives these chocolate buns their incredibly soft and fluffy texture. Prepare your steamer by filling the bottom pot with water, ensuring it doesn’t touch the bottom of the steamer basket. Bring the water to a rolling boil. While the water heats, arrange your shaped buns in the steamer basket, leaving ample space between them to allow for expansion during cooking. Overcrowding can lead to uneven steaming and buns sticking together. Once the water is boiling, place the steamer basket over the pot, cover tightly, and reduce the heat to medium-high. Steam the buns for 10-12 minutes. Avoid peeking during the first 8-10 minutes, as releasing steam can cause the buns to collapse. For more about this traditional cooking technique, consider this Wikipedia page on steaming.
Watch Buns Puff Up Nicely
The transformation during steaming is truly satisfying to observe. As the heat penetrates the dough, the baking powder and residual yeast activity cause the buns to puff up beautifully, becoming plump and round. The surface will develop a smooth, slightly glossy appearance, indicative of their delicate texture. Once the steaming time is complete, turn off the heat but leave the buns in the steamer, covered, for another 2-3 minutes. This crucial step prevents the buns from deflating due to a sudden change in temperature and helps them retain their shape and softness. When you finally lift the lid, you’ll be greeted with a basket full of perfectly puffed, irresistibly fluffy chocolate steamed buns, ready to be enjoyed.
Enjoying Your Fluffy Chocolate Steamed Buns
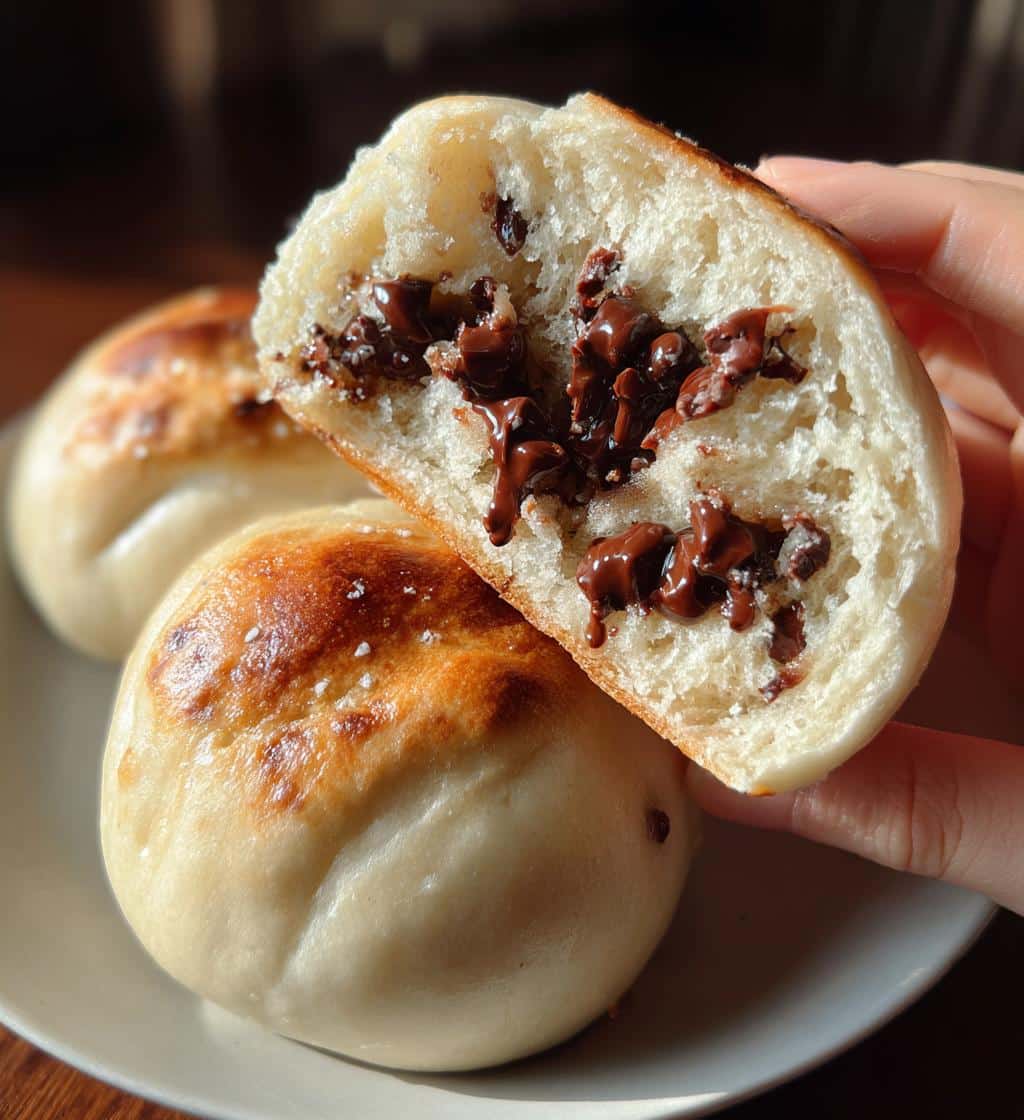
Best Served Warm and Fresh
There’s nothing quite like biting into a warm, freshly steamed bun. The soft, pillowy exterior gives way to a molten chocolate center, creating a delightful contrast in textures and flavors. These chocolate buns are truly at their peak when served straight from the steamer. The warmth enhances the aroma of the cocoa and the richness of the melted chocolate, making for an unforgettable experience. Arrange them on a platter and serve them as a comforting breakfast, a satisfying snack, or a unique dessert. They are also a wonderful addition to any special occasion spread. Pair them with a cup of tea or coffee for an elevated treat. For a delightful alternative to your main course, consider a Crispy Parmesan Chicken dish.
Smart Tips for Better Buns
Prep Everything Before Start
A successful baking experience often hinges on meticulous preparation. Before you even begin to mix, measure out all your ingredients. This practice, known as “mise en place,” not only saves time but also reduces the chances of error, especially when working with sensitive ingredients like yeast. Ensure your milk is at the correct temperature, your flour is sifted if required, and your chocolate chips are ready. Having everything laid out and organized ensures a smooth workflow, allowing you to focus on the techniques rather than scrambling for ingredients. This simple habit contributes significantly to the consistent quality of your fluffy buns and makes the entire process more enjoyable.
Adjust Sugar to Your Taste
The beauty of homemade steamed buns is the ability to customize them to your preference. While the recipe provides a balanced sweetness, feel free to adjust the amount of sugar in the dough. If you prefer a less sweet bun, you can slightly reduce the sugar, especially if your chocolate chips are already very sweet. Conversely, if you have a pronounced sweet tooth or are using very dark, unsweetened chocolate, a little extra sugar can balance the flavors. Remember that sugar also plays a role in yeast activity, so significant reductions might slightly affect the rise. Taste as you go, and don’t be afraid to experiment to find your ideal level of sweetness for these delicious homemade chocolate buns. For more sweet treats, visit our Desserts category.
Fun Filling Variations to Explore
Try Nut Butter or Fruit Jam
While chocolate chips are undeniably delicious, the world of fillings for your fluffy buns is vast and exciting. Consider trying a creamy nut butter, such as peanut butter or almond butter, for a rich and savory-sweet contrast. A swirl of fruit jam or preserves, like raspberry or apricot, can add a delightful fruity tang. Just ensure your chosen jam isn’t too runny, as this can make sealing difficult and lead to leakage during steaming. You could also experiment with a sweet red bean paste, a traditional Asian dessert filling, for an authentic twist. These variations allow you to personalize your steamed bun recipe, catering to different tastes and dietary preferences, making each batch a new culinary adventure.
Ensure Fillings Are Thick
Regardless of what creative filling you choose, its consistency is paramount. Liquid or overly thin fillings will seep through the dough during proofing or steaming, resulting in messy, unappealing buns. If you’re using a jam that’s too runny, try thickening it slightly by simmering it over low heat or mixing in a small amount of cornstarch slurry. Nut butters generally have a good consistency, but if they are very oily, you might chill them briefly. For cream-based fillings, ensure they are thick and stable. The goal is a filling that holds its shape well when scooped and can be easily encased within the dough without causing tears or ruptures. A well-contained filling ensures your homemade steamed buns look as good as they taste.
Storing and Reheating Leftovers
Keep Buns Fresh and Soft
If by some miracle you have any fluffy chocolate steamed buns leftover, proper storage is key to maintaining their deliciousness and soft texture. Once cooled completely, store the buns in an airtight container at room temperature for up to 2-3 days. To prevent them from drying out, you can also place a paper towel at the bottom of the container to absorb any excess moisture. Avoid refrigerating, as this tends to make steamed buns tough and dry. When ready to enjoy, a quick reheat can bring them back to their fresh-from-the-steamer glory. These simple storage tips ensure that every bun remains a delightful treat, preserving their irresistible qualities.
Freeze for Longer Storage
For longer-term storage, freezing is an excellent option. Once the chocolate buns have cooled completely, arrange them in a single layer on a baking sheet and flash freeze for about an hour until firm. Then, transfer the frozen buns to a freezer-safe bag or airtight container, removing as much air as possible. They can be stored in the freezer for up to 2-3 months. To reheat from frozen, you can steam them directly in a steamer for 10-15 minutes, or microwave them wrapped in a damp paper towel for 30-60 seconds per bun until warm and soft. Freezing allows you to enjoy homemade steamed buns whenever a craving strikes, making them a convenient sweet dough to prepare in advance. Don’t forget to follow Carina Recipes on Pinterest and Instagram for more cooking inspiration.
Understanding Your Bun’s Nutrition
Calories and Other Values
While indulging in these delicious fluffy chocolate steamed buns, it’s helpful to have a general understanding of their nutritional profile. A typical homemade steamed bun, depending on size and specific ingredients, will contain approximately 200-300 calories. This includes carbohydrates from the flour and sugar, fats from the oil and chocolate chips, and a small amount of protein from the flour and milk. Fiber content will be relatively low unless whole wheat flour is incorporated. These values can vary widely based on the exact recipe proportions, the type of chocolate used, and the serving size. Using semi-sweet or dark chocolate can slightly alter the sugar content, while reducing oil can lower fat. Knowing these approximate values helps you manage your intake.
Enjoy in Healthy Moderation
Like any delightful sweet dough or dessert, fluffy chocolate steamed buns are best enjoyed as part of a balanced diet. While they offer a comforting and satisfying treat, moderation is key. Consider them a special indulgence rather than an everyday staple. Pairing them with a healthier meal or enjoying one as a controlled snack can fit well within a mindful eating plan. The joy of baking and eating homemade chocolate buns lies in the experience and the delicious flavors they offer. By understanding their nutritional context and practicing moderation, you can savor every bite without compromising your healthy lifestyle. Enjoy your homemade steamed buns responsibly!