
Your easy buttery biscuits recipe is here to transform your mornings or dinner sides. This simple recipe guarantees flaky, melt-in-your-mouth results every time. With just a few common ingredients and straightforward steps, you’ll be enjoying warm, tender biscuits in under an hour. Dive in and master the art of homemade biscuits!
Key Takeaways
- Always use cold butter and cold buttermilk for the flakiest texture.
- Handle the dough minimally to prevent tough biscuits; a light touch is key.
- Preheat your oven to a high temperature for a quick, golden rise.
- Cut butter into small pieces and incorporate until coarse crumbs form.
- Bake until deeply browned for optimal flavor and a perfect crust.
Making biscuits at home is truly rewarding. Freshly baked goods bring joy. Simple steps lead to delicious results. Enjoy warm, tender biscuits anytime. It’s a kitchen skill worth mastering.
Your Easy Buttery Biscuits Recipe
Crafting your own batch of easy buttery biscuits doesn’t have to be an intimidating task. This recipe is designed to simplify the process, ensuring even novice bakers can achieve impressive results. The secret lies in understanding a few fundamental principles and executing them with a gentle hand. These biscuits are perfect for a quick breakfast, a comforting side dish, or even as a base for a savory meal. Their versatility and irresistible flavor make them a staple in any home cook’s repertoire. You’ll soon find yourself reaching for this reliable recipe again and again, eager to share these golden, tender treats.
Quick Prep for Delicious Biscuits
One of the best aspects of this easy buttery biscuits recipe is the minimal preparation time required. From gathering your ingredients to having dough ready for the oven, you can accomplish most of the groundwork in under 15-20 minutes. This efficiency makes them an ideal choice for busy mornings or when you need a quick addition to your dinner spread. The rapid prep doesn’t compromise on quality; instead, it emphasizes smart techniques that yield delicious results without unnecessary fuss. Focus on having your ingredients measured and chilled, and the rest will fall into place smoothly, setting you up for baking success. If you enjoy quick meal solutions, you might also like this easy butter chicken recipe.
Simple Ingredients List
The beauty of these easy buttery biscuits lies in their straightforward ingredient list, featuring items you likely already have in your pantry and fridge. You’ll need all-purpose flour, baking powder, baking soda, salt, unsalted cold butter, and cold buttermilk. That’s it! There are no obscure or hard-to-find components, making this recipe accessible and budget-friendly. Using high-quality ingredients, especially fresh baking powder and soda, will make a noticeable difference in the biscuits’ rise and texture. Remember, the colder your butter and buttermilk, the flakier your final product will be, so plan accordingly by chilling them thoroughly before you begin. For more simple meal ideas, consider exploring our main course category.
Why These Buttery Biscuits Shine
These buttery biscuits stand out for several reasons, making them a consistently popular choice. Their superior texture and rich flavor profile are hallmarks of a well-executed recipe that prioritizes quality ingredients and precise techniques. Unlike many store-bought options that can be dry or lack character, these homemade versions offer a warmth and depth that is truly unparalleled. The combination of simple yet effective methods ensures that each batch delivers on its promise of deliciousness. They truly are an elevated take on a classic comfort food, deserving of their reputation.
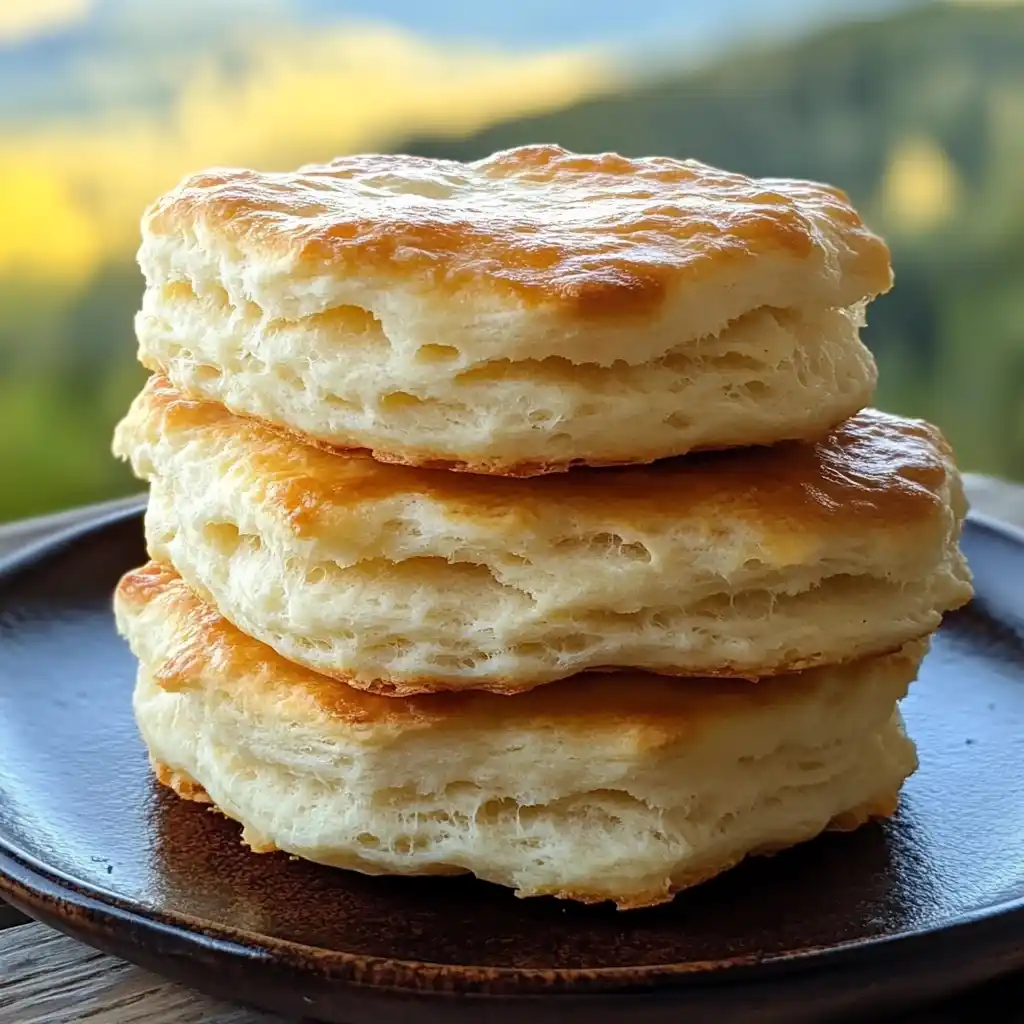
Achieve Golden-Brown Perfection
Achieving a beautiful golden-brown exterior is a key indicator of perfectly baked biscuits, and this recipe guides you to just that. The high oven temperature quickly sets the crust, promoting a rapid rise and creating that desirable crispness on the outside. Brushing the tops with melted butter before baking also contributes significantly to this golden hue and adds an extra layer of richness and flavor. This visual appeal isn’t just for show; it’s a testament to the ideal balance of heat and time, ensuring that the interior is cooked through while remaining tender. The deep brown color signifies a delightful caramelized flavor, making each bite incredibly satisfying. To learn more about the science behind achieving the perfect crust, consider reading about the Maillard reaction on Wikipedia.
Melt-in-Your-Mouth Flavor
The melt-in-your-mouth flavor of these tender biscuits is their defining characteristic. This exquisite texture comes from the generous amount of cold butter, which, when incorporated correctly, creates pockets of steam during baking, leading to distinct, flaky layers. The tang of buttermilk not only aids in leavening but also adds a subtle depth of flavor that complements the richness of the butter. Each bite is tender, moist, and infused with that comforting, savory-sweet taste that only a perfectly made biscuit can offer. It’s a flavor that evokes warmth and home, making these biscuits a truly special treat that pairs wonderfully with everything from fruit preserves to hearty gravies.
Gather Supplies for Easy Biscuits
Having all your necessary supplies and ingredients ready before you start is crucial for a smooth and enjoyable biscuit-making experience. A well-organized workspace not only speeds up the process but also minimizes the chances of forgetting a crucial step or ingredient. This simple habit can make all the difference, especially when working with temperature-sensitive ingredients like cold butter and buttermilk. Take a moment to lay out your mixing bowls, pastry cutter (or forks), measuring cups and spoons, and a baking sheet. This preparatory phase is short but vital, ensuring that your journey to easy buttery biscuits is as seamless as possible, leading to better and more consistent results. For other dinner ideas, try our creamy chicken alfredo lasagna rolls.
All-Purpose Flour and Leavening
At the heart of any great biscuit is the right combination of all-purpose flour and leavening agents. For this recipe, standard all-purpose flour works perfectly, providing the necessary structure without making the biscuits too dense. It’s important to measure your flour correctly – spoon it into your measuring cup and level it off rather than scooping directly, which can compact the flour and lead to dry biscuits. The leavening power comes from both baking powder and baking soda. Baking powder provides the initial lift, while baking soda reacts with the acidic buttermilk to create additional gas, contributing to that signature fluffy, open crumb. Ensure your leavening agents are fresh, as old baking powder or soda can significantly impact the rise and texture of your tender biscuits. Always check the expiration dates for best results.
Cold Butter and Buttermilk
The use of cold butter and cold buttermilk is perhaps the most critical secret to achieving incredibly flaky biscuits. Cold butter, cut into small pieces, remains solid when mixed with the flour. As the biscuits bake, these tiny pieces of butter melt, releasing steam and creating pockets within the dough, which translate into delicate, separated layers. This process is what gives flaky biscuits their irresistible texture. Similarly, cold buttermilk is essential. Not only does its acidity react with the baking soda for leavening, but its low temperature helps keep the butter cold, further enhancing the flakiness. If your buttermilk isn’t thoroughly chilled, pop it in the freezer for 10-15 minutes before you begin. This attention to temperature is a non-negotiable step for truly outstanding homemade biscuits.
Prepare for Biscuit Making
Before you even think about mixing dough, proper preparation is key to the success of your easy buttery biscuits. This initial setup phase ensures that your kitchen environment and ingredients are optimized for biscuit making, paving the way for a smooth and efficient process. Overlooking these preliminary steps can lead to inconsistent results or unnecessary stress later on. Taking a few moments to set things up correctly allows you to focus on the more delicate aspects of dough handling, which is crucial for achieving that desired flaky texture. Think of it as laying the groundwork for culinary success; a well-prepared start often leads to a deliciously satisfying finish.
Preheat Oven to 450°F
Preheating your oven to a high temperature, specifically 450°F (230°C), is a vital step for achieving tall, flaky biscuits. A hot oven creates a burst of steam from the cold butter within the dough, causing the biscuits to rise rapidly and form those beautiful, distinct layers. If the oven isn’t hot enough, the butter will melt too slowly, resulting in a flatter, denser biscuit. Make sure to give your oven ample time to reach and maintain this temperature; typically, preheating for at least 15-20 minutes after it signals it’s ready is a good practice to ensure the internal temperature is consistent. This high heat is a cornerstone for the texture of these easy buttery biscuits, ensuring they puff up perfectly and bake to a golden-brown finish.
Whisk Dry Ingredients Smoothly
Whisking your dry ingredients smoothly is a simple yet essential step that ensures even distribution of the leavening agents and salt throughout the flour. This process prevents clumps of baking powder or soda, which could lead to an uneven rise or pockets of bitter flavor in your easy buttery biscuits. In a large bowl, combine the all-purpose flour, baking powder, baking soda, and salt. Use a whisk to gently aerate and thoroughly mix them for about 30 seconds to a minute. This step not only distributes the leavening evenly but also lightens the flour, making it easier to incorporate the cold butter. A well-whisked dry mixture sets the stage for uniform texture and consistent flavor in every single biscuit, contributing to that desirable melt-in-your-mouth experience.
Mixing Your Billion Dollar Dough
The stage of mixing your biscuit dough is where the magic truly begins, transforming simple ingredients into the foundation for tender, flaky biscuits. This phase requires a delicate balance of technique and patience, particularly when incorporating the butter and buttermilk. The goal is to create a dough that is just combined, avoiding overmixing at all costs, as this is the primary culprit behind tough biscuits. Think of it as coaxing the ingredients together rather than forcing them. Mastering this step is crucial for the “billion dollar” texture and flavor that makes these easy buttery biscuits so special and memorable. Your efforts here will directly translate into the light, airy consistency you’re aiming for.
Cut Cold Butter into Flour
Cutting cold butter into the flour is arguably the most critical step for achieving flaky biscuits. The butter should be very cold, ideally straight from the freezer for 10-15 minutes before starting, then cut into small cubes (about 1/2-inch). You can use a pastry cutter, two forks, or even your fingertips (working quickly to prevent the butter from warming). The aim is to work the butter into the flour until it resembles coarse crumbs with some pea-sized pieces remaining. These larger pieces are what create those distinct, flaky layers as they melt and release steam during baking. Avoid overworking the mixture; you want to maintain the integrity of the cold butter pieces. This technique is central to the tender, layered structure of your homemade biscuits.
Mix Until Coarse Crumbs Form
Once the cold butter is added, the next step is to mix it into the dry ingredients until it resembles coarse crumbs. This means there should be a mixture of flour-coated butter pieces ranging from small, sandy bits to larger, pea-sized chunks. These varying sizes are ideal for developing a complex, flaky texture. Whether you’re using a pastry blender or your fingers, the key is to work quickly and efficiently to prevent the butter from melting. The warmth from your hands can soften the butter, which diminishes its ability to create steam and separation in the biscuit layers. A good visual cue is to stop when you see these distinct coarse crumbs and pea-sized pieces; overmixing at this stage can lead to a less tender biscuit, so less is definitely more here. For another great recipe, check out crispy parmesan chicken with a rich garlic sauce.
Adding Liquid for Tender Biscuits
The introduction of liquid to your biscuit dough is a delicate dance. It’s the moment when your dry, crumbly mixture begins to transform into a cohesive dough, ready for shaping. However, this step is also where many aspiring biscuit makers falter by adding too much liquid or overmixing. The goal is to hydrate the flour just enough to bring everything together, resulting in tender biscuits rather than tough ones. Precision and a light hand are your best allies here. By following the guidelines for adding cold buttermilk and gently combining, you’ll ensure that the integrity of the butter pieces is maintained and the gluten development is kept to a minimum, preserving the coveted flakiness of your easy buttery biscuits.
Pour in Cold Buttermilk
When it’s time to add the liquid, ensure your buttermilk is as cold as possible. This helps maintain the low temperature of the butter pieces you’ve worked so hard to incorporate. Pour the cold buttermilk gradually into the flour and butter mixture. It’s often best to add about three-quarters of the recommended amount first, then add more sparingly if needed. Different flours can absorb liquid differently, so observe the dough’s consistency. The mixture will look shaggy and a bit dry at first, which is perfectly normal. Avoid the temptation to dump all the liquid in at once, as this can easily lead to an over-hydrated, sticky dough that’s difficult to work with and results in denser biscuits. The buttermilk is key for both moisture and that distinct tangy flavor of tender biscuits.
Gently Combine Until Just Mixed
After adding the buttermilk, the most crucial instruction is to gently combine the ingredients until just mixed. This means using a fork or your hands to lightly bring the dough together, stopping as soon as the dry flour disappears. The dough will look shaggy and still have some dry bits; resist the urge to knead it smoothly at this stage. Overmixing develops gluten, which is what makes bread chewy, but for biscuits, it makes them tough and less flaky. A few gentle stirs are all that’s needed to form a cohesive mass. The less you handle the dough, the more tender your easy buttery biscuits will be. Trust the process; a slightly rustic, shaggy dough is exactly what you want for ultimate flakiness and softness.
Shaping Your Easy Buttery Biscuits
Shaping your easy buttery biscuits is a relatively quick step, but it plays a crucial role in achieving the ideal height and texture. The way you handle and cut the dough can significantly impact the final product, influencing how much they rise and how flaky they become. This phase emphasizes efficiency and minimal contact, building upon the gentle mixing you’ve already performed. While there’s a certain charm to rustic, free-form biscuits, a consistent shape ensures even baking and a more professional appearance. Embrace the quickness and light touch required here, and you’ll be well on your way to perfectly formed, delicious homemade biscuits that are ready for the oven.
Lightly Knead Dough Quickly
After gently combining the wet and dry ingredients, turn the shaggy dough out onto a lightly floured surface. Now, lightly knead the dough quickly, but only a few times – perhaps 5-8 folds at most. This isn’t traditional bread kneading; rather, it’s a method to create additional layers within the dough. Fold the dough over on itself, pat it down, and repeat. This minimal handling helps to develop some structure without overworking the gluten, which would lead to tough biscuits. The key word here is “quickly.” The less time your hands are on the dough, the less the butter will warm up, preserving those critical cold butter pockets essential for flaky biscuits. This technique contributes significantly to the tender, layered interior.
Pat Dough, Cut Biscuit Shapes
Once you’ve given the dough a few light kneads, pat it out evenly to about a 3/4 to 1-inch thickness. Avoid using a rolling pin, as this can compress the dough too much and inhibit its rise. For cutting, use a sharp biscuit cutter, dipping it in flour between cuts to prevent sticking. Crucially, press the cutter straight down without twisting. Twisting seals the edges of the biscuit, which can prevent it from rising properly and creating those desirable flaky layers. Place the cut biscuits on a parchment-lined baking sheet, spaced about an inch apart. Collect the scraps, gently press them together (again, no overworking!), and cut any remaining biscuits. These final few might be slightly less flaky, but they’re still delicious. This careful shaping ensures uniform baking and maximum rise for your easy buttery biscuits.
Baking to Golden Perfection
The baking phase is the culmination of all your careful preparation and gentle dough handling. It’s when the magic truly happens, as the heat of the oven transforms your simple dough into golden, puffy, and incredibly tender biscuits. Understanding the nuances of this stage, from brushing the tops to monitoring for the perfect color, ensures that every biscuit emerges from the oven as a masterpiece. The high oven temperature works quickly, so staying vigilant is key to preventing over-baking and preserving the moist, flaky interior. This final step is where the promise of easy buttery biscuits is fully realized, delivering a delightful aroma and an even more delightful taste.
Brush Tops with Melted Butter
For an extra layer of flavor and that beautiful golden-brown finish, brushing the tops of your easy buttery biscuits with melted butter before they go into the oven is a simple yet impactful step. This thin layer of fat helps promote browning and adds a rich, savory note to the crust. You can use a pastry brush to lightly coat each biscuit. This step isn’t strictly necessary for a good biscuit, but it elevates them from good to truly exceptional, enhancing both their appearance and their melt-in-your-mouth appeal. The slight caramelization of the butter on the surface provides a delicious counterpoint to the soft interior, making these homemade biscuits even more irresistible.
Bake Until Deeply Browned
Baking your easy buttery biscuits until deeply browned is crucial for developing their full flavor and ensuring a crisp, flavorful crust. In your preheated 450°F oven, biscuits typically bake for 12-18 minutes, but oven temperatures can vary, so keep a close eye on them. Don’t be afraid of a dark golden-brown color; this indicates that the exterior has caramelized beautifully, adding depth and complexity to the taste. A pale biscuit, while cooked, often lacks the rich flavor and satisfying texture of one that’s allowed to achieve a deeper hue. Once they reach that perfect golden-brown, remove them from the oven, and the aroma alone will confirm your success in baking these incredible tender biscuits.
How to Serve Warm Biscuits
Serving warm biscuits is arguably the most rewarding part of the entire baking process. Their comforting aroma fills the kitchen, signaling that a delicious treat is at hand. While they are phenomenal on their own, the right accompaniments can elevate the experience even further. The beauty of these easy buttery biscuits lies in their versatility, making them suitable for a wide range of pairings, from sweet breakfast spreads to savory dinner applications. Presenting them warm ensures the butter is still melty and the interior remains soft and tender. Consider the occasion and your personal preference when deciding how to best enjoy your freshly baked, flaky biscuits.
Let Cool Slightly Before Enjoying
As tempting as it is to immediately sink your teeth into a hot biscuit straight from the oven, it’s beneficial to let them cool slightly. Allowing your easy buttery biscuits to rest for about 5-10 minutes on a wire rack allows the internal structure to set and the flavors to meld. This brief cooling period helps prevent them from collapsing or becoming gummy, ensuring a better texture. The residual heat continues to cook them gently, and the steam trapped inside redistributes, resulting in a more uniform and tender crumb. While still delightfully warm, this slight cooling makes for a more enjoyable and satisfying eating experience, showcasing the true flakiness and melt-in-your-mouth quality you’ve worked to achieve.
Delicious with Jam or Gravy
These easy buttery biscuits are incredibly versatile and pair wonderfully with a variety of toppings, catering to both sweet and savory palates. For a classic breakfast or brunch, split them open and slather them with your favorite fruit jam, jelly, or a dollop of honey. The sweetness beautifully complements the rich butteriness of the biscuit. For a heartier, more comforting meal, especially in a Southern-inspired dinner, serve them alongside creamy sausage gravy or a rich mushroom gravy. The tender biscuits are perfect for soaking up every last bit of the flavorful sauce. No matter your preference, these homemade biscuits are guaranteed to be a hit. For more cooking inspiration, check out our Pinterest page and Instagram account.
Pro Tips for Flaky Biscuits
Mastering the art of flaky biscuits involves a few key pro tips that elevate a good recipe to an outstanding one. These aren’t just suggestions; they are fundamental principles that skilled bakers adhere to consistently. Incorporating these techniques into your biscuit-making routine will significantly improve the texture, rise, and overall appeal of your homemade biscuits. They focus on preserving the delicate structure that cold butter and minimal handling create, ensuring that every batch of your easy buttery biscuits is a testament to perfect flakiness and tenderness. Pay close attention to these details, and you’ll be baking like a pro in no time, consistently turning out delicious results.
Handle Dough as Little as Possible
One of the most important pro tips for achieving truly flaky biscuits is to handle the dough as little as possible. Every touch, every fold, every bit of pressure contributes to developing gluten in the flour. While gluten is desirable in chewy breads, it’s the enemy of tender biscuits. Overworking the dough makes it tough and dense, completely diminishing the delicate flakiness you’re aiming for. From mixing the wet and dry ingredients to lightly kneading and cutting, strive for efficiency and a gentle touch. Think of it as merely coaxing the ingredients together, not forcing them. This minimal handling ensures those precious pockets of cold butter remain intact, ready to create steam and layers in the oven, resulting in perfectly light and easy buttery biscuits.
Use Cold Ingredients Always
The mantra for flaky biscuits is simple: use cold ingredients, always. This applies primarily to your butter and buttermilk. When butter is cold and firm, it breaks down into small, distinct pieces within the flour. As these tiny butter pockets hit the hot oven, they melt and release steam, pushing apart the layers of dough and creating that characteristic flaky texture. If your butter is soft or warm, it will blend too readily with the flour, forming a smooth dough rather than a layered one. Similarly, using cold buttermilk helps maintain the overall low temperature of the dough, further preventing the butter from softening prematurely. A few minutes in the freezer for your butter and buttermilk before starting can make all the difference for your easy buttery biscuits.
Make Buttermilk Substitute Easily
Don’t have buttermilk on hand? No problem! This common ingredient can often be the one thing missing from your pantry when a biscuit craving strikes. Fortunately, making a buttermilk substitute is incredibly easy and requires just two common ingredients you likely already possess. This simple trick ensures that you can still proceed with your easy buttery biscuits recipe without an extra trip to the store, making your baking process even more convenient. While it won’t be an exact replica of genuine buttermilk, this homemade version provides the necessary acidity to react with the baking soda, contributing to the rise and tender crumb of your homemade biscuits. It’s a handy kitchen hack worth knowing.
Milk with Lemon Juice or Vinegar
To easily make a buttermilk substitute, you only need regular milk (dairy or non-dairy, though whole milk works best) and an acid, such as lemon juice or white vinegar. For every 1 cup of buttermilk needed, measure out 1 cup of milk and stir in 1 tablespoon of either lemon juice or white vinegar. Let the mixture sit for about 5-10 minutes at room temperature. During this time, the milk will curdle slightly, developing a thicker consistency and a tangy flavor, mimicking real buttermilk. This acidic environment is crucial for reacting with the baking soda in your recipe, helping your easy buttery biscuits rise properly and achieve that desirable tenderness. This simple substitution ensures you’re never far from delicious homemade biscuits.
Enjoying Your Billion Dollar Biscuits
Once your “billion dollar” biscuits are baked to golden perfection, the final step is to savor them. These easy buttery biscuits are best enjoyed warm, fresh from the oven, when their flaky layers and tender interior are at their peak. However, it’s also practical to consider how to store any leftovers to preserve their deliciousness for as long as possible. A little planning goes a long way in ensuring that every bite remains as delightful as the first. Whether you’re planning to devour them all immediately or save some for later, understanding proper storage will help maintain their quality and flavor, allowing you to extend the enjoyment of your homemade biscuits.
Store Leftovers Airtight
To keep any leftover easy buttery biscuits fresh and delicious, proper storage is essential. Once they have cooled completely to room temperature, place them in an airtight container or a resealable plastic bag. This prevents them from drying out and helps maintain their tender interior. Storing them on the counter at room temperature is fine for a day or two. If you need to keep them longer, you can store them in the refrigerator for up to a week. For longer storage, biscuits can be frozen for up to 2-3 months. To reheat, a quick warm-up in a toaster oven or microwave will bring them back close to their freshly baked glory, especially if brushed with a little extra butter.
Best Served Within Two Days
While proper storage can extend their shelf life, these easy buttery biscuits are truly at their absolute best when served within two days of baking. The texture is flakiest, the interior is most tender, and the buttery flavor is most pronounced during this period. Beyond two days, they tend to lose some of their moisture and delicate structure, becoming a bit drier. If you do find yourself with biscuits past their prime, they can still be delicious when crumbled over savory dishes, used as a topping for casseroles, or transformed into bread pudding. For the ultimate enjoyment of these homemade biscuits, prioritize consuming them fresh, celebrating their melt-in-your-mouth perfection in their prime. Learn more about traditional biscuits on Wikipedia.