
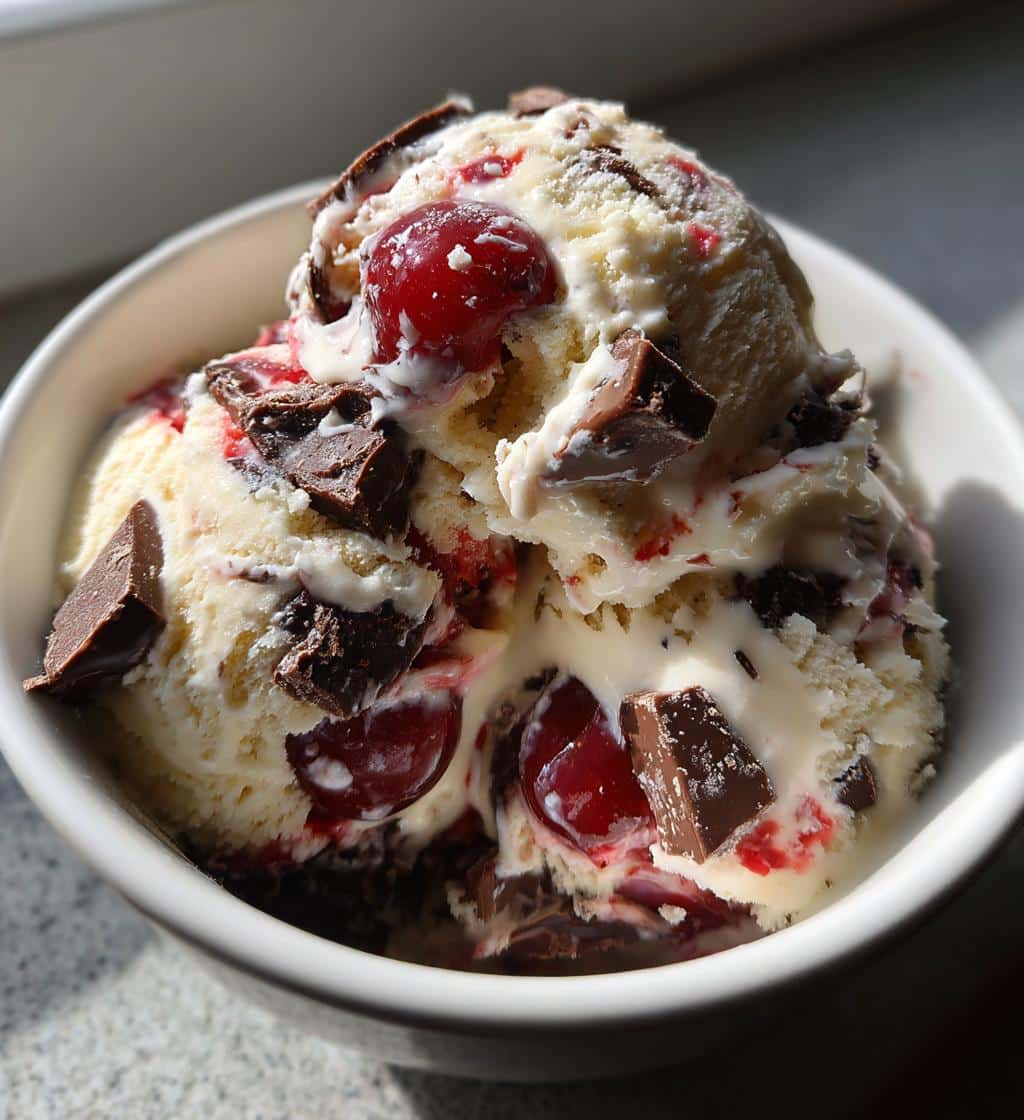
Brandied Cherry Chocolate Chunk Ice Cream offers a decadent frozen delight for any occasion. This homemade recipe combines the rich flavors of sweet cherries and dark chocolate chunks within a velvety, creamy base. Learn how to easily prepare this impressive dessert, from gathering quality ingredients to churning perfection.
Key Takeaways
- Create Brandied Cherry Chocolate Chunk Ice Cream using simple, quality ingredients.
- Follow clear steps for mixing the creamy base, adding fruit and chocolate, and churning.
- Proper freezing and serving techniques enhance the dessert’s rich flavor and texture.
- Understand prep time, yield, nutrition, and helpful tips for homemade perfection.
This ice cream is truly special. It blends fruit with chocolate. The creamy base melts perfectly. A homemade treat always delights. Enjoy every delicious spoonful.
Brandied Cherry Chocolate Chunk Ice Cream Overview
Dive into the world of homemade frozen desserts with our exceptional Brandied Cherry Chocolate Chunk Ice Cream recipe. This isn’t just any ordinary scoop; it’s a meticulously crafted treat designed to tantalize your taste buds with its sophisticated blend of flavors. The richness of dark chocolate perfectly complements the sweet, slightly boozy notes of brandied cherries, all suspended in a wonderfully creamy, smooth ice cream base. It’s a dessert that speaks of celebration and comfort, making it a stellar choice for special gatherings or simply as an indulgent evening treat. Preparing your own ice cream at home offers unparalleled freshness and the ability to customize ingredients to your exact preference, ensuring a superior result every time.
What makes this dessert special
The magic of this dessert lies in its harmonious contrast and luxurious texture. The brandied cherries provide a burst of fruity sweetness with a subtle alcoholic kick, which pairs exquisitely with the deep, sometimes bitter, notes of high-quality chocolate chunks. This combination elevates the classic cherry chocolate pairing to an adult-friendly indulgence. Unlike store-bought varieties, homemade ice cream allows for absolute control over the quality of ingredients, resulting in a purer, more intense flavor profile. The richness of the cream and milk base ensures a velvety mouthfeel that melts beautifully, making each spoonful a truly memorable experience. It’s a versatile dessert, perfect for any season, bringing a touch of gourmet elegance to your table.
Quick look at recipe steps
Crafting this frozen delight involves straightforward steps, making it accessible even for novice ice cream makers. The process begins with gathering your premium ingredients, ensuring everything is ready. Next, you’ll prepare the rich, creamy base by whisking together the milk, cream, and sugar, infusing it with vanilla for depth. The stars of the show, the brandied cherries and chocolate chunks, are then gently folded into the chilled base. The mixture is then churned in an ice cream maker until it reaches a soft-serve consistency, followed by a crucial freezing period to firm it up. Finally, it’s ready to be served and savored. This simple yet rewarding process transforms basic ingredients into an extraordinary homemade dessert that will impress everyone.
Gathering Ingredients for This Ice Cream
The foundation of any exceptional dessert lies in the quality of its ingredients, and our Brandied Cherry Chocolate Chunk Ice Cream is no exception. Taking the time to select fresh, high-quality components will significantly impact the final flavor and texture of your homemade treat. From the dairy base to the fruity and chocolatey inclusions, each element plays a vital role in creating this decadent frozen delight. Ensuring your ingredients are at their best is the first step toward achieving a truly gourmet experience.
Heavy cream and whole milk
The cornerstone of a rich, creamy ice cream is a robust dairy base. We opt for a combination of heavy cream and whole milk to achieve the perfect balance of richness and smooth texture. Heavy cream provides the necessary fat content for a luscious, less icy consistency, while whole milk contributes to the overall liquid volume and ensures the mixture isn’t overwhelmingly rich. Using full-fat dairy products is crucial here; skim or low-fat alternatives will result in a icier, less satisfying ice cream. Always choose fresh, high-quality dairy for the best flavor profile, as it forms the canvas for all other ingredients.
Sugar and vanilla extract
Granulated sugar is essential for sweetness and also plays a role in the ice cream’s texture, helping to prevent excessive ice crystal formation. We use a balanced amount to complement the natural sweetness of the cherries without making the ice cream cloyingly sweet. For flavoring, pure vanilla extract is non-negotiable. Its warm, aromatic notes enhance all other flavors in the ice cream, providing a depth that a synthetic vanilla essence simply cannot replicate. Aim for a good quality pure vanilla extract for the most impactful and authentic flavor, as it really makes a difference in homemade desserts like this and even simpler ones such as Vanilla Bean Creme Brulee Cheesecake Cupcakes.
Cherries and chocolate chunks
The stars of this ice cream are undeniably the cherries and chocolate. For the cherries, we recommend using pre-brandied cherries or making your own by soaking pitted fresh or frozen sweet cherries in a good quality brandy for at least a few hours, or even overnight. This infuses them with a wonderful aroma and a delicate boozy kick that sets this ice cream apart. If using fresh cherries, pit them carefully; if frozen, thaw and drain them thoroughly before branding. For the chocolate, opt for good quality dark chocolate chunks (around 60-70% cacao) or chop a dark chocolate bar into irregular pieces. The variation in size adds textural interest, and the slight bitterness of dark chocolate beautifully cuts through the sweetness of the cherries and cream, providing a sophisticated contrast.
Mixing the Cream and Sugar Base
Creating the perfect ice cream texture begins with a properly prepared base. This foundational step ensures that your Brandied Cherry Chocolate Chunk Ice Cream will be smooth, creamy, and free of grainy sugar crystals. The process is simple but requires attention to detail to ensure all components are thoroughly dissolved and well-integrated before chilling. This careful preparation sets the stage for a truly delightful frozen treat that will impress with its professional-grade consistency.
Whisking milk, cream, sugar
In a large mixing bowl, combine the whole milk, heavy cream, and granulated sugar. It’s important to whisk these ingredients together vigorously until the sugar is completely dissolved. You can test this by rubbing a small amount of the mixture between your fingers; if it feels smooth with no gritty sugar particles, you’ve done it right. This initial whisking helps to emulsify the fats in the cream and milk, creating a homogenous mixture that will churn into a beautifully smooth ice cream. Some recipes suggest heating the base to dissolve sugar, but for this particular recipe, a thorough cold whisking works perfectly, preserving the fresh dairy flavor. This base also forms the start for many other creamy concoctions, even savory ones.
Adding vanilla for flavor
Once your dairy and sugar mixture is smooth, it’s time to incorporate the pure vanilla extract. Gently stir the vanilla into the base, ensuring it is evenly distributed. Vanilla is a crucial flavor enhancer; it doesn’t just add its own distinct aroma but also amplifies the natural sweetness of the dairy and will beautifully complement the forthcoming cherry and chocolate flavors. Avoid over-mixing once the vanilla is added to prevent incorporating too much air before churning. After adding the vanilla, cover the bowl and refrigerate the mixture for at least 4 hours, or preferably overnight. Chilling the base thoroughly before churning is vital for achieving the best texture, as it allows the fats to properly temper and prevents the formation of large ice crystals during the churning process, leading to a much smoother, creamier ice cream, much like achieving the perfect texture for Peanut Butter Brownie Swirl Cookies.
Adding Cherries and Chocolate Chunks
Once your creamy base is thoroughly chilled and ready, it’s time to introduce the star components: the brandied cherries and decadent chocolate chunks. This step is where the Brandied Cherry Chocolate Chunk Ice Cream truly begins to take its signature form, offering bursts of flavor and delightful textures in every bite. Proper preparation and gentle incorporation of these mix-ins are key to ensuring they are evenly distributed throughout your homemade frozen delight, guaranteeing a consistent and enjoyable experience.
Preparing brandied cherries
If you’re using store-bought brandied cherries, ensure they are well-drained of any excess liquid. Too much liquid can introduce ice crystals into your ice cream. If you prepared your own brandied cherries, gently strain them to remove the brandy, but don’t discard the liquid entirely – it can be used for cocktails or drizzled over the finished ice cream. Pat the cherries dry with a paper towel to remove any residual moisture. You can leave them whole if they are small, or roughly chop larger cherries into halves or quarters. The goal is to have bite-sized pieces that distribute well and provide a pleasant textural contrast without overwhelming the ice cream base. This preparation step is crucial for the overall quality and texture of your finished product, just as choosing the right cheese makes a big difference in a Cheesy Chicken and Rice Casserole.
Stirring in chocolate pieces
Once the brandied cherries are prepared, it’s time to add your chosen chocolate chunks. For the best experience, use high-quality dark chocolate (60-70% cocoa content) chopped into varying sizes. This variety in chunk size offers different sensations with each spoonful – from small shavings that melt quickly to larger pieces that provide a satisfying snap. Gently fold the prepared cherries and chocolate chunks into your chilled ice cream base. It’s important to do this carefully to ensure even distribution without overworking the mixture. The goal is to have a generous amount of both cherries and chocolate in every scoop, creating a truly harmonious and indulgent flavor profile. This step should be done just before churning or during the final minutes of the churning process to prevent the heavier mix-ins from sinking to the bottom.
Churning Your Homemade Ice Cream Delight
The churning process is where your chilled liquid base transforms into the creamy, semi-solid texture we associate with ice cream. This crucial step incorporates air, breaks down ice crystals, and freezes the mixture simultaneously, creating that desirable smooth mouthfeel. Proper churning is essential for preventing an icy, grainy result and achieving the luxurious consistency expected of a gourmet Brandied Cherry Chocolate Chunk Ice Cream. Dedicate your attention to this stage for optimal results.
Using an ice cream maker
An ice cream maker is an indispensable tool for achieving a perfectly smooth and creamy texture. There are various types, including compressor models, freezer-bowl models, and rock-salt models, each with its own advantages. For the Brandied Cherry Chocolate Chunk Ice Cream, ensure your ice cream maker’s bowl is sufficiently pre-chilled (for freezer-bowl types, this means freezing it for at least 12-24 hours). A well-chilled bowl is critical for efficient churning and prevents the mixture from taking too long to freeze, which can lead to larger ice crystals. Pour your cold, prepared ice cream base, along with the brandied cherries and chocolate chunks, directly into the frozen churn bowl. The colder the base, the faster and more efficiently it will churn, resulting in a superior finished product.
Following manufacturer instructions
While the general principle of ice cream making is similar across devices, each ice cream maker has specific operating instructions regarding capacity, churning time, and assembly. Always refer to your particular model’s manual for precise guidelines. Generally, you will churn the mixture for about 20-30 minutes, or until it reaches the consistency of soft-serve ice cream. During this process, the machine continuously agitates and freezes the mixture, preventing the formation of large ice crystals and incorporating air for a light, fluffy texture. Towards the end of the churning cycle (usually the last 5 minutes), you might want to add any larger, more delicate inclusions like additional chocolate shavings or whole brandied cherries if you prefer them to retain more shape and texture. Monitoring the consistency is key; you want it firm enough to hold its shape but still pliable, ensuring it’s ready for the final freezing stage.
Freezing the Ice Cream Delight Properly
After churning, your Brandied Cherry Chocolate Chunk Ice Cream will have the consistency of soft-serve, which is delicious but not quite ready for scooping. The next vital step is the “ripening” or final freezing phase. This period allows the ice cream to firm up completely, develop its full flavor, and achieve the perfect scoopable texture. Proper freezing techniques are crucial to prevent ice crystal formation and ensure your homemade dessert is as smooth and creamy as possible, guaranteeing a truly decadent experience for you and your guests.
Transferring to a container
Once your ice cream has reached a soft-serve consistency in the churner, carefully transfer it to an airtight freezer-safe container. Glass containers, metal loaf pans, or specialized ice cream containers work best, as they help maintain a consistent temperature. Avoid plastic containers that are too thin, as they might not insulate as effectively. When transferring, gently spread the ice cream evenly to eliminate any large air pockets, which can contribute to iciness. If you have any additional mix-ins, such as a swirl of cherry syrup or more chocolate shavings, this is the perfect time to layer them in for visual appeal and an extra burst of flavor. This step is also a great opportunity to get a sneak peek taste of your hard work!
Chilling for at least four hours
After transferring, cover the container tightly with a lid or plastic wrap, pressing the wrap directly onto the surface of the ice cream to minimize exposure to air. This prevents freezer burn and the formation of ice crystals on top. Place the container in the coldest part of your freezer for at least four hours. For optimal firmness and flavor development, chilling overnight is even better. During this final freezing stage, the ice cream hardens to a scoopable consistency, and the flavors have time to meld and intensify. Resist the urge to open the freezer frequently, as temperature fluctuations can compromise the texture. Proper chilling is the secret to a professional-grade frozen dessert, making it as satisfying as a perfectly baked Snickerdoodle Cobbler.
Serving Your Brandied Cherry Chocolate Chunk Ice Cream
After the anticipation of preparation, churning, and freezing, the moment has finally arrived to enjoy your homemade Brandied Cherry Chocolate Chunk Ice Cream. Serving it correctly can make all the difference in appreciating its rich flavor and luxurious texture. While tempting to dig in immediately, a few simple steps ensure you get the perfect scoop and truly savor every delicious bite. This final stage is about presentation and enhancing the overall enjoyment of your culinary creation.
Allow softening before serving
Directly from the freezer, homemade ice cream can be quite hard. To achieve the ideal scoopable consistency and allow the flavors to truly shine, it’s best to let your Brandied Cherry Chocolate Chunk Ice Cream soften slightly before serving. Remove the container from the freezer and let it sit on the counter for about 5-15 minutes, depending on the ambient temperature and the hardness of your ice cream. This brief period allows the ice cream to warm just enough to become pliable, making it easier to scoop and providing a smoother, creamier mouthfeel. A serving spoon or ice cream scoop dipped in hot water before each scoop will also help glide through the ice cream effortlessly.
Best ways to enjoy
Your Brandied Cherry Chocolate Chunk Ice Cream is a masterpiece on its own, but there are numerous ways to enhance the serving experience. Serve it in elegant bowls or cones, perhaps garnished with an extra brandied cherry or a sprinkle of finely grated dark chocolate. For an extra touch of indulgence, consider drizzling a little melted chocolate sauce or a reduction of the leftover cherry brandy over each serving. It also makes a fantastic accompaniment to other desserts, such as a warm brownie, a slice of pound cake, or a simple fruit tart. Share your creative serving ideas and finished treats on platforms like Pinterest, where fellow dessert enthusiasts can find inspiration. The joy of this homemade dessert is in its versatility and the pleasure it brings to every palate.
Prep Time and Total Recipe Time
Understanding the time commitment for any recipe is key to successful meal planning and ensuring a stress-free cooking experience. Our Brandied Cherry Chocolate Chunk Ice Cream, while requiring some waiting, boasts a surprisingly quick active preparation time. This makes it an ideal project for a weekend afternoon, allowing ample time for chilling and freezing without demanding hours of hands-on work. Breaking down the time into active “prep” and passive “waiting” helps manage expectations and schedules.
Quick 20-minute preparation
One of the most appealing aspects of this decadent ice cream recipe is its minimal active preparation time. You’ll spend approximately 20 minutes hands-on, which includes gathering all your ingredients, whisking together the cream, milk, and sugar base, adding the vanilla extract, and preparing the brandied cherries and chocolate chunks. This quick prep means you can fit the initial stages of this recipe into even a busy schedule. The efficiency of this step allows you to focus on quality ingredients without feeling rushed, setting the foundation for a truly special dessert. For those who love efficient recipes, this dessert is a winner.
Total waiting and chilling time
While the active prep is brief, the total recipe time for Brandied Cherry Chocolate Chunk Ice Cream involves significant waiting for chilling and freezing. The ice cream base needs to be refrigerated for a minimum of 4 hours, or ideally overnight, to ensure it’s thoroughly chilled before churning. This chilling is crucial for achieving a smooth, creamy texture. After churning (which takes about 20-30 minutes), the ice cream then requires a final freezing period in the freezer for at least another 4 hours to harden to a scoopable consistency. For the best results, we recommend freezing overnight. Therefore, while active prep is quick, the overall process from start to finish spans at least 8-10 hours, largely passive, making it a perfect make-ahead dessert for entertaining or a weekend project.
Nutrition Facts for Each Serving
While Brandied Cherry Chocolate Chunk Ice Cream is an indulgent treat, it’s always helpful to have a general understanding of its nutritional content. Please note that these figures are approximate and can vary based on the specific brands of ingredients used, the exact measurements, and the size of your chocolate chunks and cherries. This overview provides a typical snapshot for a standard serving size, helping you enjoy this delicious dessert mindfully as part of a balanced diet.
Calories, fat, cholesterol
A standard half-cup (about 100g) serving of Brandied Cherry Chocolate Chunk Ice Cream typically contains around 280-350 calories. This is primarily due to the heavy cream, whole milk, and sugar content. Fat content generally ranges from 18-25 grams per serving, with saturated fat being a significant portion of that due to dairy and chocolate. Cholesterol levels can be approximately 70-90 mg per serving. These figures highlight that this is a rich, energy-dense dessert, best enjoyed in moderation. For those conscious of fat intake, consider using slightly less chocolate or reducing the portion size.
Carbohydrates, sugar, protein
In terms of carbohydrates, a half-cup serving usually provides about 25-35 grams, a large portion of which comes from sugar. The total sugar content, including natural sugars from milk and cherries, as well as added granulated sugar, typically falls between 20-30 grams per serving. Protein content is relatively modest, averaging around 3-5 grams per serving, primarily from the dairy. The fiber content will be minimal, mainly from the cherries and chocolate. While these numbers confirm it’s a sweet treat, the natural antioxidants from dark chocolate and cherries offer a small nutritional bonus. Enjoy this decadent dessert knowing its general components and plan accordingly for a balanced intake.
Recipe Yield and Serving Suggestions
Knowing the precise yield of a recipe is crucial for planning portions and storage, especially when creating a homemade frozen delight like our Brandied Cherry Chocolate Chunk Ice Cream. This recipe is designed to produce a generous amount, perfect for family enjoyment or for sharing with friends at a gathering. Understanding the yield also helps in determining appropriate serving sizes, ensuring everyone gets a satisfying taste of this exceptional dessert.
Makes one quart of ice cream
This Brandied Cherry Chocolate Chunk Ice Cream recipe is calibrated to produce approximately one quart (about 950 ml) of rich, creamy ice cream. This volume is a standard yield for most home ice cream makers and provides a substantial amount for multiple servings. One quart is typically enough to serve 6 to 8 people generously, assuming standard portion sizes. Knowing this yield allows you to plan if you need to double the recipe for a larger crowd or if you’re making it just for a few to enjoy over several days. The robust flavor also means a little goes a long way, making each scoop a satisfying indulgence.
Standard half-cup serving size
For nutritional and enjoyment purposes, a standard serving size for ice cream is generally considered to be half a cup (approximately 100-110 grams). This portion size provides a delightful taste of the Brandied Cherry Chocolate Chunk Ice Cream without overindulging. While it’s tempting to scoop more, a half-cup allows you to fully appreciate the complex flavors of the brandied cherries and rich chocolate chunks without feeling overwhelmed. It also ensures that the one-quart yield can stretch to serve more people, making it an excellent dessert for sharing. Remember that serving sizes can be adjusted based on personal preference and how you choose to enjoy your homemade ice cream.
Helpful Tips for Perfect Ice Cream
Crafting homemade ice cream is a rewarding culinary adventure, and with a few insider tips, you can elevate your Brandied Cherry Chocolate Chunk Ice Cream from good to absolutely extraordinary. These pointers focus on ingredient selection and technique refinement, ensuring that every batch you make achieves the highest standards of flavor and texture. Pay close attention to these details, and you’ll consistently create a dessert that rivals any gourmet ice cream parlor.
Choosing your brandied cherries
The quality of your brandied cherries significantly impacts the final taste. If you’re not making them from scratch, opt for high-quality jarred brandied cherries from a reputable brand. Look for those packed in their own syrup, not overly sweet, and with a good cherry flavor. If you choose to brandy your own, select ripe, sweet cherries (such as Bing or Rainier) and soak them in a good quality fruit brandy (like kirsch) for at least 24 hours. Ensure they are thoroughly drained before adding to the ice cream base to prevent excess liquid from causing ice crystals. Patting them dry gently will help. The subtle boozy notes are what make this dessert truly special, so don’t skimp on quality here.
Achieving smoother texture
Several factors contribute to a super-smooth ice cream texture. First, ensure your base is exceptionally cold before churning; chilling it overnight is ideal. The colder the base, the faster it freezes during churning, which prevents large ice crystals from forming. Second, consider adding a tablespoon of vodka or a small amount of liquid glucose to your base. Alcohol lowers the freezing point, resulting in a softer, creamier texture that’s easier to scoop straight from the freezer. Liquid glucose (or corn syrup) acts as an anti-crystallization agent. Third, don’t overfill your ice cream maker, as it needs space for the mixture to expand as air is incorporated. Finally, store your finished ice cream in an airtight container, pressing plastic wrap directly onto the surface to minimize air exposure and freezer burn. These steps will ensure your ice cream is wonderfully creamy, much like the rich texture in a Quick Italian Cream Cake.
Enjoying This Brandied Cherry Ice Cream
The final and most delightful step of any homemade dessert is, of course, the enjoyment! Your Brandied Cherry Chocolate Chunk Ice Cream is more than just a sweet treat; it’s a testament to your culinary creativity and the simple pleasures of crafting something truly special from scratch. This section celebrates the joy of sharing and savoring your hard work, highlighting why this particular dessert is perfect for a multitude of occasions and how it embodies the pure satisfaction of homemade goodness.
Perfect for any occasion
The sophisticated flavor profile of Brandied Cherry Chocolate Chunk Ice Cream makes it incredibly versatile, suitable for a wide range of events. It’s elegant enough for a formal dinner party, yet comforting enough for a casual family gathering. Imagine serving scoops at a summer barbecue, bringing a refreshing chill to the warmth, or as a decadent finish to a holiday meal. Its rich, deep flavors also make it a fantastic treat for cozy evenings in. Whether celebrating a milestone or simply indulging a craving, this ice cream fits the bill perfectly. It’s also an excellent choice for a potluck dessert, sure to be a crowd-pleaser and spark conversation.
The joy of homemade dessert
There’s an incomparable satisfaction that comes with creating a dessert from scratch. From selecting each ingredient to watching the ice cream churn and finally tasting the fruits of your labor, the entire process is a rewarding experience. Homemade desserts like this Brandied Cherry Chocolate Chunk Ice Cream not only taste superior to store-bought options but also carry the warmth and care of your personal touch. It’s a delightful way to treat yourself and your loved ones, making memories around shared food. For more delightful culinary creations and inspiration, follow us on Instagram, where we celebrate the art of cooking and the joy of homemade meals. Embrace the joy of making, sharing, and savoring this truly special frozen delight!