
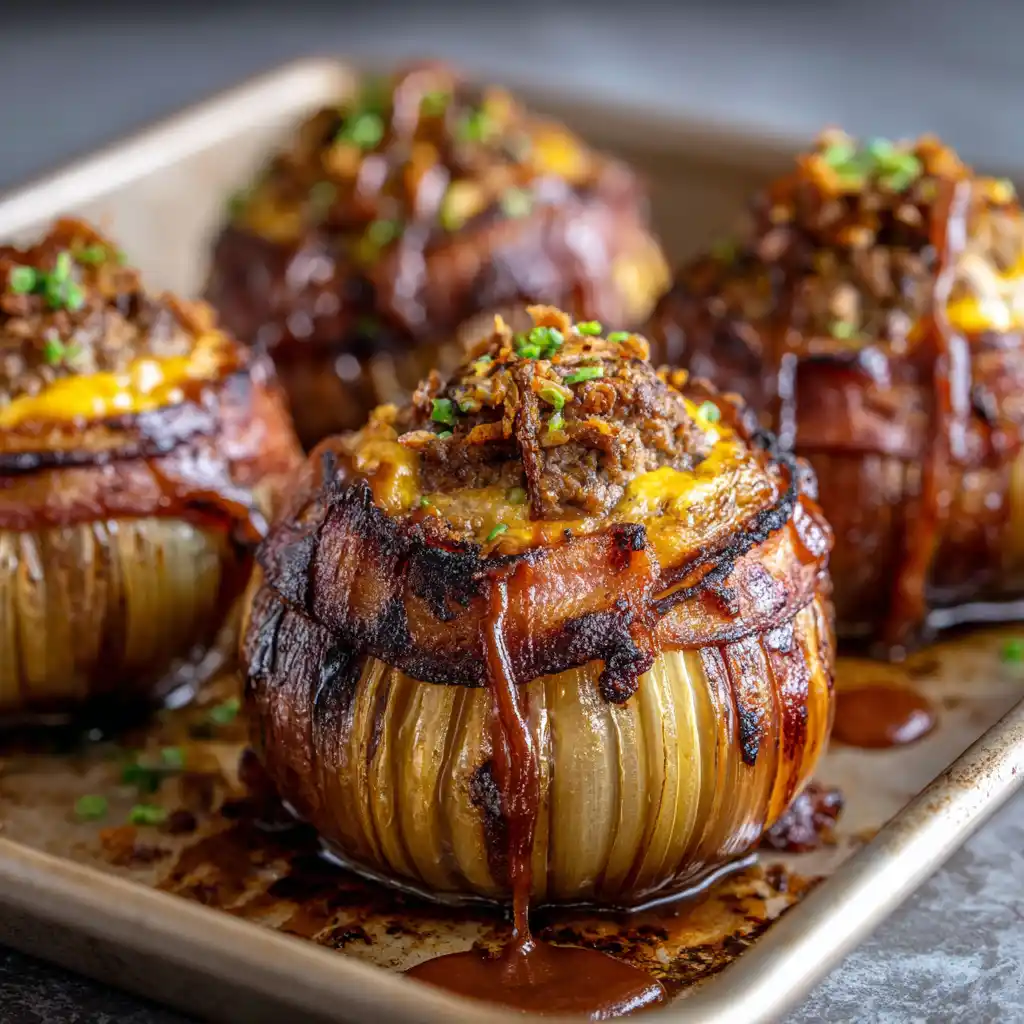
Best Bacon Cheeseburger Bombs are a truly irresistible treat, perfect for any gathering or game day. Imagine savory beef bacon wrapped around a creamy, cheesy onion filling, baked to crispy perfection. This easy recipe brings together classic burger flavors into a convenient, delicious appetizer or main course. Get ready to impress!
Key Takeaways
- Use thick-cut beef bacon for optimal crispness and structural integrity.
- Caramelize onions slowly to develop deep, sweet flavor for the filling.
- Ensure cream cheese is at room temperature for a perfectly smooth mixture.
- Bake at 375°F (190°C), flipping halfway for even golden-brown results.
- These bombs are excellent for making ahead or freezing for future enjoyment.
These savory bombs redefine party food. Each bite offers rich flavors. They are surprisingly simple to make. Guests will surely ask for more. Prepare to be the cooking hero.
Make Best Bacon Cheeseburger Bombs
Making the best bacon cheeseburger bombs involves a combination of high-quality ingredients and careful preparation, leading to an unforgettable appetizer or main dish. This popular recipe expertly transforms classic burger components—savory beef, rich cheese, and sweet onion—and encases them in irresistible crispy beef bacon. The result is a portable, incredibly flavorful bite that promises to be a crowd-pleaser at any event. Whether you’re preparing for a lively game day, a casual family gathering, or simply craving a satisfying snack, these homemade bacon bombs are guaranteed to be a hit. The process itself is surprisingly straightforward, focusing on building layers of taste and texture that culminate in a truly memorable dish. From meticulously selecting the right cut of beef bacon to perfecting the rich, creamy onion filling, every step contributes significantly to the overall deliciousness. We will guide you through each stage, ensuring your culinary efforts yield consistently perfect results. These bombs are fantastic as a main course or a superb appetizer, offering a versatile and delightful addition to any menu. For another hearty, crowd-pleasing option, consider our chicken bacon ranch tater tot casserole. Get ready to master this delightful creation!
Gather Ingredients for Tasty Bombs
Success in making delicious bacon cheeseburger bombs begins with assembling the right ingredients. High-quality components ensure the best flavor and texture in your final product. Take a moment to check your pantry and refrigerator, ensuring you have everything readily available before you start. This foundational step is crucial for a smooth cooking process and ultimately, for bombs that truly impress. Pay attention to the freshness of your produce and the quality of your meats and cheeses to truly elevate the taste. For instance, selecting premium beef bacon can make a noticeable difference in crispiness and flavor profile. Having all your ingredients prepped and measured makes the entire cooking experience more enjoyable and efficient.
Main Beef Bacon and Cheese Needs
- Beef Bacon: Opt for thick-cut beef bacon. Its robustness holds the filling better and crisps up beautifully, adding a satisfying texture. About 12-16 slices will be needed for a standard batch.
- Ground Beef: Lean ground beef (80/20) works best, providing flavor without excessive grease. You’ll need approximately 1 pound.
- Cream Cheese: Full-fat cream cheese, softened to room temperature, is key for a smooth, creamy filling. One 8-ounce block is usually sufficient.
- Cheddar Cheese: Shredded sharp cheddar cheese adds a classic, tangy flavor. About 1 cup is ideal. You can also mix in some mozzarella for stretchiness.
Essential Spices and Fresh Onion
- Onion: One medium yellow onion, finely diced, will form the sweet, caramelized base of your filling.
- Garlic Powder: A teaspoon or two enhances the savory profile.
- Smoked Paprika: Half a teaspoon adds depth and a subtle smoky note.
- Salt and Black Pepper: To taste, these are fundamental for balancing all the flavors.
- Optional: A dash of Worcestershire sauce for umami, or a pinch of red pepper flakes for a slight kick.
Crafting the Creamy Onion Filling
The heart of these bacon cheeseburger bombs lies in their rich and flavorful creamy onion filling. This component provides the moisture, seasoning, and delightful cheesy goodness that balances the crispy beef bacon. Taking your time with this step ensures a well-developed flavor profile, making each bite truly indulgent. The key is to build flavor by properly caramelizing the onions and then smoothly incorporating the cheeses and spices. This preparation ensures that the filling is not only delicious but also holds together well when wrapped in bacon, preventing any melty cheese escapes during baking. A well-crafted filling is what transforms a simple bacon-wrapped item into a gourmet experience, making it a truly popular choice for hearty meals or appetizers.
Sautéing Onions for Sweetness
Begin by finely dicing your yellow onion. In a skillet over medium-low heat, add a tablespoon of olive oil or butter. Sauté the diced onions slowly and patiently. This process isn’t about browning them quickly; it’s about drawing out their natural sugars and allowing them to soften and turn translucent, then golden-brown. This caramelization can take 10-15 minutes, or even longer for deeper sweetness. Stir occasionally to prevent burning. The sweet, mellow flavor of properly caramelized onions is indispensable for the creamy onion filling, adding significant depth to the bomb’s overall taste. Don’t rush this step—it truly impacts the final deliciousness.
Mixing Cheeses and Spices
Once your onions are beautifully caramelized and slightly cooled, transfer them to a mixing bowl. Add the softened cream cheese, shredded cheddar, garlic powder, smoked paprika, salt, and black pepper. Using a spoon or spatula, thoroughly mix all the ingredients until everything is well combined and forms a uniform, creamy mixture. Ensure there are no lumps of cream cheese. Taste the mixture and adjust seasonings as needed; this is your chance to make it perfect! If you prefer a little more kick, now is the time to fold in a pinch of red pepper flakes. This creamy filling will be the delicious core of your bacon cheeseburger bombs, ready to be encased in savory beef bacon.
Wrapping Beef Bacon Around Filling
The art of wrapping is crucial for ensuring your bacon cheeseburger bombs hold their shape and cook evenly, resulting in that irresistible crispy exterior. This step transforms the separate components into a cohesive, delicious package. Careful handling here prevents the creamy filling from oozing out during baking, guaranteeing each bomb retains its juicy, cheesy center. The goal is to achieve a snug wrap that fully encloses the filling and ground beef mixture, allowing the beef bacon to crisp up beautifully around it. This is where your homemade bacon bombs truly come to life, evolving from a simple idea into a tangible, mouth-watering reality.
Laying Out Beef Bacon Slices
Prepare your workspace by laying out sheets of parchment paper or a clean cutting board. Take one slice of thick-cut beef bacon and lay it flat. For a consistent shape, you might want to slightly stretch the bacon slice width-wise, though this is optional depending on the bacon’s thickness. On one end of the bacon slice, place a small, flattened patty of seasoned ground beef (about 1-1.5 ounces). This will serve as an outer layer for the creamy filling. Ensure the beef patty isn’t too thick, allowing for even cooking. The beef bacon should extend slightly beyond the beef patty to facilitate a full wrap, creating a sturdy shell for your delicious bomb.
Securing Your Bacon Bomb Shape
Once the beef patty is on the bacon, spoon a generous amount of your creamy onion filling onto the center of the ground beef. You’ll want about a tablespoon or so. Now, carefully fold the beef patty and bacon around the filling, shaping it into a compact ball. Ensure all edges of the beef and filling are tucked in. Then, wrap the remaining beef bacon tightly around this ball, spiraling it to cover the entire surface. If necessary, use a toothpick to secure the end of the bacon slice, especially if it doesn’t stay put. This meticulous wrapping prevents the filling from escaping during baking and ensures a perfectly spherical, crispy bacon bomb. Place the finished bomb seam-side down on a baking sheet, ready for the oven.
Baking Your Bacon Bombs Perfectly
Baking is the final step where the magic truly happens, transforming your carefully assembled bacon cheeseburger bombs into golden, crispy delights. Achieving perfect bacon cheeseburger bombs involves precise oven temperature and monitoring to ensure the beef is cooked through, the cheese is melty, and the beef bacon achieves that irresistible crispness. Over-baking can dry out the filling, while under-baking leaves the bacon flabby. This section focuses on the essential baking instructions that will guarantee a perfectly cooked, mouth-watering result. Proper baking contributes significantly to the overall enjoyment, ensuring every bite is a harmonious blend of textures and flavors. These careful baking techniques are key to your success.
Oven Temperature and Time
Preheat your oven to 375°F (190°C). This temperature is ideal for cooking the ground beef thoroughly while allowing the beef bacon to crisp up without burning too quickly. Arrange your secured bacon bombs on a baking sheet lined with parchment paper or a wire rack set over a baking sheet to allow fat to drip away, promoting crispiness. Ensure there’s enough space between each bomb for even air circulation. Bake for an initial 20-25 minutes. The bacon will begin to render its fat and turn golden brown. The internal temperature of the beef should reach at least 160°F (71°C) for safety. A meat thermometer is highly recommended for accuracy, guaranteeing your cheesy beef bacon bombs are cooked perfectly.
Flipping for Even Crispiness
After the initial baking period (20-25 minutes), carefully remove the baking sheet from the oven. Using tongs, gently flip each bacon bomb to its other side. This critical step ensures that both sides of the beef bacon crisp up evenly, creating a uniform, golden-brown crust all around. Return the baking sheet to the oven and continue baking for another 15-20 minutes, or until the bacon is deeply golden and crispy, and the internal temperature of the ground beef is confirmed. Keep a close eye on them during this second phase, as bacon can go from perfectly crispy to burnt very quickly. The goal is a consistently browned, irresistible exterior on every single bacon bomb.
Serving Hot and Delicious Bacon Bombs
Once your bacon cheeseburger bombs emerge from the oven, glistening and perfectly crispy, the anticipation for enjoying them is at its peak. Serving them hot ensures the cheese inside is wonderfully gooey and the beef bacon maintains its satisfying crunch. These delicious bombs are designed to be enjoyed fresh, right out of the oven, allowing all the integrated flavors and textures to shine. Proper serving also involves a brief resting period and considering how to best present them, whether as casual party food or a more structured appetizer. Remember, the presentation can elevate the entire dining experience, making your culinary effort even more rewarding.
Cooling Before Enjoyment
While it’s tempting to bite into a bacon bomb immediately after baking, it’s important to let them cool slightly for about 5-10 minutes. This resting period allows the internal temperature to equalize and the molten cheese filling to set just enough, preventing burns and ensuring the bombs hold their shape better when bitten into. Transfer the hot bombs to a wire rack after baking; this helps maintain their crispiness by allowing air to circulate around them, preventing the bottoms from becoming soggy. This small pause makes a big difference in both safety and the overall enjoyment of your perfectly cooked treats.
Garnish Ideas for Presentation
Elevate the visual appeal of your bacon cheeseburger bombs with simple yet effective garnishes. A sprinkle of freshly chopped chives or green onions adds a pop of color and a fresh, mild oniony bite. For a more classic burger aesthetic, a dash of sesame seeds on top before baking can mimic a burger bun. A swirl of your favorite barbecue sauce or a drizzle of sriracha mayo can also serve as an attractive and flavorful garnish. Arranging them artfully on a platter, perhaps with small bowls of dipping sauces, instantly makes them more inviting and professional, perfect for any gathering or a special meal.
Best Bacon Bomb Tips for Success
To consistently achieve outstanding bacon cheeseburger bombs, incorporating these expert tips makes all the difference. They address common pitfalls, guiding you toward perfection. From ingredient selection to preparation techniques, these best practices ensure your homemade bacon bombs are truly exceptional. Attention to these details elevates the dish, guaranteeing maximum flavor, ideal texture, and a delightful experience every time. Consider these your secret weapons for crafting culinary excellence.
Choosing Thick-Cut Beef Bacon
The type of bacon significantly impacts the final outcome. Always opt for thick-cut beef bacon. Thinner bacon cooks too quickly, becoming brittle or burning before the internal filling and ground beef are heated. Thick-cut bacon provides a substantial wrap, withstands longer baking, and crisps beautifully without fragility. Its robust nature helps the bomb hold its shape, ensuring a satisfying bite. This choice is fundamental for a truly superior bacon bomb, enhancing both taste and texture.
Room Temperature Cream Cheese
Using room temperature cream cheese is essential for a silky, smooth filling. Cold cream cheese is stiff and hard to mix, leading to lumps and uneven flavor distribution in your creamy onion filling. By allowing it to soften for at least 30-60 minutes before mixing, you’ll achieve a perfectly homogenous and creamy texture. This integrates seamlessly with caramelized onions and spices. Attention to this detail ensures your filling is consistently delightful, contributing to the overall excellence of your bacon cheeseburger bombs.
Don’t Rush Onion Caramelization
Patience is a virtue when caramelizing onions. This step, though time-consuming, is paramount for developing deep, sweet, complex flavors in the creamy onion filling. Rushing the process on high heat results in burnt, bitter onions, undermining desired sweetness. Instead, cook slowly over medium-low heat for 10-15 minutes until golden-brown. This slow caramelization extracts natural sugars, creating incredible depth that is irreplaceable. For more on the science of cooking, check out Caramelization on Wikipedia.
Fun Flavor Twists for Bacon Bombs
While classic bacon cheeseburger bombs are delicious, experimenting with flavor twists is part of the fun. Customizing your bombs caters to different palates and explores new tastes. These variations transform the basic recipe into something uniquely yours, adding exciting dimensions to your game day snacks or party food idea. Don’t hesitate to get creative with ingredients you love; the bombs are adaptable to various additions. Experimenting can lead to new family favorites and expand your appetizer repertoire, offering endless culinary possibilities.
Cheesy Swaps like Pepper Jack
Beyond traditional cheddar, swapping cheeses easily introduces new flavor profiles. For a kick, try Pepper Jack cheese, adding a spicy, creamy element pairing wonderfully with beef bacon. Monterey Jack offers a milder, meltier texture, while smoked Gouda imparts sophisticated depth. You could also use a blend of cheeses, like sharp provolone with Parmesan, for an Italian-inspired twist. Each cheese brings unique character, ensuring exciting flavor twists. Consider what complements beef and bacon, then let your imagination guide your cheesy swaps.
Adding Heat with Jalapenos
If you enjoy spice, incorporating jalapeños is an excellent way to add heat. Finely dice fresh jalapeños (remove seeds for less heat) and fold them into the creamy onion filling. Alternatively, roast jalapeños first for a smoky, milder heat. For more intensity, a dash of cayenne pepper or red pepper flakes can achieve the desired fiery kick. Start with a small amount and taste as you go, ensuring the heat complements rather than overpowers other delicious flavors.
Meaty Additions like Chorizo
For an even meatier and spicier bomb, consider adding other cooked meats. Cooked and crumbled chorizo sausage brings smoky, spicy, and deeply savory flavor that beautifully complements the beef and bacon. Ensure chorizo is well-drained before mixing to prevent greasiness. Other options include finely diced pepperoni, crumbled Italian sausage, or shredded smoked chicken for different texture. These meaty additions elevate the richness of your bacon bombs, making them more substantial and satisfying for meat lovers.
Make Ahead for Your Next BBQ
Preparing bacon cheeseburger bombs ahead of time is a fantastic strategy for effortless entertaining, especially when planning for a BBQ or any large gathering. This approach allows you to handle much of the preparation work in advance, significantly reducing stress on the day of your event. By having your bombs ready to bake, you can spend more time enjoying your guests and less time in the kitchen. Make ahead appetizers are a host’s best friend, ensuring fresh, hot food without the last-minute rush. This convenience makes these bombs an even more appealing option for any occasion.
Preparing Bombs for Refrigeration
To make bacon bombs ahead, follow all the preparation steps up to, but not including, baking. Once you’ve wrapped each bacon bomb and secured its shape, arrange them in a single layer on a baking sheet lined with parchment paper. Cover the baking sheet tightly with plastic wrap or aluminum foil to prevent them from drying out or absorbing refrigerator odors. Refrigerate the unbaked bombs for up to 24-48 hours. When you’re ready to bake, remove them from the refrigerator about 15-20 minutes beforehand to allow them to come closer to room temperature, then proceed with the baking instructions as usual. This method ensures freshness and crispiness, making these easy recipe bombs perfect for any party.
Freeze Bacon Bombs for Later
Freezing bacon cheeseburger bombs offers an excellent solution for meal prepping or ensuring you always have a delicious snack ready for unexpected guests or spontaneous cravings. This method extends their shelf life considerably, allowing you to enjoy homemade goodness whenever you desire, without starting from scratch. Properly freezing unbaked bombs preserves their flavor and texture, ensuring they bake up just as fresh and delicious as if they were made on the spot. Having a stash of frozen bacon bombs in your freezer is a true game-changer, providing convenience and culinary satisfaction on demand. This makes them truly versatile for busy households or when planning for future events.
How to Freeze Unbaked Bombs
To freeze unbaked bacon bombs, first arrange the prepared (but unbaked) bombs in a single layer on a parchment-lined baking sheet. Place the baking sheet in the freezer for about 2-3 hours, or until the bombs are completely frozen solid. This step, known as flash freezing, prevents them from sticking together. Once frozen, transfer the solid bombs to a freezer-safe airtight container or heavy-duty freezer bags. Label with the date and store for up to 1-2 months. When ready to bake, do not thaw. Bake them directly from frozen, increasing the baking time by about 10-15 minutes or until fully cooked and golden brown. For specific freezing guidelines, you can consult resources like Food Preservation on Wikipedia. This method is great for stocking up on delicious bomb appetizers.
Storing and Reheating Leftover Bombs
While bacon cheeseburger bombs are best enjoyed fresh out of the oven, it’s not uncommon to have a few delicious leftovers. Proper storage and reheating techniques are essential to maintain their flavor and texture, ensuring they remain as enjoyable as possible on subsequent days. Simply tossing them in the fridge without care can lead to soggy bacon and a less appealing experience. With a few simple steps, you can extend the life of your cheesy beef bacon bombs and savor their savory goodness again. This thoughtful approach to leftovers prevents food waste and keeps those delightful flavors intact.
Proper Storage for Freshness
To keep leftover bacon bombs fresh, allow them to cool completely to room temperature after serving. This is crucial; storing them while still warm can create condensation, leading to sogginess. Once cooled, place the bombs in an airtight container. Line the container with a paper towel to absorb any excess moisture, helping to keep the bacon crispier. Store them in the refrigerator for up to 3-4 days. For optimal freshness, avoid stacking them too tightly, as this can compress the bacon and affect its texture. Proper storage ensures your leftover delicious bombs are ready for their next appearance.
Reheating for Best Crispness
Reheating bacon cheeseburger bombs to restore their initial crispness requires a gentle touch and the right method. Avoid the microwave, as it will inevitably make the bacon soggy. The best way to reheat them is in an oven or air fryer. Preheat your oven to 300-325°F (150-160°C) and place the bombs on a baking sheet. Reheat for 10-15 minutes, or until warmed through and the bacon has re-crisped. An air fryer is even faster, typically taking 5-7 minutes at 300°F. Always check the internal temperature to ensure they are heated through. For other dinner ideas or reheating tips, explore our recipe collection. This method guarantees a satisfying, crispy result, just like when they were first baked.
Enjoy Your Best Bacon Cheeseburger Bombs
With all the preparation, baking, and careful handling complete, the moment has arrived to fully enjoy your best bacon cheeseburger bombs. These savory, cheesy, and utterly satisfying treats are perfect for any occasion, from casual snacking to being the star appetizer at your next party. Whether you’ve made them fresh, prepared them ahead, or pulled them from the freezer, their homemade goodness is undeniable. The combination of crispy beef bacon, succulent ground beef, and a creamy, flavorful filling makes them truly irresistible. Savor each bite, appreciating the effort you put into crafting these delightful culinary creations.
Dipping Sauces to Pair
Enhance the experience of your bacon cheeseburger bombs with complementary dipping sauces. Classic choices include ketchup and mustard, mirroring traditional burger condiments. For a creamy tang, a homemade ranch dressing or a blue cheese dip works wonderfully. A spicy sriracha mayo or a sweet and smoky barbecue sauce can add an exciting kick. Even a simple garlic aioli or a cool sour cream dip can elevate the flavors. Offer a variety of dipping sauces to cater to different tastes, allowing everyone to customize their culinary adventure. This also provides an opportunity to cross-promote our social media, so follow us on Instagram for more delicious pairings!
Sides to Complement Your Meal
If you’re serving bacon cheeseburger bombs as a main course, consider pairing them with simple, satisfying side dishes. A fresh garden salad provides a crisp, light contrast to the rich bombs. Crispy oven-baked fries or sweet potato fries are a natural pairing, completing the burger experience. Coleslaw offers a refreshing, tangy crunch, while corn on the cob adds a touch of sweetness. For a heartier meal, a side of creamy baked mac and cheese makes a decadent addition. Choose sides that balance the richness of the bombs without overpowering their star flavor, ensuring a well-rounded and delightful meal for everyone to enjoy.