
Piroshki recipe: These delightful baked pockets offer a taste of traditional Russian pastries. Mastering the homemade dough and creating various savory fillings brings immense satisfaction. Enjoy baking these golden brown, delicious pastry treats for family and friends. This guide will walk you through every step to perfect comfort food.
Key Takeaways
- Master a soft, pliable homemade dough for perfect piroshki.
- Explore diverse filling options, from savory meat to sweet cabbage.
- Learn proper shaping and sealing techniques for beautifully baked pockets.
- Achieve a golden brown finish, ensuring delicious pastry every time.
- Understand how to store and reheat piroshki for continued enjoyment.
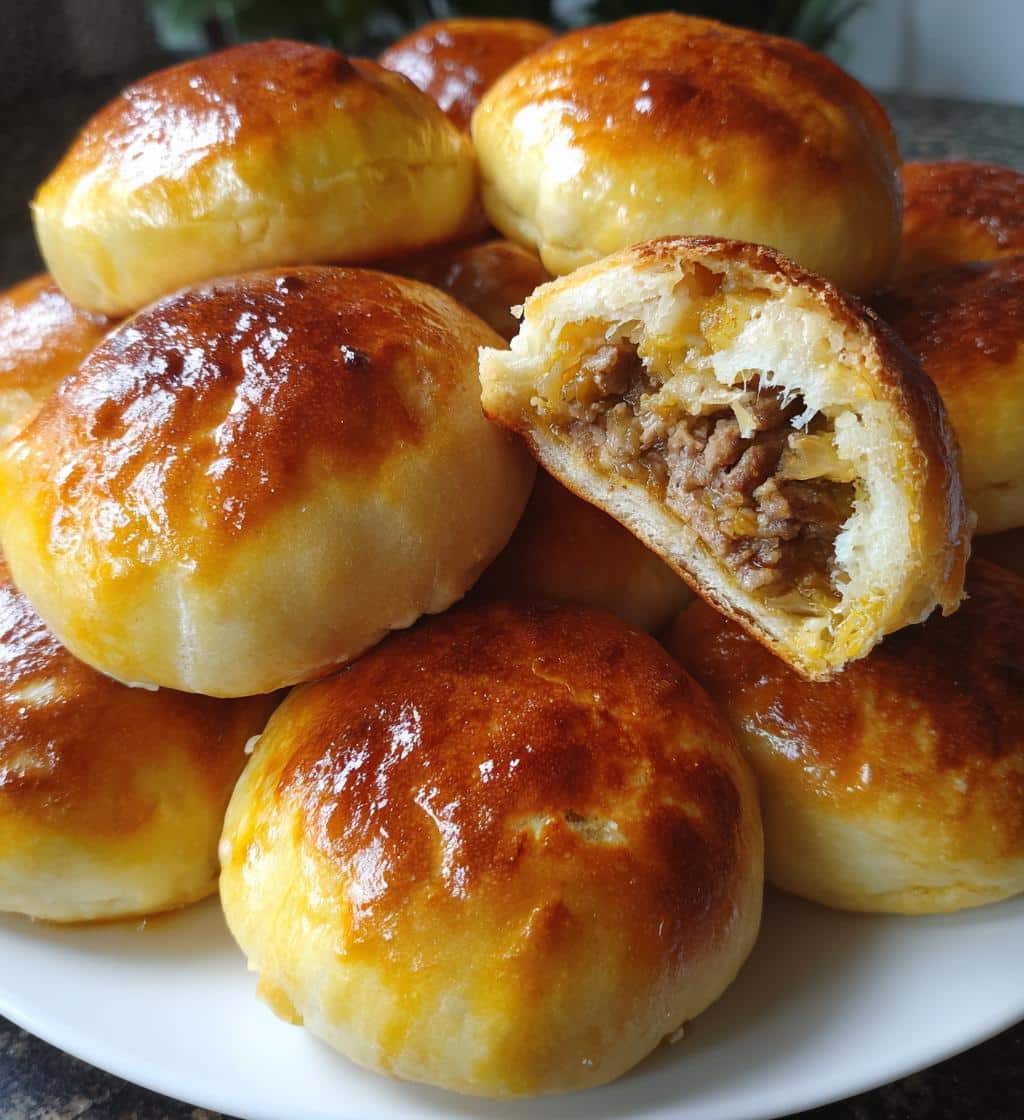
Piroshki are a wonderful savory pies. They bring warmth and flavor. Homemade dough makes them special. Fillings can be so varied. Enjoy baking these delicious pastry treats.
Why Try This Piroshki Recipe?
This piroshki recipe offers more than just a meal; it provides a culinary journey into the heart of Eastern European main course traditions. Often described as individual baked pockets of joy, piroshki are a beloved comfort food, celebrated for their fluffy, slightly sweet dough and wonderfully savory fillings. Imagine biting into a warm, golden brown pastry, perfectly encasing a flavorful mix of seasoned meat, tender cabbage, or creamy potato. There’s something incredibly satisfying about creating these delicious pastry parcels from scratch. It’s an accessible project for home bakers of all skill levels, promising a rewarding experience and an unforgettable taste. Whether you’re looking to recreate cherished family recipes or simply seeking a unique and hearty dish to impress, learning to make traditional piroshki will quickly become a favorite kitchen adventure. The versatility of fillings means you can adapt this recipe to suit any preference, making it a truly adaptable and essential addition to your cooking repertoire.
Pure Bliss in Every Bite
Each piroshki bite delivers a harmonious blend of textures and tastes. The soft, airy homemade dough provides the perfect canvas, while the robust fillings burst with flavor. These delightful savory pies are not only incredibly tasty but also deeply comforting, evoking a sense of warmth and home with every mouthful. They are perfect for a cozy family dinner, a portable snack, or even as a standout addition to any party spread. The simple act of baking these Russian pastries fills your kitchen with an inviting aroma, building anticipation for the moment you finally pull them from the oven. This recipe prioritizes ease and authenticity, ensuring that even first-time bakers can achieve pure bliss in every golden-brown pocket. Get ready to fall in love with the art of making piroshki, a truly delightful and fulfilling culinary endeavor.
Gather Your Piroshki Recipe Ingredients
Success with any piroshki recipe begins with having the right ingredients. For the homemade dough, simplicity is key, yet quality matters significantly for achieving that perfect soft texture. Beyond the dough, the real magic happens with the fillings, which allow for immense creativity and personal preference. Preparing all your components in advance makes the assembly process smooth and enjoyable. Don’t be intimidated by the seemingly long list; most items are common pantry staples. Taking the time to properly measure and prepare each ingredient will contribute directly to the deliciousness of your final baked pockets. Consider this your preparatory stage for crafting truly excellent traditional piroshki, whether you prefer them savory or with a hint of sweetness. For more context on this delightful dish, you can refer to the Pirozhok Wikipedia page.
List of Dough Essentials
For a soft, pliable, and flavorful homemade dough, you’ll need:
- All-purpose flour: The foundation of your dough.
- Active dry yeast: Essential for a good rise and airy texture.
- Warm milk: Activates the yeast and adds richness.
- Granulated sugar: Feeds the yeast and balances the flavor.
- Salt: Enhances flavor and controls yeast activity.
- Melted butter or vegetable oil: Adds tenderness and richness.
- Egg: For structure and a golden crust (optional, often used as an egg wash).
Ensure your milk is just warm, not hot, to avoid killing the yeast. Fresh ingredients are always best for optimal results when aiming for the perfect dough recipe.
Filling Options You’ll Love
The beauty of piroshki lies in its diverse filling options. Here are some popular choices to inspire your delicious pastry creations:
- Classic Meat Filling: Ground beef or pork, sautéed with onions, garlic, and seasoned with salt, pepper, and a touch of dill or parsley.
- Savory Cabbage Filling: Shredded cabbage, carrots, and onions, braised until tender, often with a hint of tomato paste or sour cream.
- Creamy Potato Filling: Mashed potatoes mixed with caramelized onions, fresh herbs, and sometimes a dollop of cream cheese or sour cream for extra richness.
- Mushroom and Onion: Sautéed mixed mushrooms with onions, garlic, and fresh herbs.
- Sweet Options: While savory is common, sweet piroshki can be made with sweetened cottage cheese (tvorog) or fruit preserves.
Each filling adds a unique character to your baked pockets, allowing for endless customization to satisfy every palate. These filling ideas make your piroshki truly special.
Mixing Your Soft Dough Together
Creating the perfect soft dough is fundamental to an outstanding piroshki recipe. The mixing process is crucial for developing gluten, which gives the dough its elasticity and ability to rise. Start with a large mixing bowl or the bowl of a stand mixer fitted with a dough hook. Precision in measuring ingredients, especially the flour and liquids, will lead to consistent results. Avoid adding too much flour too early, as this can result in a dense, tough dough rather than the light, airy texture characteristic of traditional piroshki. The goal is to achieve a dough that is soft, slightly sticky, but still manageable. This initial stage sets the foundation for the entire baking process, ensuring your homemade dough is ready for its delicious transformation into golden brown baked pockets.
Activating the Yeast
Yeast activation is the first critical step in ensuring your homemade dough rises beautifully. In a small bowl, combine your warm milk (around 105-115°F or 40-46°C), a pinch of sugar, and the active dry yeast. Stir gently and let it sit for about 5-10 minutes. During this time, the yeast will “bloom,” meaning it will become frothy and bubbly on the surface. This indicates that the yeast is active and alive, ready to leaven your dough. If your yeast mixture doesn’t show these signs, it might be old, or your milk might have been too hot or too cold, and you should start over with fresh yeast. A properly activated yeast mixture is key to achieving light, fluffy piroshki and prevents a dense, heavy end product. This simple step is vital for the success of your easy piroshki.
Kneading and Rising the Dough
After mixing, kneading is the next crucial step to achieving perfect dough for your piroshki recipe. Kneading develops the gluten strands in the flour, which creates the elastic structure necessary for the dough to trap gases produced by the yeast, resulting in a light and airy texture. You can knead by hand on a lightly floured surface or use a stand mixer with a dough hook. Aim for about 8-10 minutes of kneading until the dough is smooth, elastic, and no longer sticky. It should spring back slowly when poked. Over-kneading can lead to a tough dough, while under-kneading will result in a crumbly texture and poor rise. Paying attention to this stage ensures your homemade dough will yield exceptionally tender and delicious pastry pockets.
Achieving Perfect Dough
Once your dough is properly kneaded, it’s time for its first rise, also known as bulk fermentation. Lightly grease a large bowl, place the dough in it, and turn it once to coat. Cover the bowl with plastic wrap or a clean kitchen towel to prevent it from drying out. Place the dough in a warm, draft-free spot, ideally around 75-80°F (24-27°C). The rising time can vary depending on your kitchen’s temperature and the yeast’s activity, but it typically takes 1 to 1.5 hours. The dough should double in size. This slow rise allows the yeast to work its magic, developing flavor and creating an open, soft crumb. A successful first rise is paramount for achieving the characteristic texture of traditional piroshki and ensures your baked pockets will be wonderfully soft and fluffy.
Choose Your Delicious Piroshki Filling
The filling is the heart of your piroshki, offering a burst of flavor that complements the soft, rich dough. While we’ve discussed general ideas, now it’s time to dive into preparing these delicious pastry components. The key to a great filling is robust seasoning and a texture that isn’t too wet, which could make your dough soggy, or too dry, which would lack appeal. Don’t be afraid to experiment with herbs and spices to truly make these your own. Remember that the filling will cook further inside the piroshki, so ensure any raw meat is fully cooked before assembly. The right filling transforms your homemade dough into truly memorable savory pies, making this an exciting part of the piroshki recipe process. For another hearty meal idea, consider making Creamy Chicken Alfredo Lasagna Rolls.
Meat or Vegetable Ideas
Classic Ground Beef Filling
For a hearty meat filling, sauté 1 lb (450g) ground beef or pork in a pan until browned, breaking it up as it cooks. Drain any excess fat. Add 1 chopped onion and 2 cloves minced garlic, cooking until softened. Season generously with salt, black pepper, 1 tsp dried dill, and 1/2 tsp paprika. You can also add a tablespoon of tomato paste for depth. Let the mixture cool completely before using, ensuring it’s not watery. This meat filling is a timeless choice for many traditional piroshki recipes.
Savory Cabbage and Carrot Filling
A popular vegetarian option, this filling is both flavorful and comforting. Shred 1/2 head of cabbage and finely chop 1 large carrot and 1 onion. Sauté the onion and carrot in oil until soft, then add the shredded cabbage. Cook over medium heat, stirring occasionally, until the cabbage is tender and slightly caramelized, about 15-20 minutes. Season with salt, pepper, and a touch of caraway seeds for an authentic taste. A spoonful of sour cream or a splash of white vinegar at the end can brighten the flavors. This cabbage filling is a fantastic choice for delicious pastry.
Creamy Potato and Dill Filling
Boil and mash 3-4 medium potatoes until smooth. In a separate pan, sauté 1 chopped onion until golden brown and sweet. Combine the mashed potatoes with the caramelized onions, a generous handful of fresh chopped dill, salt, and pepper. For extra creaminess, stir in 2 tablespoons of butter or cream cheese. This potato filling is a simple yet incredibly satisfying choice, offering a comforting texture and herby freshness to your piroshki.
Shaping and Filling Each Piroshki
The art of shaping and filling piroshki is what transforms your perfect dough into beautiful baked pockets. While it might seem daunting at first, a little practice will make you a pro. The goal is to create uniformly sized piroshki that are well-sealed, preventing any delicious filling from escaping during baking. This step is where your homemade dough truly comes to life, ready to embrace its flavorful core. Ensure your workspace is clean and lightly floured, but don’t over-flour the dough itself, as this can make sealing difficult. Patience and a gentle touch are your best allies in this process, ensuring each piroshki is a miniature work of art and a true savory pie.
Dividing the Dough
Once your dough has completed its first rise and has been gently punched down, turn it out onto a lightly floured surface. Divide the dough into equal portions. For standard-sized piroshki, aim for pieces weighing about 40-50 grams each, which will yield roughly 20-24 piroshki from a typical recipe. Roll each portion into a smooth ball. Then, using a rolling pin, flatten each ball into a circular or oval shape, about 4-5 inches (10-12 cm) in diameter and about 1/4 inch (6mm) thick. Try to keep the edges slightly thicker than the center, as this will help create a better seal and prevent the filling from pushing through. Uniform division ensures even baking and consistent sizing for your delicious pastry.
Sealing the Edges
Now comes the crucial step of filling and sealing. Place a generous spoonful (about 1-2 tablespoons, depending on size) of your chosen, cooled filling in the center of each dough circle. Be careful not to overfill, as this will make sealing difficult. Fold one side of the dough over the filling to meet the other side, forming a half-moon shape. Press the edges firmly together to seal, creating a crimped seam to ensure no filling leaks out during baking. You can also pinch and twist the edges for a more decorative finish, or use a fork to press down firmly along the seam. Ensure the seal is tight all around. Arrange the shaped piroshki on a baking sheet lined with parchment paper, leaving some space between each, as they will expand slightly during the second rise and baking. A good seal is key to successful baked pockets.
Baking The Best Piroshki Ever
Baking is the final stage where your carefully prepared piroshki transform into golden brown, mouth-watering treats. Achieving that perfect color and texture involves precise temperature control and attentiveness. This step ensures that your homemade dough becomes wonderfully soft and fluffy, while the fillings heat through and meld their flavors. Before baking, many traditional piroshki recipes call for an egg wash, which contributes significantly to the shiny, appetizing crust. The aroma filling your kitchen as these savory pies bake is truly one of the most rewarding parts of the entire piroshki recipe process, promising delicious pastry perfection. For more culinary inspiration, visit our Pinterest page or follow us on Instagram!
Preheat Your Oven
Before placing your shaped piroshki into the oven, it’s absolutely essential to preheat your oven thoroughly. A properly preheated oven ensures even baking and helps the dough rise quickly and evenly, resulting in a light and airy texture. Preheat your oven to 375°F (190°C). While the oven preheats, allow your shaped piroshki to undergo a second proofing on the baking sheet for about 20-30 minutes. This allows the dough to relax and rise slightly again, contributing to a softer final product. Just before baking, gently brush the tops of the piroshki with an egg wash (one egg beaten with a tablespoon of water or milk) for that irresistible golden brown finish.
Golden Brown Finish
Bake the piroshki in the preheated oven for 20-25 minutes, or until they are beautifully golden brown on top and bottom. The exact baking time may vary slightly depending on your oven and the size of your piroshki. Keep an eye on them towards the end of the baking time to prevent over-browning. Once baked, remove the piroshki from the oven and transfer them to a wire rack to cool slightly. Allowing them to cool for a few minutes before serving helps the steam trapped inside redistribute, resulting in a softer crumb and a more pleasant eating experience. The golden brown crust is a hallmark of the best piroshki ever, indicating perfect doneness and a delicious pastry ready to be enjoyed.
Serving Warm Golden Piroshki
The moment your warm golden piroshki emerge from the oven, they are at their absolute best. The enticing aroma and the beautiful golden brown crust promise a truly satisfying experience. While irresistible straight from the oven, allowing them to cool for a few minutes prevents burnt tongues and allows the flavors within to fully settle. These delicious pastry pockets are incredibly versatile and can be enjoyed in various ways, making them perfect for any occasion, whether it’s a quick snack, a light lunch, or part of a larger family meal. Serving them warm enhances their comforting appeal and brings out the richness of both the homemade dough and the savory pies. Get ready to enjoy the fruits of your labor with these delightful treats.
Traditionally, piroshki are often served simply, perhaps with a dollop of sour cream, a clear broth, or alongside a fresh salad. Their robust flavor profile means they shine on their own, but these accompaniments can add another layer of enjoyment. They are fantastic as a stand-alone snack or as a hearty appetizer. For a complete meal, pair them with a light vegetable soup or a crisp green salad to balance the richness. The comforting nature of these baked pockets makes them an ideal choice for a cozy evening or a family gathering, providing warmth and satisfaction in every bite. No matter how you choose to serve them, these traditional piroshki are sure to be a crowd-pleaser.
Important Piroshki Recipe Tips
Mastering any piroshki recipe often comes down to a few key tips and tricks that can elevate your baking from good to truly exceptional. These insights help ensure your homemade dough is perfect, your fillings are flavorful, and your baked pockets achieve that ideal golden brown finish. Paying attention to these details can prevent common pitfalls and allow you to confidently tackle variations, ensuring every batch of traditional piroshki is a success. From handling the dough correctly to understanding how to achieve the best texture, these tips are designed to make your piroshki journey as smooth and delicious as possible. For more diverse meal ideas, try our Crispy Parmesan Chicken with a Rich Garlic Sauce.
Customize Your Filling
The beauty of piroshki lies in its adaptability. Don’t feel limited to the traditional meat, cabbage, or potato fillings. This is your chance to customize your filling to suit your taste or what you have on hand. Consider incorporating seasonal vegetables, different types of cheese, or even experimenting with sweet fillings like apple and cinnamon for a dessert piroshki. When customizing, remember a few guidelines:
- Moisture Control: Ensure your filling isn’t too wet, as excess moisture can make the dough soggy or cause it to burst during baking. Cook down any watery vegetables thoroughly.
- Cool Completely: Always allow your filling to cool to room temperature before adding it to the dough. Hot filling can start to cook the dough prematurely or make it difficult to handle.
- Flavor Balance: Ensure your filling is well-seasoned and flavorful, as the dough itself is relatively mild. Taste and adjust seasonings before filling the piroshki.
The possibilities for delicious piroshki are endless when you get creative with your fillings!
Storing Leftover Piroshki Safely
While piroshki are undoubtedly best enjoyed fresh and warm from the oven, it’s comforting to know that any leftovers can be stored safely and reheated for later enjoyment. Proper storage is key to maintaining their delicious pastry quality and ensuring food safety. Whether you’ve made a large batch of savory pies for meal prep or simply have a few golden brown baked pockets remaining after a feast, knowing how to store them correctly means you can savor their comforting taste for days to come. This also makes the piroshki recipe a practical choice for busy households, allowing you to enjoy homemade goodness without daily cooking. Following these simple guidelines will help preserve their texture and flavor, ensuring reheating brings them close to their freshly baked glory.
Reheating for Freshness
To keep your leftover piroshki tasting as close to freshly baked as possible, proper reheating is crucial.
- Oven Reheating: This is generally the best method for maintaining a crisp crust and soft interior. Preheat your oven to 350°F (175°C). Place the piroshki on a baking sheet and heat for 10-15 minutes, or until warmed through and the crust is crisp again.
- Air Fryer Reheating: For even quicker results and a very crispy exterior, an air fryer works wonderfully. Place piroshki in a single layer in the air fryer basket and heat at 325°F (160°C) for 5-7 minutes.
- Microwave Reheating: While convenient, the microwave can sometimes make the dough a bit chewy. If using, heat in short bursts (30-60 seconds) until warm. It’s best for a quick warm-up if you don’t mind a softer texture.
Avoid over-reheating, as this can dry out the filling and toughen the dough. Always ensure the internal temperature reaches 165°F (74°C) for food safety.
Quick Piroshki Nutrition Details
When incorporating any new dish into your diet, understanding its general nutrition details can be helpful. While specific values for your homemade piroshki will vary widely based on the exact ingredients, portion sizes, and choice of filling (meat, potato, cabbage, etc.), we can provide a general idea of what to expect. This section aims to offer a quick overview, acknowledging that precise dietary information would require a detailed calculation for each specific piroshki recipe. Homemade comfort food often provides more control over ingredients than store-bought options, allowing you to tailor your savory pies to fit dietary preferences or requirements better. For comprehensive information on dietary components, the Nutrition Wikipedia page is an excellent resource.
Per Serving Facts
A typical savory piroshki, especially one made with a meat or potato filling and baked (not fried), generally provides a good source of carbohydrates from the homemade dough, along with protein and some fats from the filling.
- Calories: Expect around 200-350 calories per piroshki, depending heavily on size and filling density.
- Carbohydrates: Primarily from the flour in the dough, typically ranging from 25-40 grams.
- Protein: If using a meat or high-protein vegetable filling (like mushrooms), you could get 8-15 grams per serving.
- Fats: Varies greatly. A meat filling might add 10-20 grams of fat, while a vegetable filling could be lower. Much of this comes from butter in the dough and oils used for cooking fillings.
- Fiber: Dependent on the filling, with vegetable-based fillings (like cabbage or potato) offering more fiber.
These are rough estimates. For precise information, consider using an online nutrition calculator with your exact ingredients and quantities. Remember, piroshki are a treat, and portion control is always a good approach for balancing delicious pastry with healthy eating.
Your Piroshki Questions Answered
Even with a detailed piroshki recipe, questions can arise during the baking process. This section addresses some of the most common queries, ensuring you feel confident and prepared to tackle any challenge. From dough dilemmas to filling concerns, having these answers at hand will help you achieve perfect golden brown baked pockets every time. We want your experience with making homemade dough and delicious pastry to be as smooth and enjoyable as possible. Understanding the nuances of these savory pies will make you a more confident baker. If you’re looking for another quick and tasty meal, check out our Spinach Feta Quesadillas.
- Can I prepare the dough ahead of time? Yes! After the first rise, you can punch down the dough, cover it tightly, and refrigerate it for up to 24 hours. Let it come to room temperature for about 30 minutes before proceeding with shaping and filling.
- My dough isn’t rising; what went wrong? This is usually due to inactive yeast or the liquid being too hot or too cold. Ensure your yeast is fresh and your milk is between 105-115°F (40-46°C). A cold kitchen can also slow down rising; find a warm, draft-free spot.
- Can I fry piroshki instead of baking them? Absolutely! While this recipe focuses on baked piroshki, they are traditionally often fried. To fry, heat about 1-2 inches of vegetable oil in a heavy-bottomed pan to 350°F (175°C). Fry piroshki in batches until golden brown on all sides, about 3-5 minutes per side. Drain on paper towels.
- My piroshki burst during baking; how can I prevent this? This often happens if the piroshki are overfilled or if the edges aren’t sealed tightly enough. Make sure to leave enough space at the edges for a good seal and don’t stuff them too full. Also, ensure the filling is cooled completely.
- What if my filling is too wet? If your filling is too watery, it can make the dough soggy. Cook down vegetable fillings further to evaporate excess moisture. For meat fillings, ensure you drain any fat or liquid thoroughly before cooling.