
Air fryer chicken tenders are a fantastic choice for a quick and delicious meal. This recipe offers a simple way to create incredibly crispy, flavorful chicken perfect for families. Enjoy homemade tenders with ease, making dinner preparation a breeze any night of the week. These tenders are always a family favorite.
Key Takeaways
- Achieve ultimate crispiness using Panko breadcrumbs and proper dredging.
- Prevent overcrowding the air fryer to ensure even cooking and texture.
- Always check internal temperature for safe and perfectly cooked chicken.
- Resting chicken tenders before and after cooking enhances coating and juiciness.
Making tenders is simple. Your air fryer helps a lot. Get crispy results every time. Enjoy flavorful chicken with ease. Dinner just got better.
Enjoying Crispy Air Fryer Chicken Tenders
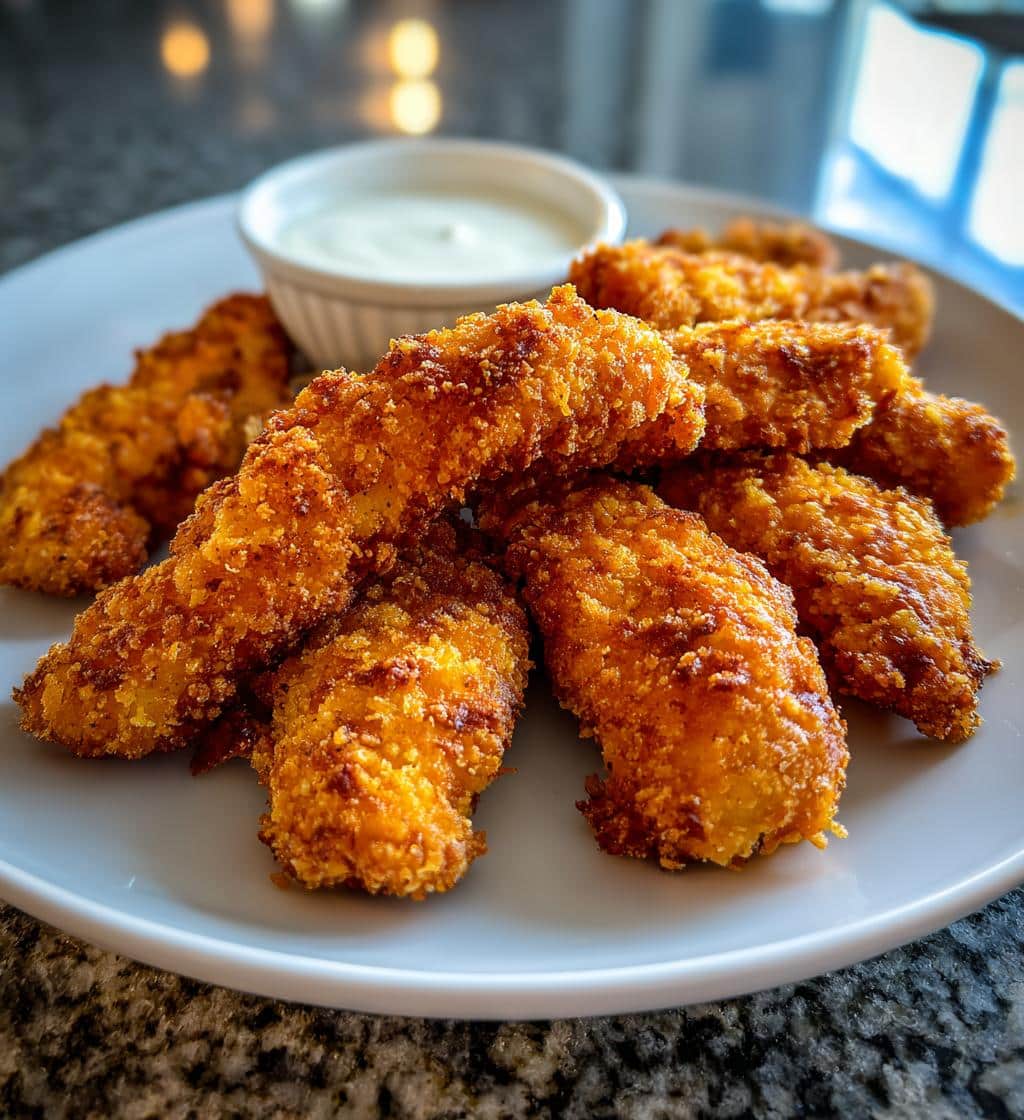
There’s nothing quite like biting into a perfectly cooked chicken tender – golden brown, delightfully crispy on the outside, and incredibly juicy on the inside. When you use an air fryer, this dream becomes a reality with significantly less oil and fuss than traditional deep frying. Air fryer chicken tenders have quickly become a staple in many households, transforming a classic comfort food into a healthier, more convenient option without sacrificing flavor or texture. This method leverages the power of circulating hot air to achieve that irresistible crunch, making it a game-changer for busy weeknights and casual gatherings alike. The simplicity of preparation, combined with the impressive results, makes this recipe a must-try for anyone looking to expand their culinary repertoire.
Quick and Easy Meal Solution
Life moves fast, and finding time to prepare wholesome, satisfying meals can often feel like a challenge. Air fryer chicken tenders offer a brilliant solution, taking the stress out of dinner planning. From prep to plate, you can have a delicious meal ready in under 30 minutes, making it perfect for those evenings when time is of the essence. No more lengthy frying sessions or messy cleanups. The air fryer streamlines the process, allowing you to focus on enjoying your food rather than worrying about the cooking. It’s an ideal choice for parents, students, or anyone seeking a straightforward path to homemade goodness. Pair these tenders with a simple salad or some roasted vegetables for a complete and balanced meal.
Family-Friendly Favorite Dish
Chicken tenders possess a universal appeal that transcends age groups, making them an undisputed family favorite. Kids adore their fun, dippable shape, while adults appreciate their versatility and comforting taste. Preparing them in the air fryer ensures that every tender emerges consistently crispy and flavorful, pleasing even the pickiest eaters. Imagine a dinner where everyone eagerly cleans their plates! These tenders are perfect for serving with a variety of dipping sauces, from classic honey mustard to tangy barbecue, allowing each family member to customize their experience. For another fantastic and easy chicken dinner idea that the whole family will love, consider trying this easy honey garlic chicken recipe.
Gather Ingredients for Air Fryer Tenders
Successful air fryer chicken tenders begin with selecting the right ingredients. Quality components lay the foundation for a delicious and satisfying meal. While the process is simple, paying attention to the details of each ingredient can significantly elevate the final taste and texture of your tenders. Having everything prepped and ready before you start the cooking process will also ensure a smoother and more enjoyable experience in the kitchen, allowing you to focus on achieving that perfect crispy coating.
Chicken Tenderloin Selection
The star of the show, chicken tenderloins, are naturally portioned strips of meat found under the chicken breast. Their lean, tender nature makes them ideal for quick cooking methods like air frying. When selecting tenderloins, look for fresh, plump pieces that are consistent in size to ensure even cooking. If you can’t find tenderloins, boneless, skinless chicken breasts can be cut into 1-inch thick strips, roughly 4-5 inches long, to achieve a similar shape and cooking time. Always choose high-quality chicken from a reputable source for the best flavor and texture. Trimming any excess fat or sinew from the tenderloins before breading will also contribute to a better eating experience.
Essential Breading Components
The magic of crispy tenders lies largely in their breading. A standard three-part breading station typically includes flour, eggs, and breadcrumbs. All-purpose flour provides the initial dry layer, helping the egg wash adhere. Eggs, beaten well, act as a binder, ensuring the breadcrumbs stick securely to the chicken. For the ultimate crunch, Panko breadcrumbs are highly recommended. Unlike traditional breadcrumbs, Panko is made from crustless white bread and processed into flakes rather than crumbs, resulting in a lighter, airier texture that cooks up incredibly crispy. You can learn more about different types of breadcrumbs, including Panko, on Wikipedia. Regular breadcrumbs can be used in a pinch, but Panko offers a superior textural experience for air frying.
Spices for Flavor Boost
While crispy chicken is delicious on its own, a well-seasoned breading takes your tenders to the next level. Don’t be shy with your spices! A basic seasoning blend might include salt, black pepper, garlic powder, onion powder, and paprika. For a little kick, consider adding a pinch of cayenne pepper or chili powder. Italian seasoning can lend a savory herb profile, while smoked paprika can add a subtle depth. Feel free to experiment with your favorite spices to tailor the flavor to your preference. Mixing your chosen spices directly into the flour and breadcrumb mixtures ensures even distribution and maximum flavor in every bite. This careful attention to seasoning is what sets truly delicious tenders apart, similar to the rich flavors found in a crispy parmesan chicken dish.
Coating Chicken Tenders for Crispiness
Achieving that coveted golden-brown, extra-crispy exterior on your air fryer chicken tenders is all about the breading technique. A proper coating not only delivers incredible texture but also helps to seal in the chicken’s juices, resulting in a tender and moist interior. While it might seem like a simple step, mastering the breading process is key to preventing soggy tenders and ensuring every bite is as satisfying as possible. This method ensures even coverage, which is crucial for uniform crispiness in the air fryer.
Three-Bowl Dredging Method
The classic three-bowl dredging method is the most effective way to coat your chicken tenders evenly and thoroughly. Set up three shallow bowls in a row on your countertop. The first bowl should contain your seasoned flour. The second bowl will hold your beaten eggs, perhaps with a splash of milk or water to thin them slightly. The third and final bowl is for your seasoned Panko breadcrumbs. The process is straightforward: first, dredge each chicken tender in the flour, shaking off any excess. This provides a dry surface for the egg to adhere to. Next, dip the flour-coated tender into the egg wash, allowing any excess to drip off. Finally, transfer it to the Panko breadcrumbs, pressing gently to ensure the crumbs stick firmly to all surfaces. Repeat this process for all your tenders. If you’re looking for visual cooking inspiration and tips, make sure to follow Carina Recipes on Instagram for more delicious ideas.
Ensuring Even Breadcrumb Coverage
Even breadcrumb coverage is paramount for uniform crispiness. If parts of the chicken are left exposed, they won’t crisp up as effectively and can lead to an unevenly cooked result. After dipping the tender in Panko, use your fingers to gently press the breadcrumbs into the chicken, ensuring every nook and cranny is covered. Don’t be afraid to apply a generous amount – the more Panko, the crispier the tender! For extra thick coverage, some chefs even double-dip: after the first Panko coat, dip the tender back into the egg wash and then into the Panko again. While this adds a bit more time and calories, it results in an undeniably robust and crunchy crust. Make sure to shake off any loose breadcrumbs before placing the tenders in the air fryer basket to prevent them from burning or creating a mess. Proper technique here will guarantee a delicious outcome.
Cooking Crispy Air Fryer Chicken Tenders
The air fryer is a marvel for achieving crispy textures without excessive oil, and chicken tenders are one of its finest applications. However, simply tossing them in isn’t enough; understanding the optimal settings and techniques will guarantee perfectly cooked, golden-brown tenders every time. The goal is to cook the chicken through while simultaneously developing a super crunchy exterior, and the air fryer’s unique mechanism excels at this. Mastering these steps will ensure your tenders are consistently delicious.
Optimal Air Fryer Temperature
Temperature control is crucial for achieving that ideal crispy-on-the-outside, juicy-on-the-inside tender. For most air fryer models, 375°F (190°C) to 400°F (200°C) is the sweet spot for chicken tenders. This high heat quickly crisps the breading without overcooking the chicken. Preheating your air fryer for 3-5 minutes before adding the tenders is highly recommended. Preheating ensures the cooking chamber is already at the desired temperature, allowing the tenders to start crisping immediately upon entry, which is vital for preventing a soggy crust. Different air fryer models can vary in their actual cooking temperature, so you might need to adjust slightly based on your specific appliance’s performance.
Flipping for Golden Brown Finish
While air fryers are excellent at circulating hot air, their heating elements are usually located at the top. This means that for truly even cooking and browning, flipping your chicken tenders is essential. About halfway through the cooking time, carefully open the air fryer basket and use tongs to flip each tender. This ensures both sides get direct exposure to the circulating hot air and heat from the top element, resulting in a uniformly golden brown and crispy crust on all sides. For air frying tips and culinary inspiration, check out Carina Recipes on Pinterest. Depending on the size and thickness of your tenders, the total cooking time will typically range from 10-18 minutes. Always monitor them closely during the last few minutes to prevent overcooking or burning, as air fryers can cook quite quickly. A little attention to flipping makes a huge difference in the final product.
Secret 1: Achieve Crispy Tender Coating
The pursuit of the perfect crispy coating for chicken tenders is a culinary quest many home cooks undertake. While the air fryer provides a significant advantage, there are specific techniques and ingredient choices that can elevate your tenders from good to truly exceptional. This first secret focuses on two key elements that work synergistically to create an unparalleled crunchy crust that stands up to any dipping sauce.
Why Panko Breadcrumbs Work
Panko breadcrumbs are not just another type of breadcrumb; they are a crispiness powerhouse. Originating from Japan, Panko is made from crustless white bread that is coarsely ground into flakes. This unique flake-like structure is what makes all the difference. Unlike traditional breadcrumbs, which are finely milled and tend to absorb oil and become dense, Panko’s airy, jagged texture allows for maximum surface area and minimal oil absorption. This results in an incredibly light, airy, and super crunchy coating that stays crispy long after cooking. When air-fried, Panko breadcrumbs achieve a superior golden-brown color and a satisfying shatter with every bite, making them indispensable for truly crispy tenders. They create a noticeable textural contrast that regular breadcrumbs simply cannot match.
Resting Tenders Before Frying
This often-overlooked step is a game-changer for ensuring your breading adheres beautifully and crisps up evenly. After you’ve coated your chicken tenders with the Panko breadcrumbs, resist the urge to immediately place them in the air fryer. Instead, arrange the breaded tenders on a wire rack set over a baking sheet and allow them to rest in the refrigerator for at least 15-30 minutes. This resting period gives the breading a chance to hydrate slightly and bind more firmly to the chicken. It helps the flour, egg, and Panko layers “set,” preventing the coating from falling off during cooking. A well-adhered coating is less likely to flake or become patchy, leading to a consistently crispy and attractive finish. This simple pause in the process makes a dramatic difference in the integrity and crunch of your final product.
Secret 2: Prevent Overcrowding Air Fryer
One of the most common mistakes when using an air fryer, particularly for items like chicken tenders, is overcrowding the basket. While it might be tempting to fit as many pieces as possible to speed up the cooking process, doing so significantly compromises the results. The air fryer relies on the efficient circulation of hot air to crisp food evenly, and overcrowding directly impedes this crucial function. Understanding and adhering to proper loading techniques is fundamental for achieving consistently crispy and perfectly cooked tenders.
Ensuring Airflow for Crispiness
The very mechanism that makes an air fryer so effective is its rapid air circulation technology. Hot air needs to be able to flow freely around each individual piece of food to remove moisture and create that desirable crispy crust. When the air fryer basket is too full, the tenders are packed too closely together, blocking the airflow. This leads to steaming rather than frying, resulting in soggy, unevenly cooked, and less crispy tenders. Think of it like a convection oven on a smaller scale; space is key for proper heat distribution. Always aim for a single layer of food with a little space between each piece, ensuring that the hot air can reach all surfaces of the chicken.
Cooking Tenders in Batches
To prevent overcrowding and guarantee optimal crispiness, cooking your chicken tenders in batches is absolutely essential. While it may add a few extra minutes to your total cooking time, the superior quality of the final product is well worth it. Depending on the size of your air fryer basket, you might be able to cook anywhere from 4 to 8 tenders at a time. After each batch, quickly remove the cooked tenders and immediately load the next batch. You can keep the cooked tenders warm in a low oven (around 200°F/95°C) while the remaining batches cook. This method ensures that every single tender receives the full benefit of the air fryer’s circulating hot air, resulting in a consistent, golden-brown, and satisfyingly crispy coating from the first tender to the last. Patience here is truly a virtue, leading to consistently delicious results.
Secret 3: Rest Tenders for Best Coat
Just as resting the chicken before cooking helps the breading adhere, a short rest after dredging also contributes significantly to the integrity and texture of the crispy coating. This step, though simple, is often overlooked in the rush to get dinner on the table. However, taking a few extra minutes here can make a noticeable difference in both the appearance and the enjoyment of your air fryer chicken tenders.
Allowing Coating to Adhere
After the chicken tenders have been fully coated in the flour, egg wash, and especially the Panko breadcrumbs, it’s beneficial to let them sit undisturbed for about 10-15 minutes before placing them in the air fryer. This brief resting period serves a crucial purpose: it gives the moist egg wash a chance to really bond with the dry flour and the Panko. During this time, the starch in the flour absorbs some moisture from the egg, creating a stronger bond that “sets” the breading onto the chicken. This adhesion helps to prevent the coating from flaking off during the vigorous air frying process, ensuring that each tender retains its full, crispy armor. It’s a small waiting game that pays off with a much more intact and appealing final product.
Better Texture and Less Mess
Beyond preventing fallout, allowing the coating to adhere contributes to a superior texture. When the breading is firmly attached, it cooks more evenly and creates a consistently crisp surface across the entire tender. You avoid those unpleasant bare spots where the chicken might dry out or become chewy. Furthermore, a well-adhered coating means less mess in your air fryer basket. Loose breadcrumbs can burn and stick to the basket, making cleanup more difficult. By ensuring the Panko is firmly locked in place, you not only improve the eating experience but also simplify the post-meal tidying. This simple resting step is a testament to how small details in preparation can lead to significant improvements in both the culinary outcome and overall kitchen efficiency.
Secret 4: Check Internal Temperature
Cooking chicken, especially chicken tenders, always comes with a critical priority: food safety. While achieving a crispy exterior is important for flavor and texture, ensuring the chicken is cooked to a safe internal temperature is absolutely non-negotiable. Guesswork can lead to undercooked poultry, which poses health risks, or overcooked, dry chicken, which detracts from the meal’s enjoyment. This secret emphasizes the reliable method for perfect and safe doneness every single time.
Safe Cooking Doneness (165°F)
The U.S. Department of Agriculture (USDA) recommends that all poultry, including chicken tenders, be cooked to an internal temperature of 165°F (74°C). This temperature is sufficient to kill any harmful bacteria, making the chicken safe to consume. It’s important to understand that the color of the chicken or the clarity of its juices are not always reliable indicators of doneness. Chicken can sometimes still be pink even when fully cooked, or appear white but still be undercooked in its thickest part. Relying on an accurate temperature reading is the only sure way to guarantee safety and prevent foodborne illnesses. Prioritizing this step means you can confidently serve your delicious air fryer chicken tenders to your family and friends. For more information on safe cooking temperatures for chicken, you can consult resources like Wikipedia’s article on chicken as food.
Using a Meat Thermometer
A reliable instant-read meat thermometer is your best friend when cooking chicken tenders (and any other meat, for that matter). To use it correctly, insert the thermometer into the thickest part of the largest chicken tender, making sure not to touch any bone, which can give an inaccurate reading. The temperature should register 165°F (74°C) without hesitation. It’s a quick and simple step that takes only a few seconds but provides immense peace of mind. Investing in a good quality digital instant-read thermometer is highly recommended for any home cook. It removes all the guesswork from cooking and ensures your chicken tenders are not only safe but also perfectly juicy, as overcooking past 165°F can lead to dry and tough meat. This tool is indispensable for consistent culinary success and food safety.
Secret 5: Extra Crunch with Panko
When it comes to achieving an unparalleled crunch in your air fryer chicken tenders, there’s one ingredient that consistently outperforms all others: Panko breadcrumbs. While regular breadcrumbs certainly have their place in the kitchen, Panko offers a distinct advantage that directly translates into a superior textural experience. This secret is all about understanding why Panko is the undisputed champion of crispiness and how it enhances the overall enjoyment of your homemade tenders.
Panko vs. Regular Breadcrumbs
The fundamental difference between Panko and regular breadcrumbs lies in their texture and how they are processed. Traditional breadcrumbs are made from dried, finely ground bread, resulting in a dense, powdery consistency. While they provide a coating, they tend to absorb more moisture and oil, often leading to a heavier, sometimes soggy, crust. Panko, on the other hand, is made from crustless white bread that is processed into large, airy, and flaky shards. These distinctive flakes have more surface area and a lower density, meaning they absorb less oil and retain their crispiness much better during cooking. The open structure of Panko allows hot air to circulate more effectively around each crumb, resulting in a lighter, crispier, and more voluminous crust that provides an audible crunch with every bite.
Enhancing Texture and Flavor
Beyond just the crunch, Panko breadcrumbs also contribute to the overall texture and flavor profile of your chicken tenders. Their light texture prevents the tenders from feeling heavy or greasy, allowing the natural flavor of the chicken and your chosen seasonings to shine through. The superior crispiness creates a delightful contrast with the tender, juicy interior of the chicken, making each bite a more complex and satisfying experience. When seasoned appropriately, Panko forms a beautiful golden-brown crust that not only looks appealing but also tastes incredibly fresh and delicious. For those who love that extra bit of textural excitement, Panko is a non-negotiable ingredient. It truly elevates the homemade air fryer chicken tender from a simple meal to a delightful culinary experience, proving that sometimes, the simplest ingredient swaps can yield the most dramatic and delicious results.
Serving Ideas for Air Fryer Tenders
Once your air fryer chicken tenders are perfectly golden and crispy, the fun truly begins with serving! Their versatility makes them an excellent canvas for a myriad of dipping sauces and complementary side dishes. Whether you’re aiming for a casual weeknight dinner or a fun appetizer spread, these tenders can be customized to suit any occasion and palate. Get creative and make them a star of your next meal.
Favorite Dipping Sauce Pairings
A chicken tender is arguably only as good as its dipping sauce. Here are some classic and creative pairings to elevate your tenders:
- Classic Honey Mustard: A timeless favorite, offering a balance of sweet and tangy.
- Tangy BBQ Sauce: Smoky and robust, perfect for a heartier flavor.
- Creamy Ranch: Cool, herby, and universally loved.
- Spicy Sriracha Mayo: For those who enjoy a little kick and creamy texture.
- Sweet Chili Sauce: A sticky, sweet, and mildly spicy Asian-inspired option.
- Garlic Aioli: A sophisticated, rich garlic-infused mayonnaise.
- Ketchup: The simple, traditional choice that never disappoints.
Consider offering a few different sauces to allow everyone to choose their favorite. You can even make homemade versions of these sauces for an extra special touch.
Side Dish Suggestions
Round out your meal with some delicious and easy-to-prepare side dishes that pair wonderfully with crispy chicken tenders:
- French Fries or Sweet Potato Fries: A classic combo, easily made in the air fryer alongside the tenders (just in separate batches!).
- Coleslaw: A refreshing, crunchy contrast to the warm tenders.
- Corn on the Cob: Sweet and satisfying, especially during warmer months.
- Steamed Green Beans or Broccoli: A healthy and simple vegetable option.
- Side Salad: A light, fresh green salad with a vinaigrette dressing.
- Macaroni and Cheese: The ultimate comfort food pairing for a truly indulgent meal.
- Crispy Cauliflower: For a delightful side that mimics the crispiness of the tenders, you might enjoy learning how to achieve perfect golden-brown edges with this crispy cauliflower recipe.
These side dishes not only complement the tenders but also help create a balanced and fulfilling meal. Mix and match to discover your ideal chicken tender feast!
Storing and Reheating Chicken Tenders
Sometimes, despite your best intentions, you might end up with a few leftover air fryer chicken tenders. The good news is that they store and reheat remarkably well, allowing you to enjoy their deliciousness for another meal. Proper storage is key to maintaining freshness, and the right reheating method can bring them back to nearly their original crispy glory, preventing them from becoming soggy or rubbery.
Fridge Storage Guidelines
To keep your cooked chicken tenders fresh and safe, allow them to cool completely to room temperature before storing. This prevents condensation from building up inside the container, which can lead to sogginess and potentially encourage bacterial growth. Once cooled, place the tenders in an airtight container or a resealable bag. Store them in the refrigerator for up to 3-4 days. For longer storage, you can freeze cooked chicken tenders for up to 2-3 months. When freezing, it’s best to flash freeze them on a baking sheet first until solid, then transfer them to an airtight freezer-safe bag to prevent them from sticking together. This makes it easy to grab just the amount you need for reheating.
Best Reheating Methods (Air Fryer/Oven)
Reheating is where many people struggle to retain the tenders’ original crispiness. Microwaving is generally discouraged as it can make the tenders chewy and rubbery. The best methods mimic the original cooking process:
- Air Fryer (Recommended): This is hands down the best way to reheat air fryer chicken tenders. Preheat your air fryer to 350°F (175°C). Place the cold tenders in a single layer in the basket, ensuring not to overcrowd. Air fry for 5-8 minutes, flipping halfway through, until they are heated through and crispy again. The exact time will depend on the size of the tenders and your air fryer model.
- Oven: Preheat your oven to 375°F (190°C). Arrange the tenders in a single layer on a baking sheet lined with parchment paper or a wire rack. Bake for 10-15 minutes, flipping halfway, until they are hot and crispy.
Both methods will bring your tenders back to life, giving them a delicious second act without compromising on that essential crispy texture.
Customizing Your Chicken Tender Recipe
While the classic air fryer chicken tender recipe is undeniably delicious, it also serves as an excellent foundation for culinary creativity. Don’t be afraid to experiment and personalize your tenders to suit your taste preferences or dietary needs. Customizing your recipe allows you to explore new flavors and textures, ensuring that this family favorite never gets boring. From different seasonings to alternative cooking methods, the possibilities are vast.
Flavor Additions (Parmesan/Spicy)
One of the easiest ways to customize your chicken tenders is by playing with flavor additions in the breading. To add a savory, cheesy dimension, mix 1/4 cup of grated Parmesan cheese into your Panko breadcrumbs. This creates a rich, umami-packed crust that’s incredibly satisfying. For those who love a bit of heat, transform your tenders into spicy delights by adding a generous pinch (or more!) of cayenne pepper, chili powder, or smoked paprika to your flour mixture. A dash of hot sauce in the egg wash can also infuse a subtle warmth throughout. Other ideas include adding dried herbs like oregano or thyme, a sprinkle of lemon zest for brightness, or even a specialized spice blend like Old Bay or Cajun seasoning. The key is to think about what flavors you enjoy and incorporate them into the breading layers.
Gluten-Free Alternatives
For individuals with gluten sensitivities or those following a gluten-free diet, enjoying crispy chicken tenders is still entirely possible. The primary gluten-containing ingredients are typically the flour and breadcrumbs. To make your recipe gluten-free, simply swap these out:
- Gluten-Free Flour: Use a 1:1 gluten-free all-purpose flour blend in place of regular flour.
- Gluten-Free Breadcrumbs or Panko: Many brands now offer excellent gluten-free Panko or traditional breadcrumbs made from rice flour or other gluten-free grains. These will provide a similar crisp texture.
- Crushed Cornflakes or Pork Rinds: For a naturally gluten-free and super crispy alternative, crush plain cornflakes or pork rinds into fine crumbs and use them as your breading. Both offer a fantastic crunch and unique flavor profile.
Ensure all other ingredients, like spices, are also certified gluten-free if cross-contamination is a concern.
Oven Baking Instructions
Even if you don’t have an air fryer, or if yours is simply occupied, you can still achieve wonderfully crispy chicken tenders in a conventional oven. This method is a reliable alternative that delivers similar great results, though it might take a little longer. Preheat your oven to 400°F (200°C). Place a wire rack on a baking sheet and lightly spray it with cooking spray. Arrange the breaded chicken tenders in a single layer on the wire rack, ensuring they are not touching. Baking on a rack allows air to circulate around all sides, mimicking the air frying effect and promoting crispiness. Bake for 18-25 minutes, flipping halfway through, until the tenders are golden brown, crispy, and cooked through to an internal temperature of 165°F (74°C). Keep an eye on them during the last few minutes to prevent over-browning. This approach ensures you can enjoy delicious, crispy tenders even without specialized equipment. For more delightful main courses, browse our extensive collection here.