
This 20 minute bread recipe is a game-changer for anyone seeking fresh, homemade bread without the wait. Perfect for busy weeknights or unexpected guests, this incredibly easy quick bread requires no yeast and just a few pantry staples. You’ll be amazed how quickly you can bake a delicious loaf from scratch.
Key Takeaways
- This quick bread bakes in just 20 minutes, ideal for busy schedules.
- No yeast is required, making the process much faster and simpler.
- Only basic ingredients are needed, readily available in most kitchens.
- The recipe is highly adaptable with various flavor additions and serving suggestions.
- It’s a perfect baking project for beginners and seasoned bakers alike.
Freshly baked bread brings warmth to any home. This recipe delivers that joy swiftly. Imagine warm slices ready in minutes. It’s a delightful and simple pleasure. Enjoy this quick baking success.
Discover This 20 Minute Bread Recipe
Craving fresh bread but short on time? This incredible 20 minute bread recipe is your answer to enjoying warm, homemade bread whenever the mood strikes. Forget the lengthy proofing times associated with traditional yeast breads; this quick bread approach simplifies the entire process. It’s an ideal solution for busy individuals or anyone looking for a reliable, fast recipe to add to their repertoire. Imagine pulling a golden-brown loaf from your oven in under half an hour from start to finish! This recipe is not just about speed; it’s about delivering a satisfyingly rustic loaf that complements any meal.
Perfect for busy days
Life moves fast, and often, there’s little time for elaborate culinary projects. That’s where this 20 minute bread recipe truly shines. Designed for efficiency, it allows you to create a beautiful, crusty loaf even on your most hectic days. Whether you need a quick side for dinner or a last-minute addition to a gathering, this recipe fits seamlessly into any schedule. It’s far healthier and more rewarding than store-bought options, providing a wholesome alternative that tastes infinitely better. You can have fresh bread on the table faster than ordering takeout, making it a perfect companion for a speedy easy honey garlic chicken dinner or a simple weeknight meal.
No yeast needed
One of the most remarkable features of this quick bread recipe is its complete absence of yeast. This eliminates the need for activation, rising times, and the delicate handling often required for yeast-based doughs. Instead, leavening agents like baking powder do all the work, reacting quickly to create a light and airy texture. This not only speeds up the process but also makes the recipe incredibly forgiving for beginner bakers. You won’t have to worry about whether your yeast is active or if your dough has risen enough; just mix, shape, and bake! This simplicity is what makes homemade bread accessible to everyone, ensuring a consistent and delicious outcome every time you bake.
Simple Ingredients for Quick Bread
The beauty of this 20 minute bread recipe lies in its minimalist ingredient list. You likely already have most, if not all, of the required components in your pantry. This eliminates the need for special grocery runs and makes spontaneous baking a real possibility. When it comes to quick bread, simplicity is key, and this recipe embodies that principle by focusing on fundamental baking staples.
Just a few basics
To create your delectable quick bread, you’ll need all-purpose flour, baking powder, salt, water, and a touch of olive oil. That’s it! These humble ingredients combine to form a dough that transforms into a wonderfully textured loaf. Flour provides the structure, while baking powder acts as the primary leavening agent, creating gas bubbles that give the bread its rise and lightness. For those interested in understanding how this powerful ingredient works, you can learn more about baking powder on Wikipedia. Salt enhances the flavor, and water brings everything together, while olive oil adds richness and helps with a tender crumb. Using high-quality basic ingredients will always yield the best results, so ensure your flour is fresh and your baking powder is active. This straightforward approach proves that you don’t need exotic items to bake an incredibly satisfying homemade bread.
Get Ready to Bake Your Bread
Preparation is a swift and easy part of making this 20 minute bread. With just a couple of initial steps, you’ll ensure your baking environment is perfect for achieving that desired golden crust and even bake. Getting everything ready before you start mixing will streamline the process, embodying the “quick” in quick bread. It minimizes any last-minute scrambling and helps you focus on the simple joy of baking. This readiness ensures that as soon as your dough is shaped, it can go straight into the optimal baking environment, making the most of those precious 20 minutes.
Preheat oven to 400°F
The first crucial step is to preheat your oven to a robust 400°F (200°C). A hot oven is essential for quick breads, as it helps the baking powder react immediately and creates a crisp, desirable crust. If the oven isn’t fully preheated, your bread might not rise as effectively, leading to a denser texture. Give your oven ample time to reach and maintain this temperature; typically, 10-15 minutes is sufficient. This initial blast of heat is vital for setting the structure of the loaf quickly, locking in moisture, and ensuring a beautiful golden finish.
Line your baking sheet
While your oven is heating, prepare your baking sheet. Lining it with parchment paper is highly recommended. Parchment paper prevents the dough from sticking, makes cleanup a breeze, and helps with even heat distribution across the bottom of the loaf. If you don’t have parchment paper, a light dusting of flour on a well-greased baking sheet can also work, but parchment offers superior non-stick properties. A good quality baking sheet, preferably light-colored to prevent over-browning on the bottom, will also contribute to consistent baking results. This simple preparation step ensures your quick bread slides off effortlessly once baked and cooled.
Mixing Up Your Bread Dough
The mixing process for this 20 minute bread is wonderfully straightforward, differing significantly from the intensive kneading required for yeast breads. The goal here is to combine ingredients until just incorporated, preventing overworking of the gluten, which can lead to a tough loaf. This gentle approach is another reason why this is such an ideal recipe for beginners and busy cooks alike, ensuring a tender and delicious outcome every time. By following these simple steps, you’ll have your dough ready for baking in no time.
Combine dry ingredients
Start by whisking together your dry ingredients in a large bowl. This typically includes the all-purpose flour, baking powder, and salt. Whisking ensures that the leavening agent and salt are evenly distributed throughout the flour, which is critical for consistent rising and flavor in your quick bread. Take your time to thoroughly combine them before adding any liquids. This preparatory step is vital for the dough’s texture and overall success, guaranteeing that every bite of your homemade bread will be perfectly leavened and seasoned.
Add water and oil
Once your dry ingredients are well-mixed, create a well in the center and pour in the water and olive oil. Begin to stir with a spoon or your hands, incorporating the wet into the dry. Mix just until the flour is moistened and a shaggy dough forms. It’s important not to overmix at this stage; overworking the dough can develop too much gluten, resulting in a tough bread rather than the desired tender crumb. The mixture might seem a little sticky, but that’s perfectly normal for this type of quick bread dough.
Knead lightly for minutes
Transfer the shaggy dough onto a lightly floured surface. Now, gently knead it for just a minute or two. This isn’t the vigorous kneading you’d do for a yeast bread; rather, it’s a light process to bring the dough together, ensure all ingredients are fully combined, and create a smooth, workable ball. Avoid pressing or pulling too hard. The dough will become more cohesive and less sticky with this minimal kneading, making it easier to shape. Remember, the less you handle it, the more tender your quick bread will be. This brief kneading prepares the dough for shaping, ready for its speedy bake into fresh homemade bread.
Shaping Your Loaf Easily
After the brief kneading, shaping your quick bread loaf is perhaps the easiest and most satisfying part of the preparation. This simple step doesn’t require any special skills or equipment, making it approachable for every home baker. The goal is to create a cohesive shape that will bake evenly and look appealing once it emerges golden from the oven. This ease of shaping further contributes to the overall efficiency and enjoyment of this 20 minute bread recipe.
Form a round or oval
Take your lightly kneaded dough and gently form it into your desired shape. A rustic round loaf is classic and simple to achieve, or you can opt for an oval shape, which can sometimes be easier to slice. Avoid compacting the dough too much; handle it with a light touch to maintain its delicate structure. The beauty of this homemade bread is its charming, rustic appearance, so don’t worry about perfection. A slightly irregular shape adds to its homemade appeal. This quick shaping process ensures your bread is ready for the oven without delay.
Place on baking sheet
Once shaped, carefully transfer your dough to the parchment-lined baking sheet. Position it in the center, ensuring there’s enough space around it for air to circulate during baking. This helps in achieving an even cook and a consistent crust all around the loaf. Making sure it’s stable on the sheet will prevent any mishaps when you transfer it into the hot oven. Your quick bread is almost ready for its transformation into a golden-brown delight.
Slash the top
Before placing the loaf in the oven, take a sharp knife or a bread lame and make a few shallow slashes across the top of the dough. Two or three diagonal slashes are usually sufficient. These slashes serve several purposes: they allow steam to escape during baking, preventing the crust from cracking unevenly, and they also add a professional, artisanal touch to your homemade bread. The slashes will open up beautifully as the bread bakes, creating an attractive pattern on the crust. This final touch enhances both the aesthetics and the baking process of your 20 minute bread.
Baking Your 20 Minute Bread
This is where the magic happens and your simple dough transforms into a delicious, aromatic loaf in record time. The high oven temperature ensures a quick and efficient bake, living up to the promise of a true 20 minute bread. Staying attentive during this phase will help you achieve the perfect texture and color, ensuring your homemade bread is a resounding success. The anticipation as the delicious aromas fill your kitchen is part of the joy of baking.
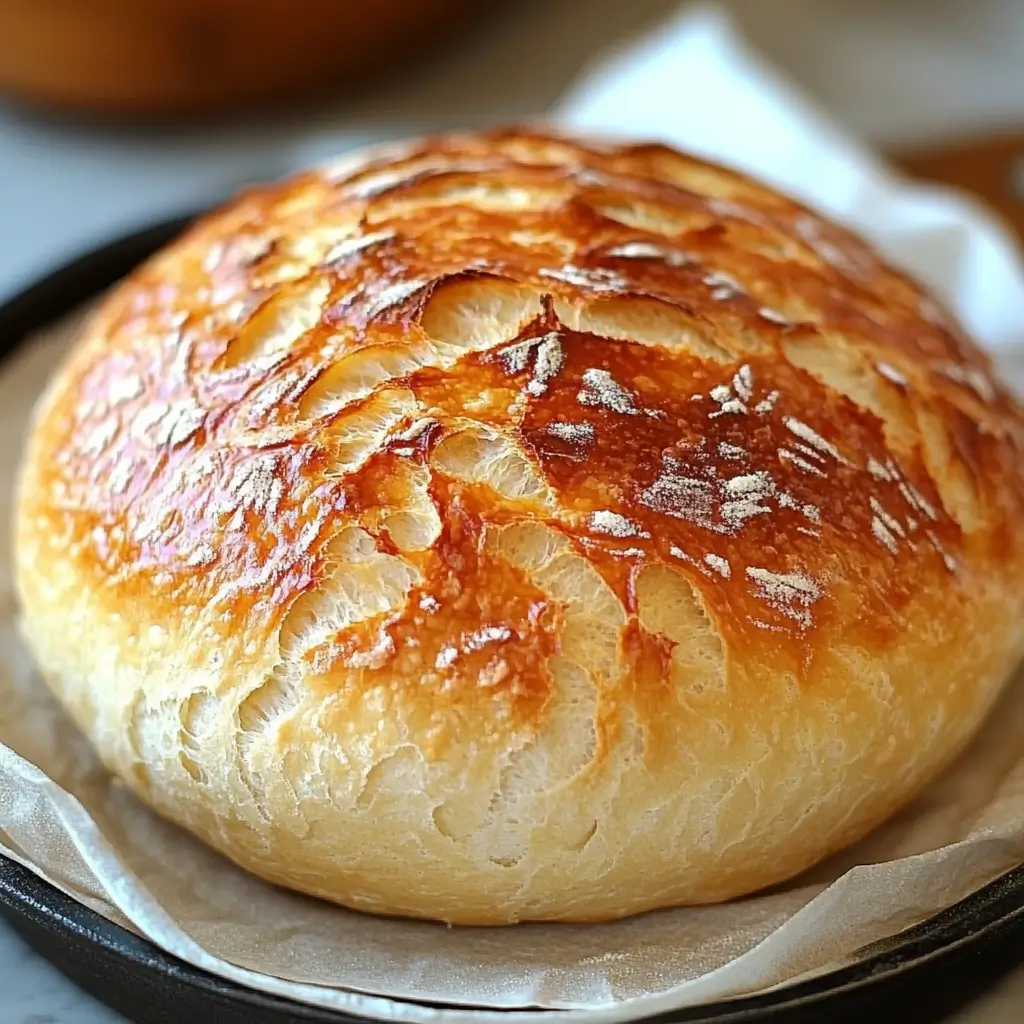
Cook until golden brown
Place your prepared baking sheet with the dough into the preheated 400°F (200°C) oven. The bread will typically bake for about 20-25 minutes. Keep an eye on it, especially towards the end of the baking time. You’re looking for a beautiful golden-brown crust all over the loaf. The top and sides should be firm to the touch, and the slashes you made earlier should have opened up nicely. This golden color indicates that the crust has developed its flavor and crispness, contributing significantly to the bread’s appeal.
Check if it’s done
To confirm your quick bread is fully baked, you can gently tap the bottom of the loaf. If it sounds hollow, it’s generally a good indication that the bread is done. For absolute certainty, an internal thermometer inserted into the center of the loaf should read around 200-210°F (93-99°C). If it doesn’t quite meet these criteria, give it a few more minutes in the oven. Over-baking slightly is often better than under-baking, as undercooked bread can be gummy. Once perfectly baked, carefully remove the loaf from the oven, admiring your freshly baked 20 minute bread.
Cooling Before You Enjoy
While the aroma of freshly baked bread is incredibly tempting, resisting the urge to slice into your 20 minute bread immediately is crucial. The cooling process is a vital, often overlooked, step that significantly impacts the bread’s final texture and flavor. Rushing this stage can lead to a gummy interior, even if the outside looks perfectly baked. Patience truly is a virtue here, ensuring that your homemade bread reaches its full delicious potential.
Let it rest slightly
Once removed from the oven, transfer your quick bread to a wire rack. Allow it to cool for at least 15-20 minutes, or even longer if you can wait. During this resting period, the internal temperature of the bread slowly equilibrates, allowing any remaining moisture to redistribute evenly throughout the loaf. This process continues to “cook” the bread slightly, preventing a dense, doughy interior. Slicing into hot bread can release steam too quickly, making it gummy and less enjoyable. A properly cooled loaf will have a superior texture, a crispier crust, and a more developed flavor. This short waiting period ensures every bite of your simple ingredients bread is perfect.
Tips for Perfect Quick Bread
Achieving a consistently excellent quick bread involves more than just following the steps; a few key insights can elevate your baking from good to truly exceptional. These simple tips are easy to incorporate and will ensure your 20 minute bread turns out perfect every single time. Paying attention to these details can make a significant difference in the final texture, rise, and overall flavor of your homemade bread, making your efforts even more rewarding.
Use fresh baking powder
The most critical tip for any quick bread recipe is to use fresh and active baking powder. Since this is your primary leavening agent, its potency directly impacts the rise and lightness of your bread. Baking powder loses its effectiveness over time, even if the container isn’t expired. To test its freshness, mix a teaspoon of baking powder with a quarter cup of hot water. If it fizzes vigorously, it’s still good to use. If there’s little to no fizz, it’s time to replace it. Stale baking powder will result in a dense, flat loaf, so investing in a new container can make all the difference for your quick bread. Another important tip is to avoid overmixing your dough, as this can develop gluten too much, leading to a tough bread instead of a tender one. Just mix until the ingredients are combined, then stop.
Delicious Ways to Serve Bread
This versatile 20 minute bread isn’t just a simple side; it’s a blank canvas for countless culinary creations. Its rustic charm and mild flavor make it an excellent accompaniment to a variety of dishes, transforming everyday meals into something special. Whether you’re looking for a quick snack or a hearty addition to your main course, this homemade bread can do it all. You can find more cooking inspiration on our Carina Recipes Pinterest page.
Try with butter and jam
For a classic and utterly satisfying experience, serve warm slices of your quick bread with a generous smear of butter and your favorite fruit jam or preserves. The simplicity of this pairing allows the bread’s natural flavor to shine, creating a comforting snack or a delightful addition to breakfast or brunch. A drizzle of honey also works wonderfully, adding a touch of sweetness that perfectly complements the bread’s texture. This combination is a timeless favorite for a reason.
Great with soups
Homemade bread and soup are a match made in culinary heaven. This 20 minute bread is perfect for dipping into hearty stews or creamy soups, soaking up all the delicious flavors. Its sturdy crust and tender interior make it ideal for scooping up every last drop. Imagine pairing a slice with a rich homemade wonton soup or a robust lentil stew. It adds a satisfying element to any bowl of warmth. You can also follow our cooking adventures on Instagram for more ideas.
Make into garlic bread
Transform your quick bread into a savory treat by turning it into garlic bread. Slice the loaf horizontally, spread a mixture of softened butter, minced garlic, and fresh herbs (like parsley or chives) onto both halves, and bake until golden and fragrant. It’s a fantastic side for pasta dishes or any meal that benefits from a burst of garlicky flavor. This quick and easy modification shows just how adaptable your simple ingredients bread can be, elevating it from a simple side to a star attraction.
Fun Variations for Your Bread
One of the most exciting aspects of this 20 minute bread recipe is its adaptability. While the basic loaf is delicious on its own, it serves as an excellent foundation for endless creative variations. Don’t hesitate to experiment with different additions to personalize your homemade bread and cater to your taste preferences. These variations can transform your simple quick bread into something truly unique, perfect for any occasion or craving.
Add garlic and herbs
For a savory twist, knead finely minced garlic and a mix of dried or fresh herbs (such as rosemary, thyme, or oregano) into the dough before shaping. This infusion adds a wonderful aromatic complexity that makes the bread perfect for serving alongside Italian dishes or roasted meats. The herbs not only enhance the flavor but also add visual appeal, flecking the bread with specks of green. This simple addition creates a beautifully fragrant and flavorful loaf, making your quick bread even more special.
Make it cheesy
If you love cheese, this variation is a must-try. Incorporate shredded cheddar, mozzarella, or Parmesan cheese into the dough during the mixing stage. The cheese will melt beautifully during baking, creating pockets of gooey deliciousness within the loaf. For an extra cheesy crust, sprinkle some additional shredded cheese on top of the loaf before baking. This cheesy quick bread is irresistible on its own or as a delightful accompaniment to a rich creamy baked mac and cheese.
Use whole wheat flour
For a healthier, heartier option, you can substitute a portion of the all-purpose flour with whole wheat flour. Start by replacing about a quarter to a third of the all-purpose flour, as whole wheat flour absorbs more liquid and can result in a denser loaf. Adjust the water content slightly if the dough seems too dry. This variation will give your 20 minute bread a nuttier flavor and a more substantial texture, packed with additional fiber. It’s a great way to enjoy homemade bread with added nutritional benefits, suitable for a wide range of tastes and dietary preferences. For more bread ideas, browse our bread category.
Common Questions About This Bread
As with any popular recipe, you might have a few questions about making and storing this 20 minute bread. Addressing these common queries will help ensure your baking experience is smooth and successful, allowing you to confidently enjoy your homemade bread. Knowing the answers to these frequently asked questions will empower you to make the most of your quick bread, from preparation to enjoyment and storage.
Can you freeze it?
Yes, this quick bread freezes beautifully! To freeze, allow the baked loaf to cool completely. Wrap it tightly in plastic wrap, then an additional layer of aluminum foil, or place it in a freezer-safe bag. It can be frozen for up to 2-3 months. To thaw, simply remove it from the freezer and let it come to room temperature on the counter, or gently reheat it in a low oven for a few minutes until warmed through. Freezing makes it easy to always have fresh bread on hand, even on your busiest days.
What about gluten-free?
Making a gluten-free version of this 20 minute bread is definitely possible, though the texture might vary slightly. You can substitute the all-purpose flour with a good quality gluten-free all-purpose flour blend that contains xanthan gum. Ensure your chosen blend is suitable for baking, as some are better for specific applications. You might also need to adjust the water content marginally, as gluten-free flours can absorb liquids differently. The quick bread method works well for gluten-free flours since there’s no need to develop gluten structure anyway.
How to store leftovers?
If you have any delicious leftovers, store the bread at room temperature in an airtight container or a bread bag. This will prevent it from drying out too quickly. It typically stays fresh for 2-3 days. For longer storage, consider freezing as mentioned above. Avoid refrigerating the bread, as this can actually make it stale faster. If the bread loses some of its crispness, a quick toast in a toaster or a few minutes in a warm oven can help revive it, making it almost as good as freshly baked.
Make This Bread Anytime
The true brilliance of this 20 minute bread recipe lies in its sheer accessibility and speed. It’s designed to fit into any lifestyle, proving that homemade bread isn’t just for experienced bakers with hours to spare. This quick bread empowers everyone to enjoy the simple pleasure and delicious aroma of a freshly baked loaf, without the usual time commitment. It removes the barriers to baking, encouraging more people to step into the kitchen and create something wonderful from scratch. Embrace the ease and versatility this recipe offers, making fresh bread a regular part of your cooking.
Great for beginners
If you’re new to baking, this 20 minute bread is the perfect starting point. Its minimal steps, forgiving nature, and lack of yeast-related complexities make it incredibly beginner-friendly. There’s no fear of proofing failures or over-kneading; just simple mixing and baking. Successfully baking your first loaf of homemade bread can be a huge confidence booster, inspiring you to try more culinary adventures. This recipe proves that even with basic skills, you can produce impressive results, leading to a rewarding experience in your kitchen. It’s a fantastic introduction to the joys of baking main course accompaniments.
Quick for last-minute meals
Picture this: dinner is almost ready, and you realize you forgot to pick up bread. No problem! With this 20 minute bread recipe, you can whip up a fresh, warm loaf in the time it takes to set the table. It’s an absolute lifesaver for last-minute meal additions, unexpected guests, or simply when a sudden craving for fresh bread strikes. This convenience makes it an invaluable recipe for any home cook, transforming potential mealtime dilemmas into delicious opportunities. Never again will you be without fresh, homemade bread when you need it most.